
Peel and stick tiles are a versatile and affordable way to upgrade your home decor. This guide presents 12 innovative DIY hacks to help you maximize their potential, from installation tips to creative design ideas, ensuring your space looks stunning without the hassle of traditional renovations.
Understand the Versatility of Peel and Stick Tiles
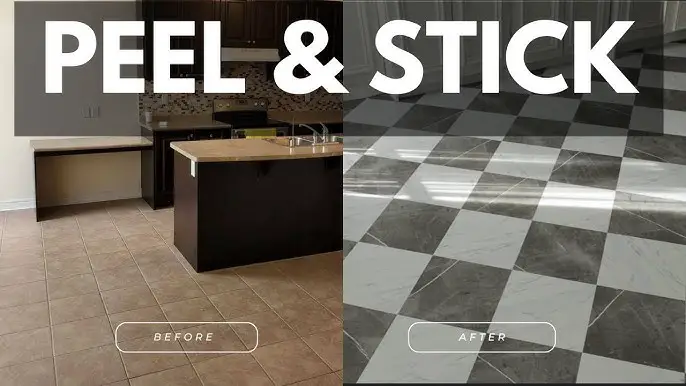
Peel and stick tiles are not just for floors anymore. These handy little tiles can transform nearly any surface in your home. Let’s dive into some creative ways to use them!
Defining Peel and Stick Tiles
Peel and stick tiles are self-adhesive tiles that you can easily apply to any clean, flat surface. They come in various materials and styles, making them perfect for different design needs. No need for grout or special tools—just peel off the backing and stick!
Common Applications in Home Decor
Here are some popular areas where peel and stick tiles shine:
Table of Contents
- Backsplashes: Ideal for kitchens and bathrooms, they add style without the mess of traditional tile.
- Accent Walls: Create a stunning feature wall in your living room or bedroom.
- Furniture: Give your old furniture a fresh look by applying tiles to tabletops or dressers.
- Fireplace Surrounds: Add a cozy touch to your fireplace area with a chic tile design.
Benefits of Using These Tiles
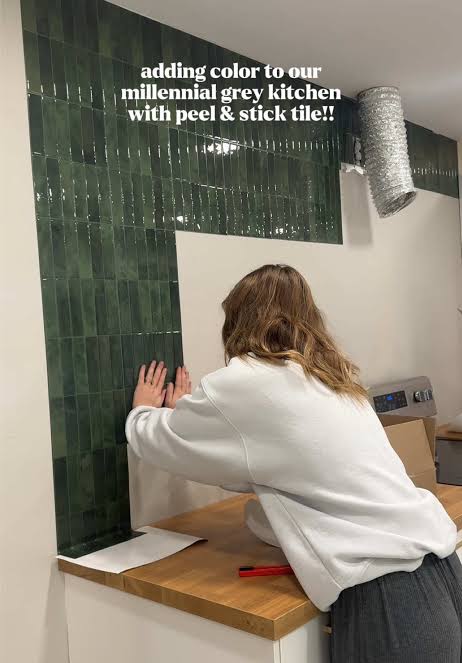
Using peel and stick tiles comes with numerous perks, including:
- Cost-Effective: They’re often cheaper than traditional tiles.
- Temporary Solutions: Perfect for renters or those who love changing their decor frequently.
- Easy Installation: No complicated tools or skills required—great for DIY newcomers!
- Variety of Designs: Choose from classic, modern, or bold patterns to suit your taste.
Unique and Unconventional Uses
Want to think outside the box? Here are a few unconventional uses for peel and stick tiles:
- Bathroom Vanities: Dress up your bathroom vanity for a quick makeover.
- Stair Risers: Add color and pattern to your stairs with tiles on the risers.
- Laundry Room: Spruce up your laundry space for a fun twist on chores.
Installation Tips
Before you start, keep these tips in mind:
1. Clean the Surface: Ensure it’s free of dust and grease for better adhesion.
2. Plan Your Layout: Lay the tiles out before sticking them to avoid mistakes.
3. Use a Roller: After applying, roll over the tiles to secure them better.
If you ever need to remove them, grab a Peel and Stick Tile Adhesive Remover to make the process smoother.
Peel and stick tiles are truly a game changer in home decor. With their versatility, the only limit is your imagination!
Prepare Your Space for Installation
Getting your space ready for peel and stick tiles is crucial. A well-prepped surface ensures better adhesion and a stunning final look. Let’s dive into the essential steps.
Cleaning and Smoothing the Surface
Start with a clean slate. Dust, dirt, and grease can ruin your tile application. Here’s how to prep your surface:
- Sweep or Vacuum: Remove any debris.
- Wipe Down: Use a damp cloth to clean the area. A mild detergent works wonders.
- Dry Completely: Make sure the surface is dry before applying the tiles.
- Smoothing: If the surface has bumps or imperfections, consider sanding them down for a flat finish.
Measuring and Planning Your Layout
Planning is key to a successful installation. Here’s how to layout your tiles before sticking them down:
- Measure the Area: Use a tape measure to get accurate dimensions.
- Mark Reference Lines: Lightly pencil in straight lines on your surface to guide tile placement.
- Dry Lay the Tiles: Place tiles without peeling the back to visualize the arrangement. Adjust as needed.
Gathering Necessary Tools and Materials
Before you start, gather all the tools and materials you’ll need. This saves time and keeps your project flowing. Here’s a handy checklist:
- Peel and stick tiles
- Measuring tape
- Utility knife
- Straight edge (like a ruler)
- Cleaning supplies (cloth, cleaner)
- Rolling pin or vinyl roller (to secure tiles)
- Optional: Peel and Stick Tile Adhesive Remover for any future adjustments
Having everything on hand makes the installation process smoother. Happy tiling!
Installation Techniques for Peel and Stick Tiles
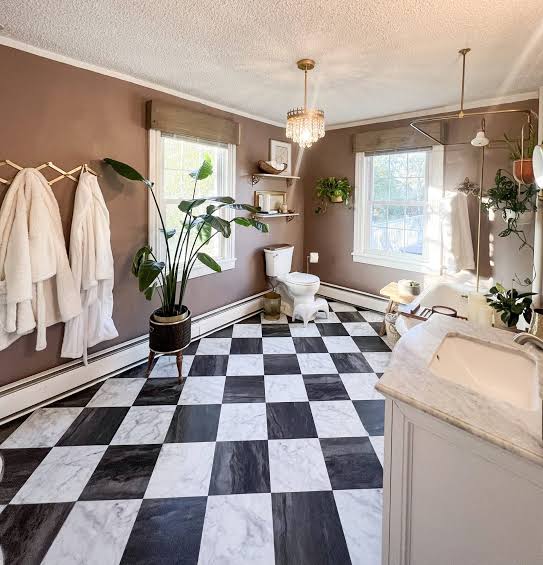
Installing peel and stick tiles can be a fun and straightforward DIY project. With the right approach, you’ll have a beautiful new surface in no time. Here’s how to do it right.
Step-by-Step Installation Guide
1. Preparation: Start with a clean and flat surface. Remove any old flooring or debris. Wipe down the area with a cleaner to ensure the tiles adhere well.
2. Measure and Mark: Use a measuring tape to find the center of the wall or floor. Mark this spot lightly with a pencil. This will be your starting point.
3. Dry Lay the Tiles: Before peeling the backing, lay out the tiles in your desired pattern. Adjust them as needed to see how they fit.
4. Peel and Stick: Once you’re happy with the layout, peel off the backing from the first tile. Press it firmly onto the surface, starting from your center mark. Use a rolling pin or vinyl roller to secure it.
5. Continue Installing: Move outward from the center, repeating the peel-and-stick process. Keep the tiles aligned and the pattern consistent. If your tiles have directional arrows, make sure they all point the same way.
6. Cut Tiles as Needed: Use a utility knife to trim tiles at the edges or around obstacles. Measure carefully before cutting to avoid mistakes.
7. Roll the Tiles: After all tiles are down, roll over the surface with a vinyl roller. This helps eliminate air bubbles and ensures a strong bond.
Common Mistakes to Avoid
- Not Cleaning the Surface: A dirty surface can prevent tiles from sticking properly. Always clean first.
- Ignoring the Center Point: Starting from the wrong spot can throw off your entire layout. Always mark the center.
- Rushing the Process: Take your time with each tile. Press down firmly and ensure they’re aligned before moving on.
Finishing Touches for a Professional Look
- Grout Line Options: Although peel and stick tiles don’t require grout, using a grout pen can enhance the look. Choose a color that complements the tiles.
- Seal the Edges: For extra durability, consider applying a sealant around the edges of the tiles. This helps prevent moisture from getting underneath.
Remember, if you ever need to adjust your tiles, a Peel and Stick Tile Adhesive Remover can help you lift them without damage. Check Price on Amazon.
With these steps in mind, you’re ready to tackle your peel and stick tile project! Enjoy the transformation!
Explore Creative Design Ideas with Peel and Stick Tiles
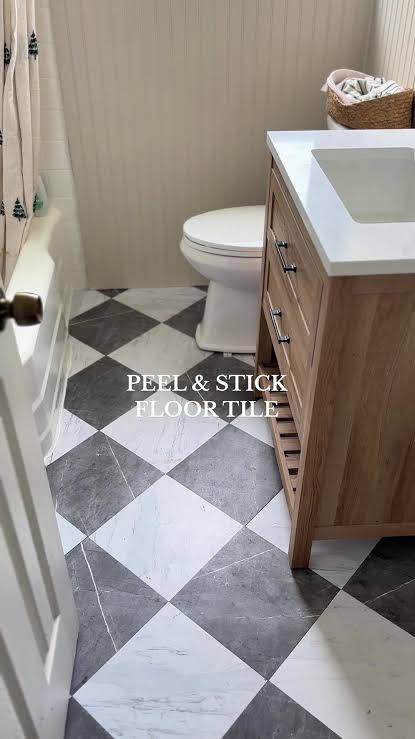
Peel and stick tiles are a game-changer for DIY home decor. They offer endless possibilities to transform your space without breaking the bank. Let’s dive into some creative design ideas that will inspire your next project!
Stylish Backsplashes for Kitchens
A chic backsplash can elevate your kitchen’s style. Peel and stick tiles make it easy to add a pop of color or texture. Here are some ideas:
- Subway Tiles: Classic white or colored subway tiles give a timeless look.
- Mosaic Patterns: Create an eye-catching focal point with colorful mosaics.
- Metallic Finishes: Go glam with shiny metallic tiles for a modern twist.
Before-and-After Example: Imagine a dull kitchen turning into a stylish space with a vibrant backsplash. Snap a picture of your kitchen before and after the transformation to appreciate the change!
Bathroom Accent Walls
Transform your bathroom into a spa-like retreat with peel and stick tiles. Use them for accent walls or around mirrors. Consider these options:
- Textured Tiles: Add depth with textured tiles that mimic natural stone.
- Bold Colors: Bright colors can make a small bathroom feel more expansive.
- Patterns: Geometric designs can create a fun, playful vibe.
Before-and-After Example: A boring white wall can become a stunning accent wall with just a few tiles. Capture the difference to showcase your handiwork!
Furniture Makeovers with Tile
Peel and stick tiles aren’t just for walls and floors. You can also refresh furniture! Here’s how:
- Tabletops: Cover old tables with tiles for a fresh look.
- Cabinets: Give your cabinets a facelift by applying tiles to the doors.
- Picture Frames: Customize frames with tiles to create unique decor pieces.
Before-and-After Example: An outdated side table can become a trendy piece with some stylish tiles. Document the process and enjoy the transformation!
Using peel and stick tiles creatively can transform your home with minimal effort and cost. Whether it’s a backsplash, an accent wall, or furniture, the possibilities are endless!
Cost-Effectiveness of Peel and Stick Tiles
Peel and stick tiles are a budget-friendly alternative to traditional tiling methods. They offer significant savings in both materials and installation, making them a popular choice for DIY enthusiasts.
Comparing Costs with Traditional Tiles
When you compare peel and stick tiles to traditional options, the price difference is clear. Here’s a quick breakdown:
| Type of Tile | Average Cost per Square Foot | Installation Cost (DIY vs. Professional) |
|---|---|---|
| Peel and Stick Tiles | $1.50 – $5.00 | DIY: $0 (no tools needed) Pro: $100+ |
| Ceramic Tiles | $2.00 – $10.00 | DIY: $300+ (tools and grout) Pro: $1000+ |
| Porcelain Tiles | $3.00 – $15.00 | DIY: $300+ (tools and grout) Pro: $1000+ |
As you can see, the upfront costs for peel and stick tiles are often lower. Plus, you save on labor costs since they’re easy to install yourself.
Potential Savings on Labor Costs
Labor costs can really add up in home renovations. For traditional tile installation, you might pay anywhere from $5 to $15 per square foot for professional help. With peel and stick tiles, you can skip this expense completely.
Doing it yourself not only saves money but also gives you a sense of accomplishment. Just peel, stick, and enjoy your new look!
Long-Term Value and Durability
While peel and stick tiles may not last as long as ceramic or porcelain tiles, they still offer great value. They’re perfect for temporary updates, allowing you to change your decor without a huge investment.
If you decide to switch things up again, you can easily remove them without damaging the underlying surface. This flexibility makes them a smart choice for renters or anyone who loves to change their space frequently.
In summary, peel and stick tiles provide an affordable, easy-to-install option for enhancing your home decor. They save you money upfront and keep your renovation costs in check!
Temporary Solutions: Ideal for Renters
Peel and stick tiles are a game-changer for renters. They let you add style without permanent changes. This means you can enhance your space without losing your deposit!
Easy Installation and Removal
One of the best features of peel and stick tiles is how simple they are to install. Just peel off the backing and stick them where you want. No messy adhesives or special tools needed.
When it’s time to move, removal is a breeze. Just peel them off! They come up clean, leaving your walls and floors intact. This is a win-win for anyone who loves to switch things up.
Non-Damaging to Walls
Worried about damaging your walls? Don’t be! Peel and stick tiles are designed to be renter-friendly. They use a gentle adhesive that won’t pull off paint or leave sticky residue. This makes them perfect for temporary decor.
Creative Temporary Decor Solutions
Peel and stick tiles open up a world of creative possibilities. Here are some fun ideas:
- Accent Walls: Create a stunning feature wall in your living room or bedroom.
- Backsplashes: Refresh your kitchen or bathroom with a stylish backsplash.
- Flooring: Upgrade your dull floors without the hassle of traditional tiles.
Consider these testimonials from fellow renters:
- Emily: “I transformed my small kitchen with a beautiful mosaic tile. It looks like a designer space!”
- Jake: “I used peel and stick tiles in my rented bathroom. When I moved out, everything came off easily. My landlord was impressed!”
Peel and stick tiles make it easy to personalize your space. They’re affordable, stylish, and perfect for anyone looking to make a temporary change.
Troubleshooting Common Installation Issues
Installing peel and stick tiles can be a breeze, but sometimes things don’t go as planned. Here’s how to tackle common problems you might encounter during your DIY project.
What to Do When Tiles Don’t Stick
If your tiles aren’t adhering well, check these points:
- Surface Cleanliness: Ensure the surface is clean and dry. Dust or grease can prevent proper adhesion.
- Temperature: Tiles stick best in warmer temperatures. If it’s too cold, consider warming the area or waiting for a better day.
- Pressure: After placing the tiles, press down firmly to ensure they bond well.
If you still face issues, try removing the tile and reapplying it after cleaning the surface again.
Addressing Air Bubbles and Misalignment
Air bubbles can ruin the sleek look of your new tiles. Here’s how to fix them:
- Use a Squeegee: A squeegee helps push out air bubbles. Start from the center and work your way outwards.
- Lift and Reseat: If you notice misalignment, gently lift the tile and reposition it. This can also help release trapped air.
- Pin Prick Method: For stubborn bubbles, use a pin to prick the bubble and smooth it out.
Repairing Damaged Tiles
Accidents happen! If you damage a tile, don’t worry. Here’s how to handle it:
- Replacement: Keep a few extra tiles on hand. Remove the damaged one and replace it with a new tile.
- Patch It Up: If the damage is minor, consider using a matching color of caulk or adhesive to fill in cracks.
- Seal Edges: Use a sealant around the edges of the tiles to protect them from moisture and potential damage.
Quick Checklist for Installation Success
- Clean the Surface: No dust or grease.
- Check the Temperature: Ideally above 65°F.
- Use Proper Pressure: Press tiles down firmly.
- Have Extras on Hand: For any mishaps.
- Seal the Edges: To avoid moisture issues.
By following these tips, you can easily troubleshoot common installation issues and enjoy your beautiful peel and stick tiles hassle-free!
Compare Peel and Stick Tiles to Traditional Options
When it comes to tiling your home, peel and stick tiles offer a fun, easy alternative to traditional tiles. But how do they stack up? Let’s break it down.
Advantages of Peel and Stick Tiles
- Easy Installation: Just peel off the backing and stick. No special tools needed.
- Cost-Effective: Generally cheaper than traditional tiles. Perfect for budget-friendly makeovers.
- Temporary Solution: Great for renters or those who love change. You can remove them without damage.
- Variety of Designs: From marble to mosaic, there’s a style for everyone.
Disadvantages to Consider
- Durability: Not as long-lasting as traditional tiles. They may wear out faster.
- Heat Sensitivity: Not ideal for high-temperature areas like behind a stove.
- Limited Adhesion: Can peel up in humid environments if not sealed properly.
When to Choose Traditional Tiles
- Permanent Installations: If you want a long-lasting solution, traditional tiles are the way to go.
- High-Traffic Areas: Areas like kitchens and bathrooms benefit from the durability of traditional tiles.
- Luxury Look: If you’re aiming for high-end aesthetics, traditional tiles can provide that luxe feel.
Quick Comparison Table
| Feature | Peel and Stick Tiles | Traditional Tiles |
|---|---|---|
| Installation | Easy and quick | Requires more skill |
| Cost | Generally lower | Higher initial cost |
| Durability | Less durable | Highly durable |
| Removability | Easy to remove | Permanent |
| Design Variety | Wide variety available | Often more limited |
Peel and stick tiles can be a game-changer for DIY updates. However, weigh the pros and cons based on your specific needs. Happy decorating!
Alternatives to Peel and Stick Tiles
If you’re looking for other DIY options for home decor, there are plenty of alternatives to peel and stick tiles. These can add style and flair without the hassle of traditional tiling. Let’s dive into some great options!
Other Self-Adhesive Options
Self-adhesive options abound if you’re into quick updates. Here are a few to consider:
- Vinyl Wall Decals: These are perfect for adding a pop of personality. They come in various designs, from playful quotes to intricate patterns. Plus, they’re easy to apply and remove.
- Self-Adhesive Wallpaper: This can transform any wall in a snap. It’s available in many colors and styles, making it easy to match your decor.
- Fabric Wall Stickers: If you want something softer, fabric stickers can be a great choice. They add texture and warmth to your space.
Paint and Stencils as Decor Alternatives
Sometimes, a little creativity goes a long way. Painting and stenciling can create stunning effects without the need for tiles. Here’s how:
- Accent Walls: Choose a bold color for one wall. This can make a room feel vibrant and inviting.
- Stenciled Designs: Use stencils to add patterns or shapes. This can mimic the look of tiles without the cost.
- DIY Painted Tiles: If you’re feeling crafty, paint wooden squares to resemble tiles. This adds a unique touch to your home.
Temporary Wallpaper and Decals
Temporary wallpaper and decals are fantastic for renters or anyone who loves change. They’re simple to apply and remove. Here’s what to consider:
- Easy Application: Just peel and stick! No messy glue involved.
- Variety of Designs: From floral patterns to modern geometrics, there’s a style for everyone.
- Surface Versatility: Apply them on walls, furniture, or even appliances for a fun twist.
Comparison of Alternatives
Here’s a quick comparison of the pros and cons of these alternatives:
| Feature | Peel and Stick Tiles | Self-Adhesive Options | Paint and Stencils | Temporary Wallpaper |
|---|---|---|---|---|
| Installation | Easy | Easy | Moderate | Easy |
| Cost | Generally lower | Varies | Low | Low |
| Durability | Less durable | Moderate | Varies | Less durable |
| Removability | Very easy | Easy | Moderate | Very easy |
| Design Variety | Wide variety | Wide variety | Limited | Wide variety |
These alternatives can breathe new life into your space without the commitment of traditional tiles. Explore these options to find the perfect fit for your DIY project!
Maintenance Tips for Peel and Stick Tiles
Keeping your peel and stick tiles looking fresh and fabulous is easier than you think. With a few simple maintenance steps, you can prolong their life and maintain their charm. Let’s dive into some essential tips!
Regular Cleaning Practices
Cleaning your peel and stick tiles regularly is key. Here’s how to do it effectively:
- Use a soft cloth or mop for cleaning.
- Avoid abrasive cleaners; they can damage the surface.
- A mixture of warm water and mild dish soap works wonders.
- Wipe spills immediately to prevent stains.
Preventing Damage and Wear
To keep your tiles in top shape, follow these preventive measures:
- Ensure furniture doesn’t scratch the surface. Use coasters or pads.
- Avoid dragging heavy items across the floor.
- Keep the area free from excess moisture, especially in bathrooms.
Repairing and Replacing Tiles
Accidents happen! If your tiles get damaged, here’s what you can do:
- For minor scratches, use a color-matching marker to touch up.
- If a tile is peeling, press it down firmly and roll over it with a rolling pin.
- For severe damage, it’s best to replace the tile. Just peel off the old one and stick on a new one.
Maintenance Schedule Template
Here’s a handy maintenance schedule to keep your tiles looking great:
| Task | Frequency |
|---|---|
| General cleaning | Weekly |
| Deep cleaning | Monthly |
| Inspect for damage | Monthly |
| Replace damaged tiles | As needed |
By following these tips, you’ll ensure your peel and stick tiles not only look good but last long too!
Final Thoughts on DIY Peel and Stick Tiles Hacks
Peel and stick tiles are a fantastic option for anyone looking to refresh their home without breaking the bank. They’re easy to install, cost-effective, and come in a variety of styles to suit any taste.
Recap of Key Benefits
- Simple Installation: Just peel off the backing and stick it on. No special tools required!
- Versatile Design: Choose from countless designs, including classic subway tiles and trendy mosaics.
- Cost-Effective: Achieve a high-end look without the high-end price tag.
- Temporary Solutions: Perfect for renters or anyone wanting a change without a long-term commitment.
Encouragement to Experiment
Don’t be afraid to get creative! Try using peel and stick tiles in unexpected places.
- Accent Walls: Create a stunning feature wall in your living room or bedroom.
- Furniture Makeovers: Give old furniture a facelift by applying tiles to tabletops or drawers.
- Decorative Touches: Use them to line shelves or even elevate your fireplace.
Inspiration for Future Projects
Here are some unique project ideas to spark your creativity:
- Kitchen Splashbacks: Transform your kitchen with a vibrant backsplash.
- Bathroom Updates: Use tiles to create a spa-like atmosphere in your bathroom.
- Entryway Revamps: Add a stylish touch to your entryway for an inviting first impression.
For more inspiration and to explore various brands, consider checking out DIY blogs or home improvement websites. They often showcase innovative applications and provide product recommendations to keep your projects fresh and exciting!
Frequently Asked Questions
These quick answers cover the most common questions about this topic, including key details, practical tips, and common concerns.
How do you install peel and stick tiles?
To install peel and stick tiles, start by cleaning and drying the surface thoroughly. Measure and plan your layout, marking reference lines for accuracy. Peel off the backing from each tile and press it firmly onto the surface, starting from the center or a designated point. Use a roller or squeegee to eliminate air bubbles and ensure strong adhesion. Trim tiles as needed with a utility knife for edges or around obstacles. Finish by rolling over the entire area to secure the tiles.
Why are peel and stick tiles a good option for renters?
Peel and stick tiles are ideal for renters because they are easy to install and remove without damaging walls or floors. They require no permanent adhesives, so they won’t leave residue or cause damage when removed. This allows renters to personalize their space temporarily and revert to the original surface when moving out. Their affordability and quick installation make them a popular choice for temporary updates.
When should I consider replacing traditional tiles with peel and stick tiles?
Replace traditional tiles with peel and stick tiles when you want a quick, budget-friendly update or are seeking a temporary solution. They are perfect for renters, small projects, or areas where you want to experiment with design. If your existing tiles are damaged, outdated, or difficult to clean, peel and stick options can offer a fast refresh without the mess of grout and mortar.
What are common mistakes when installing peel and stick tiles?
Common mistakes include not cleaning the surface thoroughly, which prevents proper adhesion. Rushing the process and not pressing tiles firmly can lead to air bubbles or tiles peeling off. Improper measurement and misalignment can create uneven patterns. Additionally, installing tiles in cold environments or on uneven surfaces can reduce sticking strength. Always plan your layout and prepare the surface carefully.
What should I do if peel and stick tiles don’t stick properly?
If tiles don’t stick, first ensure the surface is clean, dry, and smooth. Remove any dust, grease, or residue. Reapply the tile with firm pressure, using a roller to improve adhesion. If the tile still won’t stick, lift it carefully, clean the back and surface again, and try reapplying. For persistent issues, consider using a compatible adhesive or replacing the tile with a new one.
How do peel and stick tiles compare to traditional tiles?
Peel and stick tiles are easier and faster to install, often at a lower cost. They are suitable for temporary or decorative projects and don’t require grout or special tools. Traditional tiles are more durable and long-lasting, ideal for high-traffic or permanent installations. However, traditional tiles usually involve higher costs and professional installation. Choose based on your project’s permanence and durability needs.
Are peel and stick tiles suitable for outdoor use?
Most peel and stick tiles are designed for indoor use and are not weatherproof. Exposure to moisture, sunlight, or temperature fluctuations can cause them to peel or deteriorate. If you want to use them outdoors, look for products specifically rated for outdoor or exterior applications. Otherwise, traditional outdoor tiles or other weather-resistant materials are better suited.
How can I maintain peel and stick tiles to ensure longevity?
Regular cleaning with a soft cloth and mild soap helps maintain their appearance. Avoid abrasive cleaners or scrubbing tools that can damage the surface. Protect tiles from excessive moisture and avoid dragging heavy furniture across them. If a tile becomes loose or damaged, replace it promptly. Sealing edges with a clear sealant can also improve water resistance and durability.