Polishing rocks without a tumbler is entirely feasible and can yield beautiful results. By using basic tools and techniques, you can achieve a shiny finish that enhances the natural beauty of your stones. This guide covers five simple tips to help you polish rocks effectively at home.
Table of Contents
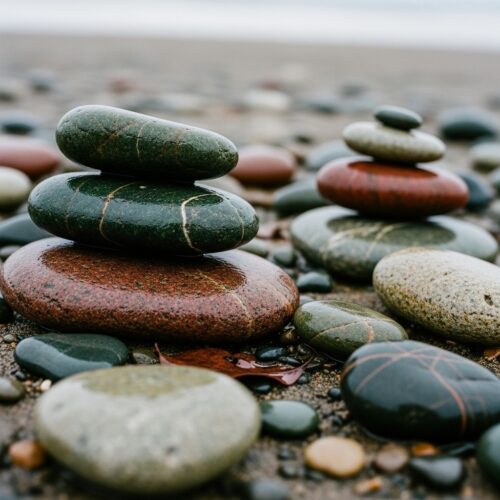
Understand Your Rocks
Not all rocks are created equal when it comes to polishing. Some will shine beautifully, while others might leave you disappointed. Let’s break down which rocks are your best friends in this process and which ones to steer clear of.
Identifying Ideal Rocks for Polishing
When looking for rocks to polish, aim for those that have the right hardness and texture. Here are some great options:
- Jasper: Known for its vibrant colors and patterns, jasper polishes beautifully.
- Obsidian: This volcanic glass can achieve a stunning shine.
- Petrified Wood: A fossilized version of wood that can be polished to reveal intricate details.
- Agate: This banded stone often has a lovely finish when polished.
These rocks usually have a hardness of 6-7 on the Mohs scale, making them suitable for hand polishing.
Rocks to Avoid When Polishing
Not every rock is suited for a shiny makeover. Here’s a list of rocks you might want to skip:
- Limestone: It’s quite soft and can easily break or crumble.
- Soapstone: Another soft rock, making it hard to achieve a smooth finish.
- Granite: While beautiful, it’s too hard for hand polishing without specialized tools.
Avoiding these will save you time and effort, ensuring you have a positive polishing experience.
Understanding Rock Hardness
Rock hardness is crucial in determining whether a rock can be polished effectively. The Mohs scale ranks minerals from 1 (softest) to 10 (hardest).
- Harder Rocks (6-7): These are ideal for polishing. They can withstand sanding and will shine beautifully.
- Softer Rocks (1-5): These tend to break or scratch easily, making them unsuitable for hand polishing.
For a successful polishing project, always check the hardness of your rock. If you’re unsure, a quick online search can help you identify the type of rock you have.
By selecting the right rocks and avoiding the unsuitable ones, you’re well on your way to achieving a stunning polished finish. If you want to streamline your process, consider investing in a Rock Polishing Kit for all your polishing needs. Check Price on Amazon.
Clean Your Rocks Thoroughly
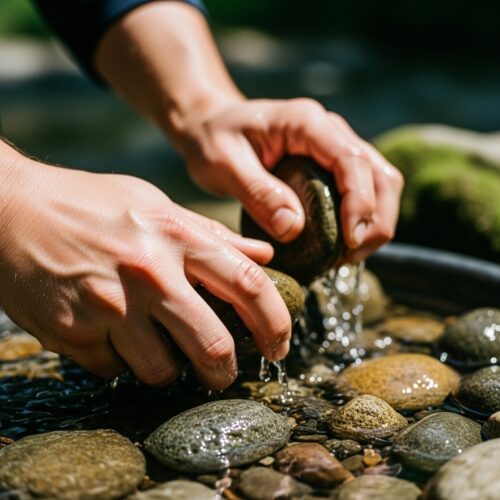
Cleaning your rocks is the first and crucial step in the polishing process. A clean surface allows for a better finish. Let’s dive into effective methods to get your rocks sparkling clean before you start polishing.
Gathering Your Cleaning Supplies
Before you start, gather your cleaning supplies. Here’s a handy checklist:
- Water: For rinsing and soaking.
- Bucket: To hold the rocks and cleaning solution.
- Soft Brush: A toothbrush or similar brush works well.
- Mild Soap: Dish soap or a gentle cleaner.
- Baking Soda: Great for tough stains.
- Vinegar: Can help with mineral deposits.
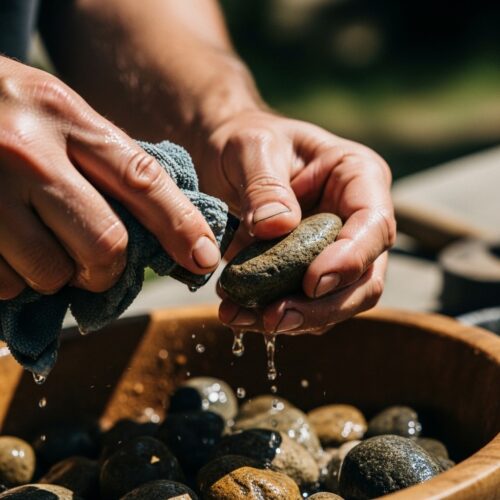
- Soft Cloth: For drying and polishing after cleaning.
Having these items ready will make your cleaning process smoother.
Step-by-Step Cleaning Process
1. Rinse the Rocks: Start by rinsing your rocks under running water. This removes loose dirt and debris.
2. Soak in a Soapy Solution: Fill a bucket with warm water and add a few drops of mild soap. Let your rocks soak for 10-15 minutes.
3. Scrub Gently: Use a soft brush to scrub the surface. Focus on crevices and rough spots where dirt may hide.
4. Rinse Again: After scrubbing, rinse the rocks thoroughly to remove any soap residue.
5. Tackle Tough Stains: For stubborn stains, make a paste of baking soda and water. Apply it to the stain and let it sit for a few minutes before scrubbing again.
6. Final Rinse and Dry: Rinse one last time to ensure all cleaning agents are gone. Pat dry with a soft cloth.
Tips for Tough Stains
- Vinegar Soak: For mineral deposits, soak the rock in vinegar for about 30 minutes. Rinse well afterward.
- Repeat as Needed: Sometimes, stains require multiple treatments. Don’t hesitate to repeat the cleaning steps for better results.
- Test on a Small Area: If you’re unsure about a cleaning solution, test it on a small, inconspicuous area first.
Cleaning your rocks properly sets the stage for a stunning polish. Enjoy the process, and remember that patience is key! If you want to streamline your polishing journey, consider a Rock Polishing Kit for all your polishing needs. Check Price on Amazon.
Master the Sanding Technique

Sanding is crucial for shaping and smoothing your rocks. It’s all about using the right grit levels to get that polished finish without a tumbler. Let’s dive into how to choose sandpaper and the sanding process step-by-step.
Choosing the Right Sandpaper Grit
Selecting the right sandpaper grit is key to achieving a smooth polish. Here’s a simple breakdown of grit levels and their purposes:
| Grit Level | Purpose |
|---|---|
| 60-120 grit | Shaping the rock, removing rough edges |
| 220 grit | Smoothing out the surface |
| 400-600 grit | Buffing out scratches |
| 1000 grit | Preparing for polish |
| 1500+ grit | Final polishing for a shiny finish |
Start with coarser grits to remove any major imperfections. Gradually work your way up to finer grits. This progression is important for getting that glassy sheen.
Sanding Process: Step-by-Step
Here’s how to go about sanding your rocks:
1. Clean the Rock: Make sure your rock is free of dirt and debris. A clean surface helps prevent scratches.
2. Start with Coarse Grit: Use 60-120 grit sandpaper. Wet both the sandpaper and the rock. Sand in circular motions, applying firm, even pressure. Spend about 5-10 minutes on each side.
3. Progress to Finer Grits: After the coarse grit, switch to 220 grit. Repeat the wet sanding process. This smooths out the surface and gets rid of deep scratches.
4. Continue to Buff: Move to 400-600 grit. Keep the rock wet. Check your progress often. You should start seeing a nice, smooth surface.
5. Final Touches: Finish up with 1000 grit, then 1500 grit. This is where the magic happens! You’ll notice a dull shine that signifies you’re almost done.
Avoiding Common Sanding Mistakes
Sanding can be tricky, but avoiding these common mistakes can improve your results:
- Skipping Grit Levels: Don’t jump from coarse to fine grit. Each level serves a purpose.
- Not Keeping it Wet: Always keep the rock and sandpaper wet. This reduces dust and enhances the sanding process.
- Applying Too Much Pressure: Let the sandpaper do the work. Too much pressure can create uneven surfaces.
By following these tips, you’ll be well on your way to polishing your rocks to perfection! If you want to streamline your polishing journey, consider a Rock Polishing Kit for all your polishing needs. Check Price on Amazon.
Polish Your Rocks to a Shine
After sanding, polishing is the final step to make your rocks shine. With the right polishing compounds and techniques, you can achieve a glossy finish that highlights the beauty of your stones.
Choosing the Right Polishing Compound
Polishing compounds are essential for giving your rocks that final luster. Here are some popular options:
- Cerium Oxide: Great for softer stones like quartz and glass. It produces a brilliant shine.
- Aluminum Oxide: Works well on harder stones like agate and jasper. It’s effective and widely available.
- Tin Oxide: Perfect for a high-gloss finish on gemstones. Use with a soft cloth for best results.
When selecting a compound, consider the type of rock you’re polishing. Softer stones need gentler compounds, while harder stones can handle more abrasive options.
Polishing Techniques for Best Results
Once you have your polishing compound, it’s time to use it effectively. Here’s a simple method:
1. Apply Compound: Put a small amount of polishing compound on a soft cloth or felt wheel.
2. Buff the Rock: Gently rub the rock in a circular motion. Don’t press too hard; let the compound do the work!
3. Check Progress: Periodically wipe the rock clean to see how it’s coming along. This helps you avoid over-polishing.
4. Final Touches: Once you achieve the desired shine, give the rock a final wipe with a clean cloth to remove any residue.
Using Household Items for Polishing
You don’t need fancy tools to polish your rocks. Here are some household items you can use:
- Baking Soda: Mix with water to create a paste. Rub it on the rock for a gentle polish.
- Toothpaste: A non-gel toothpaste can also work wonders. Apply it with a soft cloth and rinse afterward.
- Olive Oil: A dab of olive oil can enhance the shine. Use it sparingly after the polishing process.
These alternatives are easy to find and can provide surprisingly good results. Just remember, the key is patience and technique.
Common Mistakes to Avoid
To get the best shine, watch out for these common pitfalls:
- Using Too Much Compound: A little goes a long way. Too much can make a mess and reduce effectiveness.
- Skipping the Cleaning Step: Always clean your rocks before applying a polishing compound. Dirt can scratch the surface.
- Overlooking the Drying Time: Allow your rock to dry completely before moving on to the next step.
By following these tips and using the right materials, you’ll be well on your way to polishing your rocks to a stunning shine!
Troubleshooting Common Polishing Issues
Even with the best techniques, problems can arise during rock polishing. Here’s how to identify and fix common issues to keep your polishing journey smooth.
Common Problems Encountered
1. Scratches and Imperfections: You might notice that your rocks still have scratches even after polishing. This often happens if the grit used was too coarse for the final steps.
2. Dull Finish: If your rocks look cloudy or dull, it could be due to residue from the polishing compound or not using the right polishing materials.
3. Uneven Shine: An uneven shine can occur if you didn’t apply consistent pressure or missed spots while polishing.
How to Fix Polishing Mistakes
- For Scratches: Go back to a coarser grit sandpaper. Smooth out the scratches, then gradually work your way back up through the grits. Always clean the rock before moving to a finer grit.
- For Dull Finish: Clean the rock thoroughly. Use a mild soap and water, then dry it completely. Reapply a smaller amount of polishing compound and buff it with a soft cloth.
- For Uneven Shine: Focus on the uneven areas. Apply gentle pressure and make sure to cover every inch. Sometimes, just a little extra attention can make a big difference.
Preventing Future Issues
1. Use a Grit Progression Checklist: Start with the coarsest grit and work your way to the finest. Here’s a quick reference:
- Coarse (60-80 grit) for shaping
- Medium (220-400 grit) for smoothing
- Fine (600-1200 grit) for polishing
2. Clean Thoroughly Between Steps: Always clean your rock after each sanding step. This removes debris that could cause scratches in the next round.
3. Patience is Key: Don’t rush through the steps. Take your time, and don’t skip any phases. Remember, good things come to those who wait!
By following these tips, you can avoid common pitfalls and achieve a beautiful polished finish on your rocks without a tumbler!
Frequently Asked Questions
These quick answers cover the most common questions about this topic, including key details, practical tips, and common concerns.
How to shine rocks without tumbling?
You can shine rocks by hand using sanding and polishing techniques. Start with coarse sandpaper to shape and smooth the surface, then progress to finer grits for a polished finish. Finish with a polishing compound like cerium oxide or aluminum oxide applied with a soft cloth to achieve a glossy shine.
How do you polish rocks without a machine?
Polishing rocks without a machine involves manual sanding with progressively finer grit sandpapers, followed by applying a polishing compound. Use water to keep the surface wet during sanding, and buff with a soft cloth or felt pad. Household items like baking soda or toothpaste can also be used for a gentle polish.
Can I tumble rocks without a tumbler?
No, a traditional tumbler is designed specifically for the tumbling process, which involves rotary motion and abrasive grit. However, you can mimic tumbling effects by hand-sanding and polishing your rocks, but it will take more time and effort. Tumbler-like results are difficult to achieve without the machine.
What is a substitute for rock tumbler grit?
A common substitute is fine abrasive sandpaper or polishing compounds like cerium oxide, aluminum oxide, or tin oxide. Household items such as baking soda or toothpaste can also serve as mild abrasives for polishing. Always choose an abrasive suitable for your rock’s hardness.
What types of rocks polish best by hand?
Rocks with a hardness of 6-7 on the Mohs scale polish best by hand. Examples include jasper, agate, obsidian, and petrified wood. Softer rocks like limestone or soapstone are not ideal because they can scratch or crumble easily.
How long does it take to polish a rock by hand?
Hand polishing can take anywhere from 30 minutes to several hours, depending on the size, hardness, and condition of the rock. Patience and gradual grit progression are key. Typically, expect at least 30-60 minutes for a good polished finish on a small stone.
Can I use household items to polish rocks?
Yes, household items like baking soda, toothpaste, and olive oil can be used for polishing. Baking soda creates a gentle abrasive paste, toothpaste works similarly, and olive oil adds shine after polishing. Always test on a small area first and use soft cloths for application.
What grit sandpaper is best for polishing rocks?
Start with 60-120 grit for shaping, then move to 220 grit for smoothing. For finer polishing, use 400-600 grit, and finish with 1000-1500 grit for a high-gloss shine. The key is to gradually increase grit to avoid scratches and achieve a smooth surface.
How do I maintain the shine on polished rocks?
Keep your polished rocks clean by regularly wiping them with a soft cloth. Avoid exposing them to harsh chemicals or prolonged water contact. For extra shine, occasionally apply a small amount of olive oil or a commercial stone polish and buff gently.