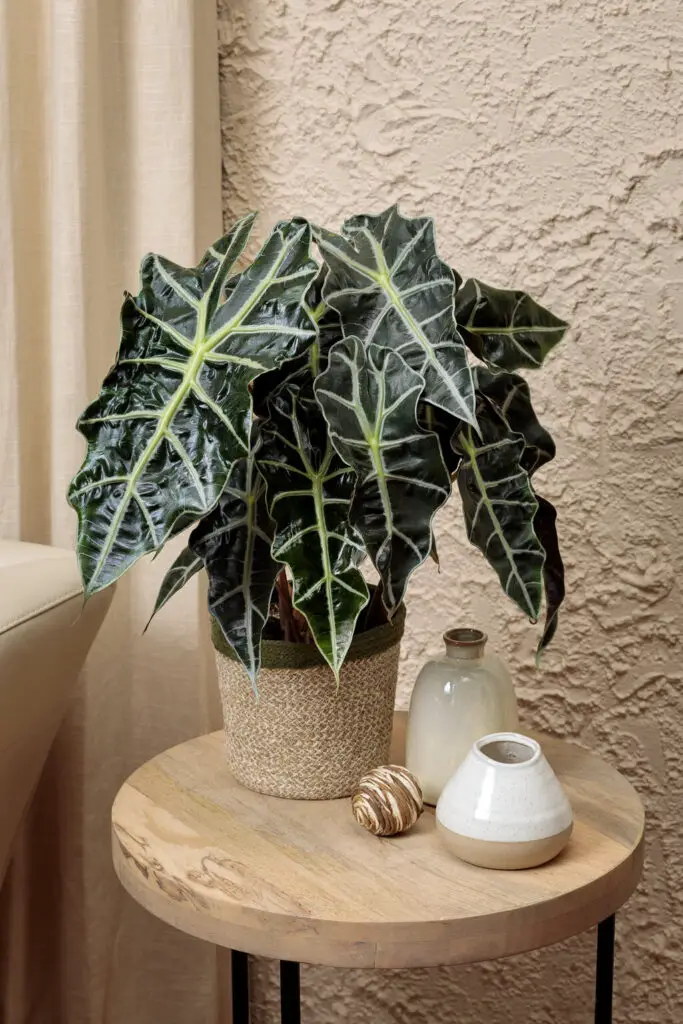
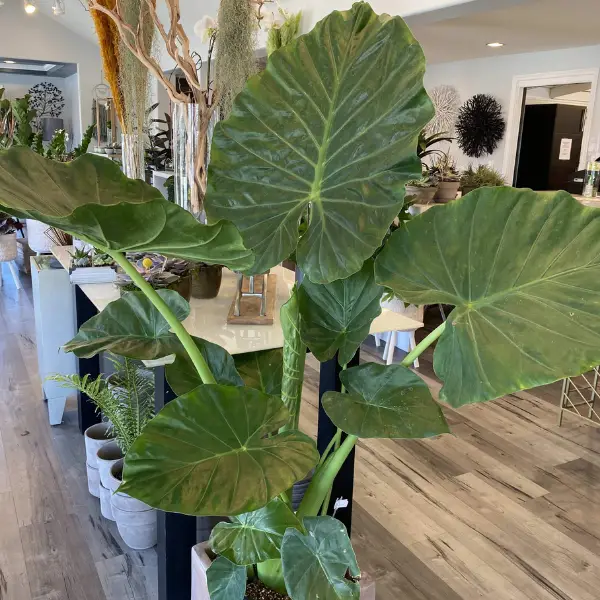
The Alocasia plant, known for its stunning foliage and unique shapes, has captivated plant enthusiasts for centuries. Native to tropical regions of Asia and Australia, this plant is often referred to as the “elephant ear” due to its large, heart-shaped leaves. It requires specific care to thrive indoors or outdoors.
Understanding the Alocasia Plant
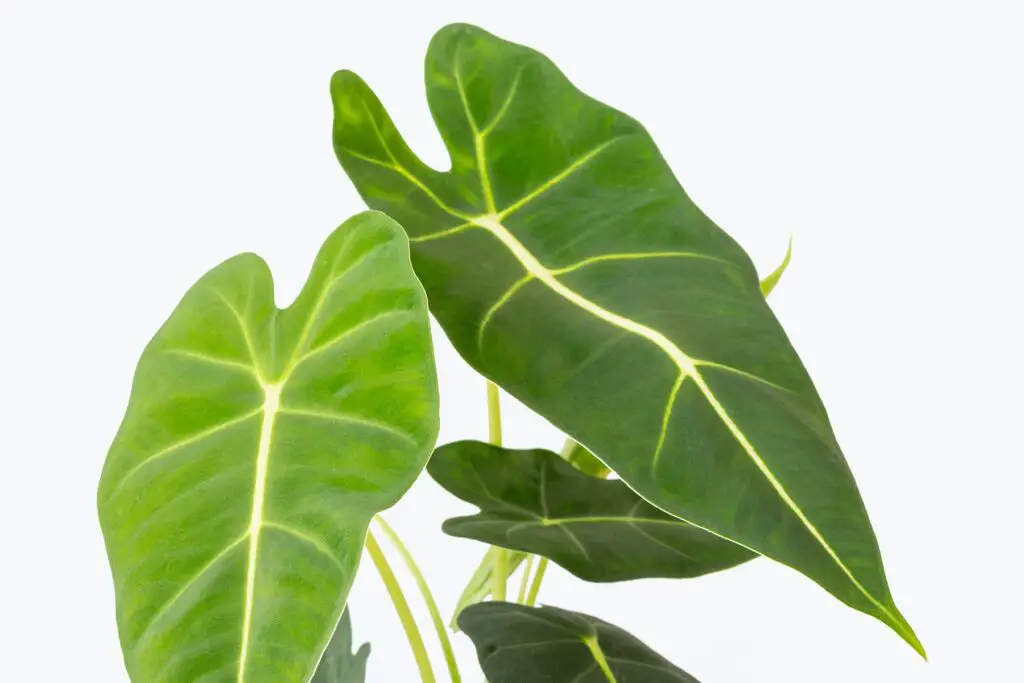
The Alocasia plant belongs to the family Araceae, which includes many other popular houseplants. Its striking leaves come in various shapes and sizes, making it a favorite among interior decorators and plant lovers alike. Over the years, numerous species and hybrids have emerged, each showcasing distinct foliage patterns and colors.
Historically, Alocasia plants have been cultivated not only for their ornamental value but also for their practical uses. In some cultures, the roots of certain species are consumed as a food source. However, caution is necessary, as some parts of the plant can be toxic if ingested improperly.
As houseplants, Alocasia varieties have gained immense popularity. Their dramatic appearance can elevate any indoor space. They are often found in homes, offices, and public spaces. The right care can enhance their beauty and prolong their lifespan.
Origins and Cultural Significance
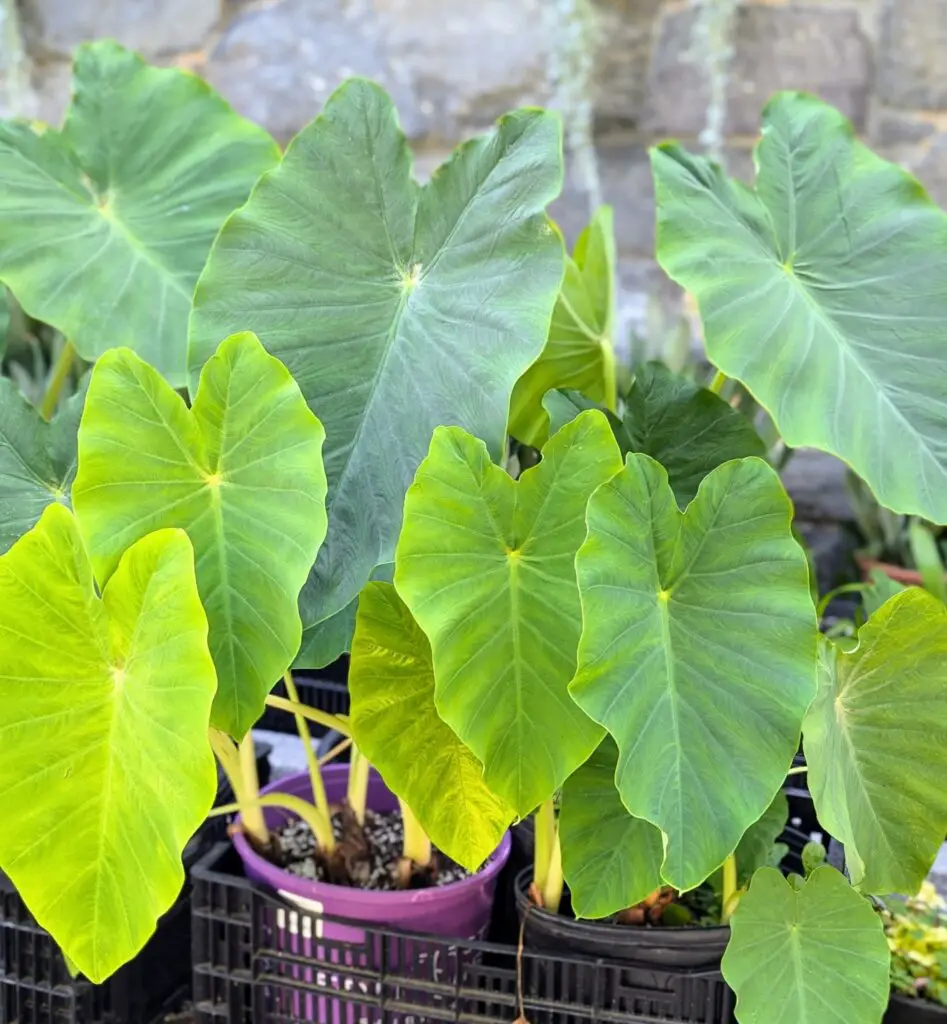
Alocasia plants originated in the tropical regions of Southeast Asia and Oceania. The diverse climates of these areas offer the perfect environment for these lush plants to flourish. In addition to their aesthetic appeal, they hold cultural significance in many societies.
- Traditional Uses: In some cultures, the leaves are used in traditional medicine.
- Food Source: Certain species’ roots are edible when cooked properly.
- Symbolism: The plant is often associated with prosperity and growth.
The fascination with Alocasia has spread globally. As people learn about their unique characteristics, demand for these plants has increased. This trend has led to the development of various hybrids that cater to different tastes and preferences.
Popular Alocasia Varieties
There are several popular varieties of Alocasia that enthusiasts often seek out. Each variety has unique features that appeal to different tastes. Here are a few notable ones:
| Variety | Description |
|---|---|
| Alocasia Polly | Features striking arrow-shaped leaves with prominent veins. |
| Alocasia Zebrina | Known for its zebra-like stems and large green leaves. |
| Alocasia Silver Dragon | Has stunning silver-green leaves with deep veining. |
These varieties illustrate the diversity within the Alocasia genus. Each type offers a unique aesthetic that can enhance your home decor or garden design.
Caring for Alocasia Plants
Caring for Alocasia plants requires understanding their specific needs. They thrive in well-draining soil and prefer bright, indirect light. Overexposure to direct sunlight can scorch their leaves, while inadequate light can hinder growth. Here are some essential tips for maintaining healthy Alocasia plants:
- Watering: Allow the top inch of soil to dry out before watering again.
- Humidity: These plants enjoy high humidity levels; consider using a humidifier.
- Temperature: Keep them in warm environments, ideally between 65°F and 80°F.
By following these care tips, you can ensure that your Alocasia plant remains vibrant and healthy, adding beauty to your living space for years to come.
Common Pests and Diseases
Despite their beauty, Alocasia plants can be susceptible to various pests and diseases. Understanding these threats is crucial for effective care. Identifying issues early can help you take appropriate action to protect your plants. Here are some common pests that may affect Alocasia:
- Spider Mites: These tiny pests thrive in dry conditions. They cause stippling on leaves and may lead to leaf drop if not addressed.
- Mealybugs: Mealybugs appear as white, cottony masses on stems and leaves. They can weaken the plant by sucking sap.
- Scale Insects: Scale insects can be hard to spot. They look like small bumps on the stems and leaves and can cause yellowing of foliage.
- Fungus Gnats: These pests are often found in overly moist soil. Their larvae can damage roots, leading to stunted growth.
To manage these pests, regular inspections are recommended. If you notice any signs of infestation, consider using insecticidal soap or neem oil as an organic solution. Additionally, maintaining proper humidity and watering practices can help reduce the risk of pests.
Diseases Affecting Alocasia Plants
In addition to pests, Alocasia plants can suffer from various diseases, primarily caused by fungi or bacteria. Here are some common diseases to watch out for:
- Root Rot: This occurs when the plant sits in overly wet soil. Symptoms include yellowing leaves and mushy roots. To prevent this, ensure proper drainage.
- Leaf Spot: Leaf spot is characterized by dark spots on leaves. It is often caused by excessive moisture or poor air circulation.
- Powdery Mildew: This fungal disease appears as a white powdery coating on leaves. It thrives in humid conditions and can be treated with fungicides.
To minimize the risk of diseases, always use clean tools when pruning or repotting. Additionally, providing adequate airflow around the plant can help reduce humidity levels that favor fungal growth.
Repotting Your Alocasia Plant
Repotting is an essential part of Alocasia care, particularly if the plant has outgrown its current container. This process allows you to refresh the soil, promote healthy growth, and prevent root-bound conditions. Here are some steps to follow when repotting your Alocasia:
- Choose the Right Time: The best time to repot is during the spring or early summer when the plant is actively growing.
- Select a New Pot: Choose a pot that is 1-2 inches larger in diameter than the current one. Ensure it has drainage holes.
- Prepare Fresh Soil: Use a well-draining potting mix, ideally formulated for tropical plants. You can mix regular potting soil with perlite or orchid bark for better drainage.
- Remove the Plant: Gently take the plant out of its current pot. Be careful not to damage the roots.
- Inspect Roots: Trim any dead or mushy roots with sterilized scissors. Healthy roots should be firm and white.
- Repot: Place the plant in the new pot, ensuring it sits at the same depth as before. Fill in with fresh soil and water lightly.
After repotting, give your Alocasia time to adjust to its new environment. Avoid fertilizing for a few weeks to reduce stress on the plant. This process helps maintain a healthy root system and promotes overall growth.
3>Fertilizing Alocasia Plants
Feeding your Alocasia plant properly is vital for healthy growth. Fertilization supports foliage development and overall vitality. Here are some tips for fertilizing your Alocasia:
- Type of Fertilizer: Use a balanced liquid fertilizer diluted to half strength. Fertilizers high in nitrogen are beneficial for leaf growth.
- Frequency: Fertilize every 4-6 weeks during the growing season (spring and summer). Reduce or stop during fall and winter when growth slows.
- Application: Always apply fertilizer to moist soil to prevent root burn. Water well after application to help distribute nutrients.
By following these fertilization tips, you can ensure that your Alocasia plant receives the nutrients it needs to thrive in your home.
Propagation of Alocasia Plants
Propagating Alocasia plants can be a rewarding experience. It allows you to expand your collection or share plants with friends. Propagation can be done through division or offsets. Both methods are effective but require careful handling to ensure success.
Dividing Alocasia
Division is the most common method for propagating Alocasia. This technique involves separating the plant into smaller sections, each with its roots and leaves. Here’s how to do it:
- Choose the Right Time: The best time to divide an Alocasia is during the spring when it is actively growing.
- Remove the Plant: Gently take the plant out of its pot, being careful not to damage the roots.
- Inspect the Roots: Examine the root system for healthy sections. Each division should have at least one healthy stem and a good root system.
- Separate the Sections: Use sterilized scissors or a knife to separate the sections. Ensure each piece has roots and at least one leaf.
- Replant: Plant each division in its own pot with fresh, well-draining soil. Water lightly after planting.
After repotting, place the new plants in a warm area with indirect light. Keep the soil moist but not soggy until they establish themselves.
Using Offsets for Propagation
Offsets are small plants that grow from the base of the main Alocasia plant. These can also be used for propagation. Here are the steps to follow:
- Identify Offsets: Look for small plants attached to the main plant’s base, usually near the soil surface.
- Detach Offsets: Carefully remove the offsets by gently twisting or cutting them away from the main plant. Ensure you get some roots with them.
- Prepare New Pots: Use small pots filled with a suitable potting mix for the offsets.
- Plant Offsets: Place each offset in its pot, ensuring it sits at the same depth as it did before. Water lightly.
This method is simpler than division and often leads to successful propagation due to the established root system of the offsets.
Common Mistakes to Avoid
Caring for Alocasia plants can be challenging, especially for beginners. Here are common mistakes to avoid when growing these beautiful plants:
- Overwatering: This is one of the most frequent issues. Ensure that the top inch of soil dries out before watering again to prevent root rot.
- Poor Lighting Conditions: Alocasia plants thrive in bright, indirect light. Avoid placing them in dark corners or direct sunlight.
- Lack of Humidity: These plants prefer high humidity levels. Neglecting humidity can lead to dry leaf tips and poor growth.
- Neglecting Pests: Regularly check for pests and diseases. Early detection is key to effective control.
Avoiding these common pitfalls will help ensure your Alocasia remains healthy and vibrant throughout its life.
Seasonal Care for Alocasia Plants
The care requirements for Alocasia plants can vary with the seasons. Understanding these changes can help you provide the best environment year-round.
Spring and Summer Care
During the growing season, Alocasia plants thrive. Here are some care tips for spring and summer:
- Increase Watering: As growth accelerates, increase your watering frequency, ensuring that you don’t let the soil dry out completely.
- Fertilize Regularly: Use a balanced fertilizer every 4-6 weeks to support new growth.
- Monitor for Pests: Keep an eye out for pests that may become more active during this time.
Fall and Winter Care
As temperatures drop, Alocasia plants enter a period of dormancy. Adjust your care routine accordingly:
- Reduce Watering: Allow the soil to dry out more between waterings. Overwatering can lead to root rot during dormancy.
- Avoid Fertilizing: Stop fertilizing during fall and winter to prevent stress on the plant.
- Maintain Humidity: Use a humidifier or pebble trays to keep humidity levels up, especially in heated homes.
By adjusting your care routine according to the seasons, you can help your Alocasia thrive no matter the time of year.
Additional Tips for Success with Alocasia Plants
To fu
rther enhance your experience with Alocasia plants, consider these additional tips. They can help you create a thriving environment for your plants while also making your care routine more enjoyable.
Choosing the Right Location
Finding the ideal spot for your Alocasia is crucial. Here are some factors to consider when selecting the location:
- Light Levels: Ensure the area receives bright, indirect light. Avoid direct sunlight, which can scorch the leaves.
- Temperature Stability: Keep the plant away from drafts or sudden temperature changes. Alocasia prefers a stable temperature.
- Accessibility: Place your Alocasia where you can easily monitor its health and care for it regularly.
Cleaning Leaves
Dust can accumulate on the large leaves of Alocasia plants, which can hinder photosynthesis. Regularly cleaning the leaves not only keeps them looking their best but also promotes better health. Use a damp cloth to gently wipe the leaves, removing any dust or debris.
Using Decorative Pots
Alocasia plants are not only beautiful in foliage but also in their presentation. Consider using decorative pots that complement your home decor. Ensure that these pots have proper drainage holes to prevent waterlogging.
Creating a Plant Care Schedule
Establishing a plant care schedule can simplify your routine. Include tasks such as watering, fertilizing, and checking for pests. This helps keep your Alocasia healthy and allows you to enjoy its beauty without stress.
Final Thoughts
The Alocasia plant is a stunning addition to any indoor or outdoor space. With its unique foliage, it brings a touch of the tropics to your home. Understanding its history, care requirements, and propagation techniques will enable you to enjoy this plant for many years. From proper watering and lighting to managing pests and seasonal adjustments, each aspect of care contributes to a thriving Alocasia.
By following the tips provided, you can create an environment that supports the health and beauty of your Alocasia. Whether you are a novice plant parent or an experienced green thumb, these insights will help you cultivate a vibrant collection. As you nurture your Alocasia, take time to appreciate its growth and transformation, making it a rewarding part of your gardening journey.
With dedication and attention, your Alocasia will not only survive but flourish, adding character and charm to your living space. Happy gardening!