Alocasia plants generally do not like to be root bound. They thrive in well-draining soil with ample room for their roots to grow. When they become root bound, their growth can slow, and they may show signs of stress.
*As an Amazon Associate we earn from qualifying purchases.
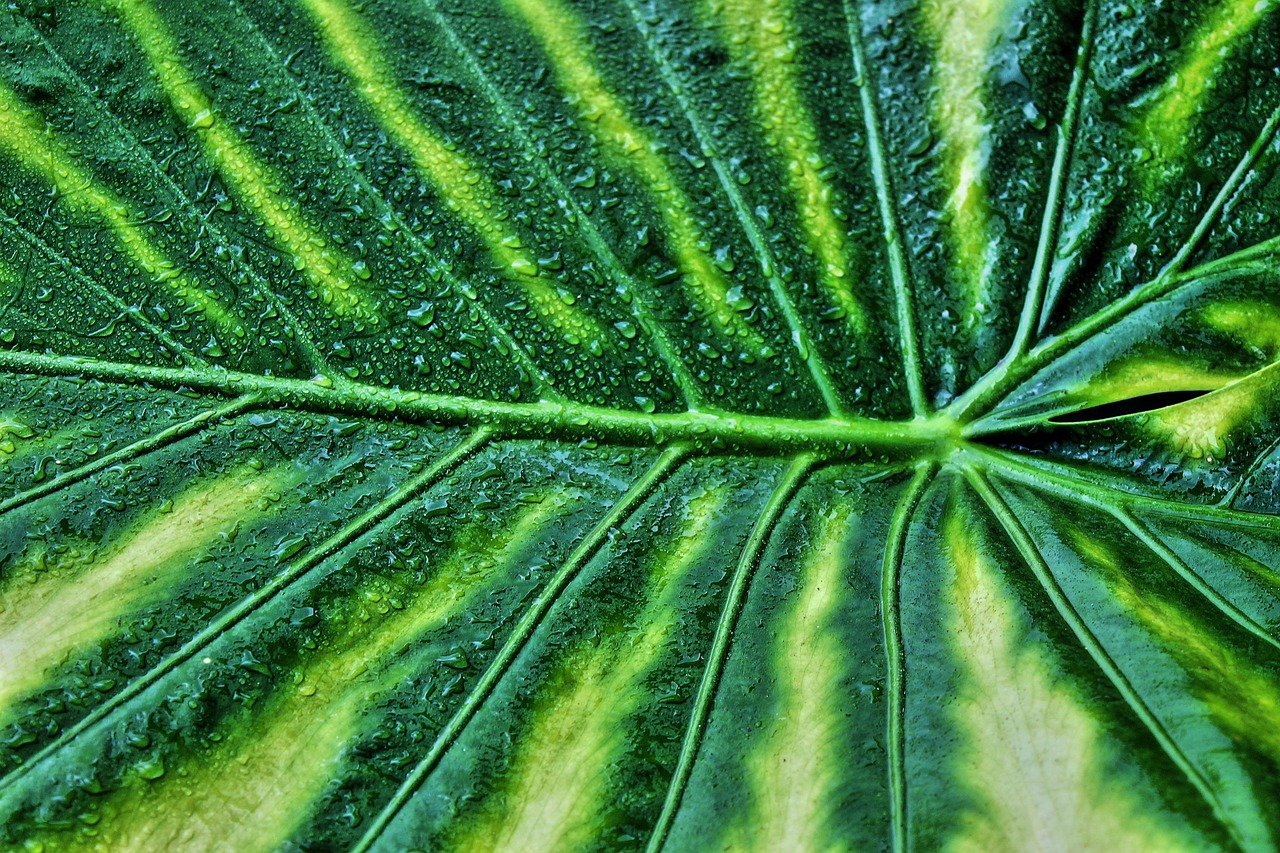
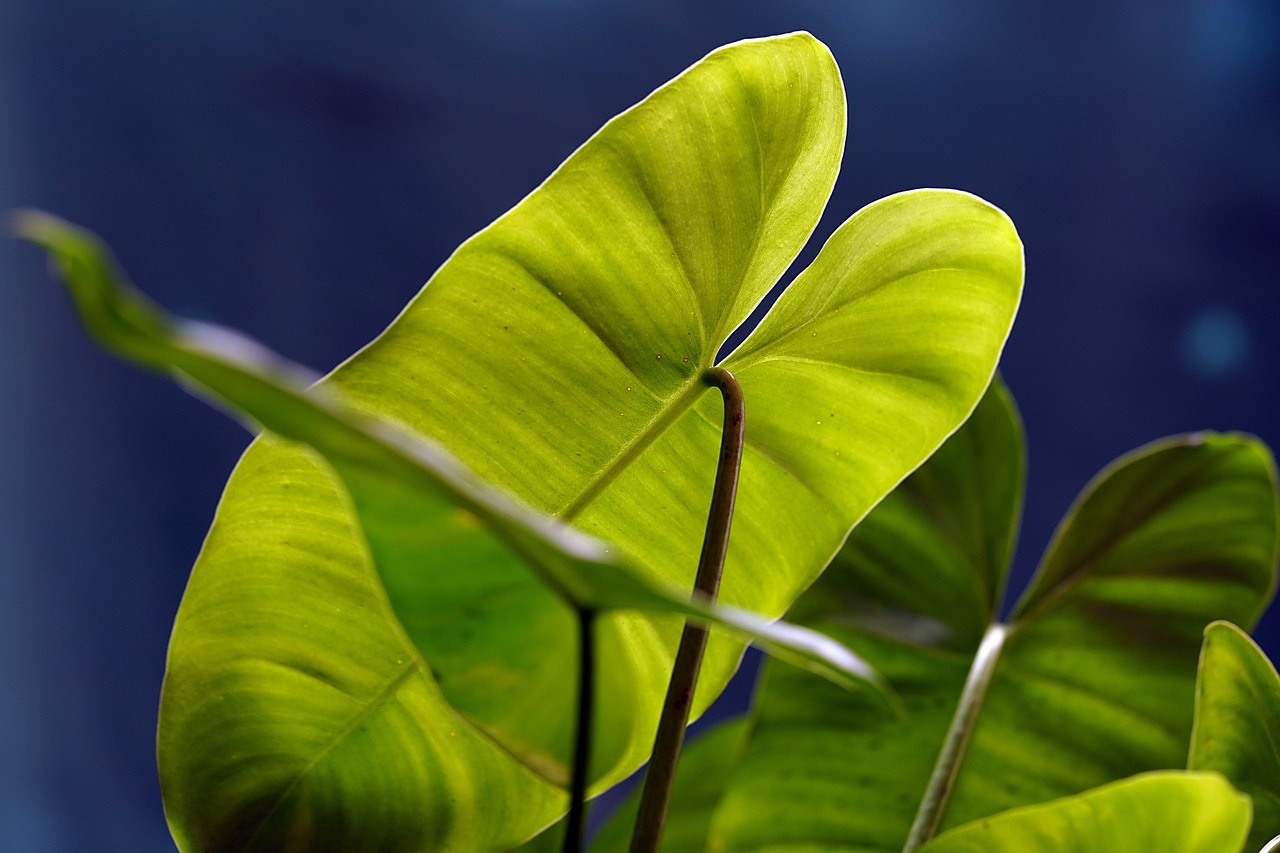
Alocasia, commonly known as elephant ear plants, are tropical perennials known for their striking foliage and unique leaf shapes. These plants belong to the family Araceae and are native to Southeast Asia and parts of Australia. With their large, often glossy leaves, Alocasia plants have become popular among indoor plant enthusiasts and gardeners alike.
One of the key factors in maintaining a healthy Alocasia is understanding its root system. The roots of these plants are sensitive and require specific conditions to thrive. As they grow, their root structure expands, and providing the right amount of space becomes crucial for their overall health.
What Does It Mean to Be Root Bound?
Being root bound refers to a condition where a plant’s roots grow too densely within its container. This can occur when a plant is left in the same pot for too long without repotting. In such situations, the roots may circle around the pot, restricting their growth and potentially leading to various health issues for the plant.
Several signs indicate that an Alocasia may be root bound:
Stunted growth or no new growth.
Roots emerging from drainage holes at the bottom of the pot.
Soil dries out quickly after watering.
Leaves turning yellow or wilting.
Why Alocasia Prefer Space
Alocasia plants are accustomed to growing in nutrient-rich environments with plenty of space for their roots to access water and nutrients. When they are root bound, their ability to absorb these essential elements diminishes. This can lead to poor growth and an increased risk of pests and diseases.
Additionally, a cramped root system can lead to poor drainage. Excess moisture may accumulate around the roots, promoting root rot—an issue that can be detrimental to the plant’s health.
Optimal Potting Conditions
To ensure that Alocasia plants thrive, providing them with the right potting conditions is essential. Here are some important factors to consider:
Pot Size: Choose a pot that is slightly larger than the current one when repotting. A pot that is too large can lead to overwatering issues.
Drainage: Ensure that the pot has adequate drainage holes to allow excess water to escape.
Soil Type: Use a well-draining potting mix, preferably one designed for aroids or tropical plants.
The Repotting Process
Repotting your Alocasia is crucial if you notice signs of being root bound. Here is a step-by-step guide to repotting:
Choose a new pot that is 1-2 inches larger in diameter than the current one.
Gently remove the plant from its current pot. Be careful not to damage the roots.
Inspect the roots for any signs of rot or damage. Trim away any unhealthy roots.
Add fresh potting mix to the bottom of the new pot before placing the plant inside.
Fill around the sides with more potting mix, ensuring the plant is stable.
Water thoroughly after repotting to help settle the soil around the roots.
When to Repot Your Alocasia
The best time to repot Alocasia plants is during the growing season, typically in spring or early summer. This allows the plant to establish its roots in the new pot before entering dormancy in the fall. Regularly checking for signs of being root bound will help maintain the health of your Alocasia.
Signs of Stress in Alocasia Plants
Recognizing when an Alocasia plant is stressed is vital for its care. Stress can occur not only from being root bound but also from various environmental factors. Below are some common signs of stress to watch for:
Leaf Yellowing: This can indicate overwatering, nutrient deficiencies, or root problems.
Wilting Leaves: This may result from underwatering, root rot, or extreme temperature fluctuations.
Brown Leaf Edges: This often signifies dry air or inconsistent watering practices.
Leaf Drop: Sudden leaf drop may indicate a major change in the plant’s environment or care routine.
Environmental Factors Affecting Alocasia
Alocasia plants thrive in specific environmental conditions. Understanding these factors can help prevent stress and promote healthy growth.
Light Requirements
Alocasia plants prefer bright, indirect light. While they can tolerate some direct sunlight, too much can scorch their leaves. Insufficient light may cause stunted growth and leggy plants. Here are some tips for providing the right lighting:
Place them near east or west-facing windows for optimal light exposure.
Avoid placing them in dark corners or areas with low light.
Rotate the plant periodically to ensure even light distribution.
Temperature and Humidity
Temperature and humidity levels play a crucial role in the health of Alocasia plants. They prefer warm temperatures ranging from 65°F to 80°F (18°C to 27°C). Sudden temperature drops can shock the plant. Here are some recommendations:
Avoid placing them near drafts, heaters, or air conditioning vents.
Maintain humidity levels around 50% to 70%. Use a humidifier if necessary.
Grouping plants together can create a micro-humidity zone.
Watering Practices for Alocasia
Proper watering is essential for the health of Alocasia plants. Overwatering and underwatering can both lead to stress and root issues. To ensure adequate watering:
Check the top inch of the soil; if it feels dry, it’s time to water.
Water until excess moisture drains from the bottom of the pot.
Ensure that the potting mix allows for good drainage to prevent waterlogging.
Soil Composition
The type of soil used for Alocasia is crucial for their growth. A well-draining potting mix helps maintain the right moisture levels while providing necessary nutrients. Consider the following:
Aroid Mix: A mix specifically formulated for aroids can be beneficial.
Additives: Consider adding perlite or orchid bark to enhance drainage.
Homemade Mix: A combination of potting soil, perlite, and peat moss can work well.
Pest Management
Pests can also contribute to the stress levels of Alocasia plants. Common pests include spider mites, aphids, and mealybugs. It’s essential to monitor your plant regularly for signs of infestation. Here are some strategies for managing pests:
Regular Inspections: Check the undersides of leaves and stems frequently.
Natural Remedies: Use insecticidal soap or neem oil as a natural treatment.
Isolation: Keep newly acquired plants separate until you confirm they are pest-free.
Importance of Fertilization
Fertilizing Alocasia plants helps provide essential nutrients. During the growing season, regular fertilization encourages healthy growth and vibrant foliage. Here are some tips on how to fertilize your Alocasia properly:
Type of Fertilizer: Use a balanced liquid fertilizer diluted to half strength.
Frequency: Fertilize every 4-6 weeks during the growing season.
Avoid Over-Fertilization: Too much fertilizer can lead to salt buildup and root damage.
By paying attention to these aspects of care, you can help ensure your Alocasia remains healthy and vibrant throughout its growth cycle.
Common Varieties of Alocasia
Alocasia plants come in a variety of species, each with its unique characteristics. Understanding the different types can help you provide the best care tailored to their specific needs. Below are some popular Alocasia varieties:
Alocasia Polly: Known for its striking arrow-shaped leaves with prominent veins, this variety is often sought after for its ornamental appeal.
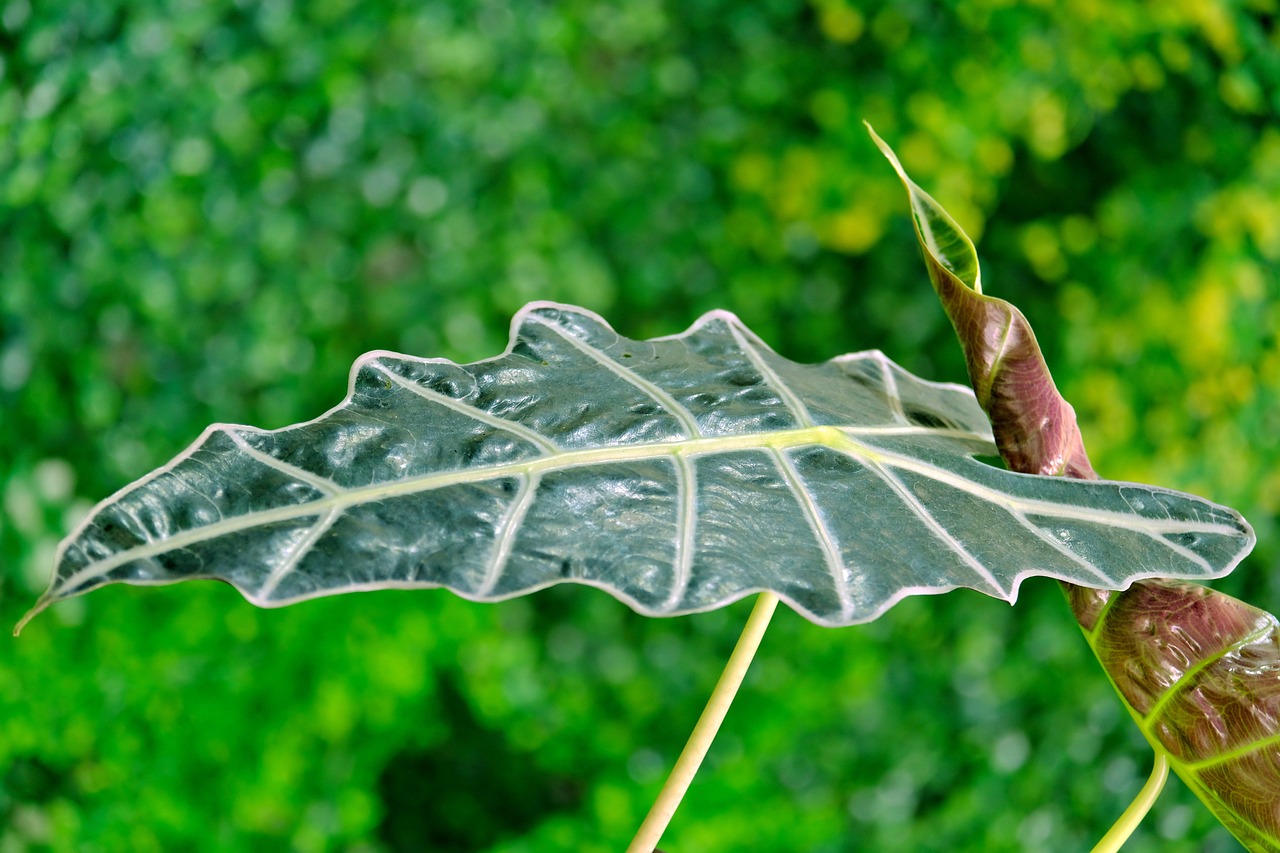
Alocasia Zebrina: This type features distinctive zebra-striped stems and large, dramatic leaves, making it a favorite among collectors.
Alocasia Macrorrhiza: Also known as giant taro, this variety produces large leaves and can grow quite tall, adding an exotic touch to any space.
Alocasia Amazonica: This hybrid combines features from different Alocasia species, showcasing stunning foliage and a compact size.
Caring for Different Varieties
While all Alocasia plants share some common care requirements, each variety may have specific preferences. Here’s how to care for some of the popular varieties mentioned above:
This variety prefers bright, indirect light and thrives in high humidity. Ensure you water it when the top inch of soil dries out. Keep it in a well-draining soil mix to prevent root rot.
Alocasia Zebrina
The zebra plant enjoys similar conditions to Alocasia Polly but may require slightly more moisture. Mist its leaves regularly or use a humidifier to maintain high humidity levels. Avoid placing it in direct sunlight, as this can scorch its leaves.
Alocasia Macrorrhiza
This variety can tolerate lower light conditions but performs best in bright, indirect light. It is essential to keep the soil consistently moist but not soggy. Regular feeding during the growing season will support vigorous growth.
Alocasia Amazonica
The Amazonica thrives in bright, indirect light and benefits from regular watering. Ensure the soil dries slightly between waterings. This variety is sensitive to temperature changes, so maintaining stable conditions is critical.
Propagation Methods for Alocasia
Propagating Alocasia can be a rewarding experience, allowing you to expand your collection or share with friends. There are several methods of propagation, including division and offsets.
Division
Division is the most common method for propagating Alocasia plants. This technique involves separating the plant into smaller sections, each with its roots. Here’s how to do it:
Choose a mature Alocasia plant that has several stems.
Remove the plant from its pot and gently separate the roots.
Using clean scissors or pruning shears, cut through the rhizomes to create new sections.
Ensure each section has at least one healthy leaf and root system.
Replant each section in a suitable potting mix and water thoroughly.
Offsets
Some Alocasia varieties produce offsets or “pups” at their base. These small plants can be removed and potted separately:
Wait until the offsets are large enough to handle, usually when they have a few leaves.
Carefully detach them from the main plant using clean scissors.
Pot them in their own containers with a well-draining soil mix.
Water them lightly and place them in a warm, humid environment until they establish themselves.
Troubleshooting Common Issues
Caring for Alocasia plants can sometimes lead to challenges. Being aware of potential issues can help you address them quickly. Here are some common problems and their solutions:
Root Rot
Root rot is one of the most significant threats to Alocasia health. It often results from overwatering or poorly draining soil. Signs include yellowing leaves and a mushy root system.
Solution: Allow the soil to dry out between waterings and ensure proper drainage. If rot is detected, remove the affected roots and repot in fresh soil.
Pests
Pests can also affect Alocasia plants, as previously mentioned. Regular inspections are crucial for early detection.
Solution: Treat infestations promptly with insecticidal soap or neem oil, and isolate affected plants to prevent spreading.
Nutrient Deficiencies
If your Alocasia shows signs of poor growth or discoloration, it may be lacking essential nutrients.
Solution: Consider fertilizing with a balanced fertilizer during the growing season and monitoring watering practices to avoid nutrient leaching.
By being proactive about care and recognizing these issues, you can keep your Alocasia thriving and vibrant in your indoor garden.
that your Alocasia thrives, it is crucial to create and maintain an ideal environment. This includes not just the right pot size and soil mix but also careful attention to light, humidity, and temperature. Let’s delve deeper into how to optimize these factors for your Alocasia plants.
Light Requirements Revisited
As previously mentioned, Alocasia plants flourish in bright, indirect light. However, understanding the nuances of light can greatly enhance their growth:
Filtered Light: If you cannot provide bright, indirect sunlight, consider using sheer curtains to filter harsh sunlight.
Light Intensity: You can use a light meter to gauge the intensity of light in your home, ensuring it meets your plant’s needs.
Artificial Lighting: In low-light conditions, supplement with grow lights to help your Alocasia thrive.
Humidity Levels
Humidity is another critical factor that influences the health of Alocasia plants. Here are some effective ways to boost humidity levels:
Pebble Trays: Place a tray filled with pebbles and water beneath the pot. As the water evaporates, it increases humidity around the plant.
Misting: Lightly misting the leaves can temporarily increase humidity. However, avoid overdoing it to prevent fungal issues.
Room Humidifiers: Investing in a humidifier can provide consistent moisture, especially in dry climates or during winter months.
Temperature Considerations
Alocasia plants prefer stable temperatures. Sudden changes can stress them significantly. Follow these tips to maintain ideal temperatures:
Avoid Cold Drafts: Keep plants away from windows and doors that open frequently.
Heat Sources: Do not place them near radiators or heating vents as intense heat can dry out the leaves.
Temperature Monitoring: Use a thermometer to monitor room temperatures, ensuring they remain within the desired range.
care routines according to seasonal changes is essential for the health of your Alocasia. Different seasons bring varying light levels and humidity conditions that can affect growth patterns.
Spring and Summer Care
During the growing season, Alocasia plants will require more frequent watering and fertilization. Here’s a checklist for these months:
Watering: Increase watering frequency as the plant actively grows, ensuring the soil remains slightly moist.
Fertilization: As discussed earlier, fertilize every 4-6 weeks with a balanced fertilizer.
Pest Monitoring: Keep an eye out for pests, as warmer weather may promote pest activity.
Fall and Winter Care
In fall and winter, Alocasia plants generally enter a dormant phase. Adjust care accordingly:
Watering Reduction: Water less frequently as the plant’s growth slows; allow the top layer of soil to dry out before watering again.
No Fertilization: Hold off on fertilizing during this period until new growth appears in spring.
Temperature Stability: Ensure temperatures remain consistent and avoid cold drafts that can harm your plant.
Final Thoughts
Caring for Alocasia plants requires attention to their specific needs regarding potting conditions, watering practices, light exposure, and environmental factors. Alocasia do not like to be root bound; providing them with ample space allows their roots to flourish and supports vibrant growth. By understanding their requirements and regularly monitoring their health, you can cultivate beautiful, thriving Alocasia plants in your home.
Remember that each variety may have unique preferences, so take the time to learn about the specific types you own. With patience and care, your Alocasia can become a stunning centerpiece in any indoor garden.
By following these guidelines and staying aware of common issues, you can ensure that your Alocasia remains healthy and continues to thrive for years to come.
I'm Amelia Clark , a seasoned florist and gardening specialist with more than 15 years of practical expertise. Following the completion of my formal education, I dedicated myself to a flourishing career in floristry, acquiring extensive understanding of diverse flower species and their ideal cultivation requirements. Additionally, I possess exceptional skills as a writer and public speaker, having successfully published numerous works and delivered engaging presentations at various local garden clubs and conferences. Check our Social media Profiles: Facebook Page, LinkedIn, InstagramTumblr
To successfully grow American groundnuts at home, ensure you select a well-drained, sunny location. Start with quality seeds, prepare the soil properly, and maintain consistent moisture....
Are your tropical plants looking a bit tired? Revitalizing them with natural remedies can be both rewarding and surprisingly simple. Let’s explore how to breathe new life into your indoor...