Ferns are a beautiful and popular houseplant that adds a touch of elegance to any home, but they can also be tricky to keep healthy. Many people struggle with their ferns turning brown or wilting, despite their best efforts to keep them alive. If you’re one of those people, don’t worry – you’re not alone! There are many reasons why your fern might be struggling, from improper watering to inadequate lighting. In this post, we’ll explore the top 10 reasons why your fern leaves may be turning brown, and provide some simple tips and tricks to help you revive your fern and keep it thriving. So, whether you’re a seasoned green thumb or a beginner looking to add some greenery to your home, read on to learn how to keep your ferns healthy and beautiful.
Table of Contents
1. Introduction: The beauty and benefits of ferns in your home or garden
Ferns are a delightful addition to any indoor or outdoor space, bringing a touch of lush greenery and a sense of natural beauty. With their delicate fronds and unique foliage patterns, ferns have become a popular choice among plant enthusiasts and gardeners alike. Not only do they add a touch of elegance to your surroundings, but they also offer numerous benefits that make them a worthwhile investment.
Firstly, ferns are known for their air-purifying properties. They have the ability to effectively filter pollutants from the air, making them an excellent choice for improving indoor air quality. This can be particularly beneficial for those living in urban areas or for individuals who suffer from allergies or respiratory conditions.
Additionally, ferns are relatively low-maintenance plants, making them ideal for both experienced gardeners and beginners. They thrive in areas with indirect light and moderate humidity, making them a versatile choice for various environments. Whether you want to adorn your living room with a hanging fern or create a lush fern garden in your backyard, these plants are sure to bring life and vibrancy to any space.
Furthermore, ferns have a unique ability to create a calming and serene atmosphere. Their lush green leaves and graceful fronds can instantly evoke a sense of tranquility, making them a perfect addition to meditation rooms, offices, or any space where you seek relaxation and peace.
In this blog post, we will delve into the common issue of fern leaves turning brown, which can be a cause of concern for many fern owners. We will explore ten possible reasons behind this issue and provide practical tips and solutions to revive your ferns. By understanding the underlying causes and implementing the right strategies, you can ensure that your ferns remain healthy and vibrant, allowing you to enjoy their beauty and benefits for years to come.
2. Understanding the causes of browning fern leaves
Understanding the causes of browning fern leaves is crucial in reviving these beautiful plants. There are several factors that can contribute to this issue, and identifying the specific cause is the first step in finding a solution.
1. Lack of humidity: Ferns thrive in moist environments, and low humidity levels can cause their leaves to dry out and turn brown. Consider using a humidifier or placing a tray filled with water near your fern to increase the humidity around it.
2. Overwatering or underwatering: Both overwatering and underwatering can lead to browning leaves. Overwatering can suffocate the roots and cause root rot, while underwatering can result in dehydration. Find the right balance by allowing the top inch of soil to dry out before watering again.
3. Inadequate drainage: Poor drainage can cause water to accumulate at the roots, leading to root rot and browning leaves. Ensure that your fern is planted in well-draining soil and use a pot with drainage holes.
4. Insufficient light: Ferns prefer indirect light or dappled shade. Exposing them to direct sunlight can scorch their leaves, causing them to turn brown. Find a suitable location in your home or garden where your fern can receive the right amount of light.
5. Temperature extremes: Ferns are sensitive to temperature fluctuations. Exposure to extreme heat or cold can stress the plant, resulting in browning leaves. Keep your fern away from drafts or heating vents and maintain a moderate temperature range.
6. Nutrient deficiencies: Lack of essential nutrients can impact the overall health of ferns and lead to browning leaves. Ensure that you are providing your fern with a balanced fertilizer specifically formulated for ferns, following the recommended dosage.
7. Pests and diseases: Certain pests, such as spider mites or mealybugs, can infest ferns and cause leaf discoloration. Additionally, fungal diseases like leaf spot can lead to browning. Regularly inspect your fern for any signs of pest infestation or disease and take appropriate measures to control and prevent them.
8. Overcrowding: If your fern is surrounded by other plants or is in a crowded pot, it may not be receiving adequate airflow. Poor air circulation can contribute to moisture buildup, increasing the risk of browning leaves. Consider repotting or adjusting the placement of your fern to ensure proper ventilation.
9. Chemical exposure: Exposure to certain chemicals, such as chlorine in tap water or harsh cleaning products, can harm ferns and cause leaf browning. Use filtered or distilled water when watering your fern, and avoid exposing it to any potentially harmful substances.
10. Natural aging: Lastly, it’s important to note that some browning of fern leaves can be a natural part of their life cycle. As ferns age, older fronds may turn brown and die off, making room for new growth. Regularly prune away any dead or brown leaves to maintain the overall health and appearance of your fern.
By understanding the causes of browning fern leaves, you can take the necessary steps to address the specific issue and revive your fern to its lush green glory. Remember to be patient and provide consistent care, and your fern will reward you with vibrant foliage once again.
3. Lack of moisture: How to properly water your ferns
Proper watering is crucial when it comes to keeping your ferns healthy and vibrant. One of the most common reasons why fern leaves turn brown is due to a lack of moisture. Ferns are native to shady and humid environments, so replicating those conditions is essential for their well-being.
First and foremost, it’s important to ensure that your fern is potted in a well-draining soil mix. This allows excess water to escape, preventing the roots from sitting in waterlogged conditions, which can lead to root rot.
When it comes to watering your fern, consistency is key. Rather than giving your ferns sporadic drenches, aim for a regular watering schedule. As a general rule of thumb, ferns prefer to be kept consistently moist but not soggy. This means watering them when the top inch of soil feels dry to the touch.
To water your fern properly, use a watering can with a narrow spout to direct the water towards the base of the plant. Avoid wetting the fronds excessively, as this can create an environment for fungal diseases to thrive.
Another helpful tip is to use room temperature or lukewarm water. Cold water can shock the sensitive roots of ferns, leading to stress and browning of the leaves.
In addition to regular watering, consider increasing humidity around your ferns. You can achieve this by placing a tray filled with water and pebbles beneath the pot. As the water evaporates, it creates a more humid microclimate around the plant, mimicking its natural habitat.
Remember to monitor your fern closely and adjust your watering routine accordingly. Factors such as temperature, humidity levels, and the size of the pot can influence the frequency of watering. By providing consistent moisture to your ferns, you can help prevent browning leaves and revive their lush green appearance.
4. Inadequate humidity: Tips for increasing humidity levels for your ferns
Ferns are known for their love of humidity, and if the leaves of your ferns are turning brown, it could be a sign that the humidity levels are not up to par. Low humidity can cause the leaves to dry out and become crispy, leaving your once lush and vibrant fern looking sad and neglected.
Luckily, there are several tips and tricks you can implement to increase the humidity levels for your ferns and bring them back to their former glory.
1. Group your ferns together: Placing your ferns in close proximity to each other can create a microclimate of increased humidity. As the plants transpire, they release moisture into the air, creating a more humid environment for all the ferns.
2. Use a pebble tray: Fill a tray with water and place pebbles or rocks in it. Then, place your ferns on top of the pebbles, making sure the bottom of the pots is not submerged in water. As the water evaporates, it will increase the humidity around the ferns.
3. Misting: Regularly misting your ferns with water can help to increase the humidity levels. Use a spray bottle to lightly mist the leaves, making sure to cover both the top and bottom surfaces. Misting in the early morning or late afternoon is best to avoid water droplets sitting on the leaves for too long.
4. Humidifier: Investing in a humidifier is an excellent long-term solution for increasing humidity levels. Place the humidifier near your ferns and set it to an appropriate humidity level. This will ensure that your ferns receive a consistent and adequate amount of moisture in the air.
5. Bathroom or kitchen placement: These areas of your home typically have higher humidity levels due to the presence of water activities. Placing your ferns in a bathroom or kitchen can naturally provide the humidity they need.
6. Terrarium or greenhouse: If you have the space and resources, consider creating a terrarium or greenhouse specifically for your ferns. These enclosed spaces provide optimal humidity and create a controlled environment for your plants to thrive.
Remember, ferns thrive in environments with humidity levels between 40% and 60%. By implementing these tips and tricks, you can ensure that your ferns receive the proper moisture they need to stay healthy and vibrant, and prevent those dreaded brown leaves from appearing.
5. Insufficient light: Finding the right balance of light for ferns
Finding the right balance of light is crucial when it comes to the health and vitality of your ferns. While ferns thrive in shady and low-light conditions, they still require some degree of sunlight to flourish. Insufficient light can lead to brown and withered leaves, ultimately affecting the overall appearance of your ferns.
First, it’s important to identify the specific lighting requirements of your fern species. Some ferns prefer indirect or filtered light, while others can tolerate more direct sunlight. Assess the lighting conditions in the area where your fern is currently placed and make adjustments accordingly.
If your fern is placed in a spot with too little light, you may notice that the leaves start turning brown and losing their vibrant green color. In this case, consider moving your fern to a brighter location, such as near a window with filtered sunlight or in a well-lit room.
On the other hand, if your fern is exposed to too much direct sunlight, it can also result in brown leaves. Excessive sunlight can scorch the delicate fronds and cause them to dry out. To combat this, provide some shade by using sheer curtains or blinds to filter the intense rays of the sun.
Additionally, rotating your fern periodically can ensure that all sides of the plant receive adequate light exposure, promoting even growth and preventing one side from becoming excessively shaded.
If natural light is limited in your space, you can supplement it with artificial lighting options. LED grow lights or fluorescent lights designed for indoor plants can provide the necessary light spectrum for ferns to thrive. Place the lights at an appropriate distance from the fern to avoid burning or overheating.
Remember to monitor your fern’s response to the adjusted lighting conditions. Over time, you should see healthier, greener leaves replacing the brown ones. Finding the right balance of light for your ferns is essential to revive their beauty and ensure their long-term health.
6. Temperature extremes: Managing temperature fluctuations for healthy ferns
Temperature extremes can have a significant impact on the health and appearance of your ferns. Ferns are typically known for their love of moisture and humidity, but they can also be quite sensitive to temperature fluctuations.
One common problem that fern owners face is brown or scorched leaves, which can be caused by exposure to extreme temperatures. Ferns thrive in moderate temperatures, ideally between 60-75°F (15-24°C). If the temperature rises above this range, especially if it reaches 90°F (32°C) or higher, the fern may begin to experience stress and its leaves may turn brown.
On the other hand, if the temperature drops too low, especially below 50°F (10°C), the fern may also suffer. Cold drafts, air conditioning vents, or placing the fern near windows during winter can expose it to chilly temperatures and cause browning or even frost damage.
To manage temperature fluctuations and promote healthy fern growth, it’s crucial to find a suitable location for your fern. Choose a spot in your home or garden that maintains a consistent temperature within the preferred range. Avoid placing the fern near heating or cooling sources, as well as areas with direct sunlight, as this can cause increased temperature variability.
If you live in an area with extreme temperature seasons, such as hot summers and cold winters, consider bringing your fern indoors during the harshest months or providing additional insulation. You can use a humidifier or mist the fern’s leaves regularly to maintain the desired humidity levels.
Remember to monitor the temperature regularly and adjust accordingly to ensure your fern stays within its preferred range. By managing temperature extremes, you can help your fern thrive, maintain its vibrant green color, and prevent browning or damage to its delicate foliage.
7. Nutrient deficiencies: Essential nutrients for vibrant fern leaves
Nutrient deficiencies are a common cause of brown or yellowing fern leaves. Just like any other plant, ferns require a balanced supply of essential nutrients to thrive and maintain vibrant foliage. Without an adequate nutrient intake, fern leaves can start to show signs of discoloration and deterioration. Here are some key nutrients that are crucial for healthy fern growth:
1. Nitrogen: Nitrogen is essential for leaf development and overall plant growth. A lack of nitrogen can result in pale or yellowing leaves. To address this deficiency, you can use a balanced fertilizer with a higher nitrogen content.
2. Phosphorus: Phosphorus is necessary for root development and energy transfer within the plant. Insufficient phosphorus can lead to stunted growth and weakened fern leaves. Adding a phosphorus-rich fertilizer can help rectify this deficiency.
3. Potassium: Potassium contributes to the overall strength and resilience of ferns. It promotes disease resistance, water regulation, and supports photosynthesis. A lack of potassium may cause brown or scorched leaf edges. Use a fertilizer specifically formulated for ferns to ensure an adequate potassium supply.
4. Iron: Iron is crucial for chlorophyll production, which gives leaves their green color. Iron deficiency often manifests as yellowing or pale leaves with green veins. Applying an iron supplement, such as chelated iron, can help restore the vibrant green color.
5. Magnesium: Magnesium is an essential component of chlorophyll and aids in photosynthesis. A lack of magnesium can cause older fern leaves to turn yellow while the veins remain green. Use a magnesium-rich fertilizer or apply Epsom salt to provide an adequate magnesium supply.
6. Calcium: Calcium is important for cell wall development and overall plant structure. Insufficient calcium can lead to weak growth and distorted leaves. Incorporating calcium-rich amendments, such as crushed eggshells or gypsum, into the soil can help address this deficiency.
It’s crucial to maintain a proper balance of these nutrients to ensure healthy fern growth. However, it’s important not to over-fertilize, as excessive nutrient levels can also cause damage to the plant. Regularly monitor your fern’s nutrient needs and make adjustments accordingly to revive your fern’s leaves and promote their lush green appearance.
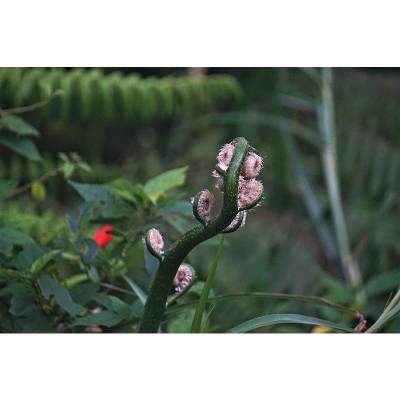
8. Pest infestations: Identifying and treating common fern pests
Pests can be a common culprit behind brown and browning fern leaves. These pesky invaders can wreak havoc on your beloved ferns, causing them distress and leading to unsightly brown spots and damage. Identifying and treating these common fern pests is crucial to revive the health and beauty of your ferns.
One common pest that affects ferns is the spider mite. These tiny arachnids can be difficult to spot with the naked eye, but their presence can be identified by fine webbing on the undersides of leaves. Spider mites pierce the plant cells and suck out the contents, resulting in discolored and brown leaves. To combat spider mites, you can opt for organic insecticidal soaps or neem oil sprays. Regularly spraying the undersides of leaves with these solutions can help control and prevent infestations.
Another notorious fern pest is the mealybug. These white, cottony insects may appear on the fronds of your fern, causing stunted growth and brown patches. To tackle mealybug infestations, you can manually remove them using a cotton swab dipped in rubbing alcohol or a mixture of water and dish soap. Additionally, introducing natural predators like ladybugs can help control the population of mealybugs in your ferns.
Scale insects are another common fern pest that can cause brown spots and leaf discoloration. These insects attach themselves to the stems and leaves of ferns, sucking out sap and causing damage. You can manually remove scale insects using a soft brush or cloth soaked in rubbing alcohol or insecticidal soap. Regularly monitoring your ferns for signs of scale insects and taking prompt action can prevent further damage.
To prevent future pest infestations, make sure to practice good plant hygiene. Regularly inspect your ferns for any signs of pests and promptly isolate infected plants to prevent the spread. Keep your plants well-maintained and healthy, as strong and vigorous ferns are less susceptible to pest attacks.
Remember, early detection and swift action are key when it comes to managing pest infestations in your ferns. By identifying and treating common fern pests, you can ensure the health and vitality of your ferns and revive their lush, green appearance.
9. Disease issues: Recognizing and addressing common fern diseases
Ferns are delicate and beautiful plants that can add a touch of elegance to any indoor or outdoor space. However, like any living organism, ferns are susceptible to diseases that can cause their leaves to turn brown and wither. It’s important to be able to recognize these diseases early on and take appropriate measures to address them.
One common disease that affects ferns is leaf spot. This fungal infection causes small, dark spots to appear on the leaves, eventually leading to browning and wilting. To combat leaf spot, it’s essential to remove any infected leaves and ensure proper air circulation around the plant. Avoid overhead watering and instead water the soil directly to prevent the spread of the fungus.
Another common disease that can plague ferns is root rot. This occurs when the roots are constantly exposed to excessive moisture, leading to a rotting of the root system. Signs of root rot include yellowing and browning of the leaves, as well as a foul odor emanating from the soil. To prevent root rot, make sure your fern is planted in well-draining soil and avoid overwatering. If root rot has already set in, it may be necessary to repot the plant in fresh, dry soil and trim away any affected roots.
Ferns can also fall victim to pests such as aphids and mealybugs. These tiny insects can sap the nutrients from the leaves, causing them to turn brown and become weak. To combat these pests, regularly inspect your fern for any signs of infestation and remove them manually. In some cases, a gentle wash with mild soapy water can also help eliminate these pests.
In addition to these common diseases, ferns can also be affected by fungal infections, bacterial leaf blight, and viral diseases. Recognizing the specific symptoms of each disease is crucial in implementing the appropriate treatment. It’s recommended to consult with a plant expert or local garden center for accurate identification and guidance on how to address these diseases effectively.
In conclusion, being able to recognize and address common fern diseases is essential in reviving the health and beauty of your ferns. By staying vigilant, providing proper care, and taking prompt action when necessary, you can ensure that your ferns thrive and continue to add a touch of lush greenery to your surroundings.
10. Proper care and maintenance: Best practices for keeping your ferns healthy and green
Proper care and maintenance are crucial for keeping your ferns healthy and vibrant. By following these best practices, you can ensure that your ferns stay green and beautiful:
1. Watering: Ferns require consistent moisture, but they don’t like to sit in water. Water your ferns thoroughly when the top inch of soil feels dry, allowing the excess water to drain away. Avoid overwatering, as it can lead to root rot and browning of the leaves.
2. Humidity: Ferns thrive in humid environments. Increase humidity by placing a tray filled with water near your ferns or using a humidifier. Misting the leaves occasionally can also provide additional moisture.
3. Light: Most ferns prefer indirect or filtered light. Avoid placing them in direct sunlight, as it can scorch their delicate fronds, leading to browning. Find a spot with bright, indirect light for your ferns to flourish.
4. Temperature: Ferns enjoy moderate temperatures ranging from 60°F to 75°F (15°C to 24°C). Avoid exposing them to extreme temperature fluctuations, drafts, or cold air from windows or air conditioning units.
5. Fertilization: Feed your ferns with a balanced, water-soluble fertilizer during the growing season (spring and summer) to provide them with essential nutrients. Follow the package instructions for proper dosage and frequency.
6. Soil: Ferns prefer well-draining soil rich in organic matter. Use a mixture of peat moss, perlite, and compost to create a suitable growing medium for your ferns.
7. Pruning: Regularly remove any yellow or brown fronds to maintain the overall health and appearance of your ferns. Use clean, sharp scissors or pruning shears and make clean cuts near the base of the plant.
8. Air circulation: Good air circulation helps prevent fungal diseases and keeps your ferns healthy. Avoid overcrowding your ferns and ensure that they have sufficient space for air to circulate around them.
9. Pests: Keep an eye out for common fern pests such as mealybugs, scale insects, and spider mites. If you notice any signs of infestation, treat them promptly with organic or chemical insecticides.
10. Repotting: As your fern grows, it may outgrow its current pot. Repotting your fern every 1-2 years allows its roots to spread and obtain fresh nutrients. Choose a slightly larger pot with good drainage and use fresh potting soil during the repotting process.
By following these care and maintenance practices, you can provide the optimal conditions for your ferns to thrive, ensuring that their leaves stay green and vibrant, adding beauty and freshness to your indoor or outdoor space.
11. Conclusion: Enjoying thriving ferns with lush green leaves
In conclusion, with the right care and attention, you can enjoy thriving ferns with lush green leaves in your home or garden. By understanding the common reasons behind browning fern leaves and implementing the appropriate solutions, you can revive your ferns and create a vibrant and flourishing display.
Remember to provide your ferns with the ideal growing conditions, such as indirect light, consistent moisture, and proper humidity levels. Avoid overwatering or underwatering your ferns, as this can lead to stressed plants and brown foliage.
Regularly inspect your ferns for pests and diseases, promptly addressing any issues that arise. Clean the leaves regularly to remove dust and debris, allowing them to breathe and absorb light effectively.
Consider adjusting the temperature and humidity levels in your fern’s environment, especially if you notice signs of stress or browning. Ferns thrive in a humid environment, so misting or using a humidifier can help create the optimal conditions for their growth.
Lastly, be patient and give your ferns time to recover. It may take some time for new growth to emerge and for the damaged leaves to be replaced by healthy green foliage. With consistent care and attention, your ferns will reward you with their beauty and vitality.