To grow a bean plant, start by selecting a sunny spot with well-drained soil. Then, plant the seeds 1-2 inches deep and water regularly.
Ensure the soil stays moist, and provide support as the plant grows. Are you interested in starting your own garden with bean plants? Growing bean plants is a simple and rewarding process that can be easily done at home. By following a few steps, you can cultivate healthy and productive bean plants that will provide you with a bountiful harvest.
We will guide you through the step-by-step process of growing bean plants, from selecting the right location to caring for your plants as they develop. Whether you are a seasoned gardener or new to the world of gardening, this comprehensive guide will help you achieve success in growing bean plants. Let’s get started!
Credit: kidsactivitiesblog.com
Choosing The Right Bean Variety
Choosing the right bean variety is vital for successful bean plant growth. Follow these step-by-step instructions to ensure optimal results in your garden.
Table of Contents
Bush Beans
Bush beans are compact plants that don’t require support. These are perfect for small spaces and beginner gardeners.Pole Beans
Pole beans are climbing plants that need a trellis or support to grow vertically. They are ideal for maximizing space and can yield an abundant harvest.Plant Type | Growth Habit | Ideal for — | — | — Bush Beans | Compact, no support needed | Small gardens Pole Beans | Climbing, need trellis | Maximizing spaceWhen choosing your bean variety, consider your available space and gardening experience to ensure a bountiful harvest.Preparing The Soil
When it comes to growing bean plants, preparing the soil is a crucial step that greatly impacts the plant’s growth. Properly preparing the soil provides the ideal foundation for your bean plants to thrive. In this section, we’ll cover the essential steps in preparing the soil, including choosing the site, testing the soil, and amending the soil.
Choosing The Site
You’ll want to select a site for your bean plants that receives plenty of sunlight. Bean plants thrive in direct sunlight and require at least 6-8 hours of direct sunlight daily. Additionally, choose a location that has good drainage to prevent waterlogging, which can lead to root rot.
Testing The Soil
Before planting your bean seeds, it’s essential to test the pH levels of the soil. Aim for a pH level between 6.0 and 7.0 for optimal bean plant growth. You can conduct a soil pH test using a simple soil testing kit available at garden centers or through county extension offices.
Amending The Soil
Once you have tested the soil, amend it if necessary to achieve the optimal pH level. You can adjust the pH level by adding limestone to raise the pH or sulfur to lower it. Additionally, incorporate organic matter such as compost or well-rotted manure to improve the soil structure and provide essential nutrients for the bean plants.
Planting The Beans
When it comes to growing bean plants, planting the beans is a crucial step. Whether you choose to directly sow the seeds in the garden or start them indoors, the right approach can make all the difference in the success of your bean plants. In this section, we’ll discuss both methods so you can choose the one that best suits your gardening style and needs.
Direct Sowing
Direct sowing means planting the bean seeds directly into the soil where they will grow. It’s essential to choose a sunny spot in the garden with well-draining soil. Before planting, prepare the soil by turning it over with a garden fork and removing any rocks or debris. Create rows spaced about 18 inches apart and plant the seeds about 1 inch deep and 2-4 inches apart within the rows. You can cover the seeds with soil and gently pat it down. Water the area thoroughly after planting.
Starting Indoors
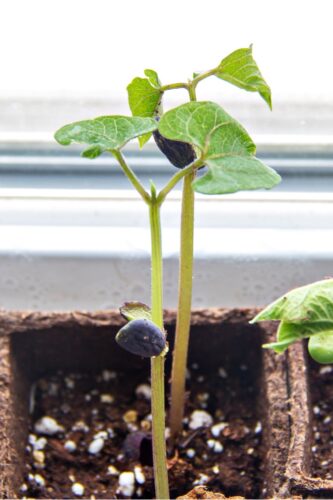
- Starting seeds indoors allows you to get a head start on the growing season. Begin by filling small pots or seed trays with a quality potting mix. Plant the bean seeds about 1 inch deep, one per pot or cell, and water gently. Cover with plastic wrap to keep the moisture in and place them in a warm location. As soon as the seeds sprout, remove the plastic wrap and continue to water as needed.
- Once the seedlings have grown a few sets of true leaves and the risk of frost has passed, they can be transplanted into the garden. Be sure to harden off the seedlings by gradually exposing them to outdoor conditions for about a week before planting them in their permanent location.

Credit: www.primarythemepark.com
Providing Proper Care
Proper care is crucial for the healthy growth of your bean plants. Here are essential steps for providing the right care:
Watering
Water your bean plants consistently to maintain soil moisture. Stick your finger into the soil; if it feels dry, it’s time to water.
Fertilizing
Give your bean plants a boost with a balanced fertilizer. Apply fertilizer at the base of the plants according to package instructions.
Mulching
Mulching helps retain soil moisture and suppresses weeds. Apply a layer of organic mulch around your bean plants.
Harvesting And Enjoying Your Beans
Learn how to grow your bean plants step by step, from sowing seeds to harvest. Discover the joy of harvesting and enjoying fresh beans straight from your garden. Enjoy the process of tending to your plants and reaping the rewards of your hard work.
Determining When To Harvest
Growing your own bean plants can be a rewarding and enjoyable experience. From planting the seeds to caring for the plant, seeing your beans reach maturity is truly fulfilling. When it comes to harvesting your beans, timing is crucial to ensure maximum flavor and tenderness. But how do you know when your beans are ready to be picked?
One way to determine if your beans are ready to be harvested is by their size. Beans typically reach maturity when they are about the length of a finger or slightly longer. So, keep an eye on the size of your beans as they grow and wait for them to reach this optimal length.
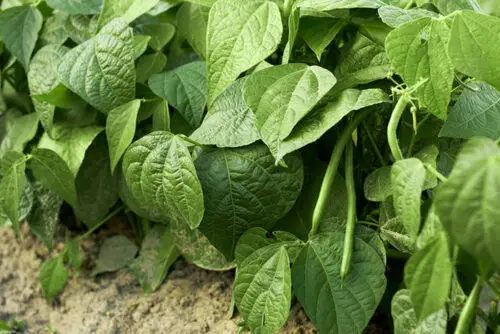
Another way to determine if your beans are ready for harvest is by their color. Different varieties of beans have different colors when they are ripe. For example, green beans are usually ready to be harvested when they are a vibrant green color. If you’re growing a different variety, refer to the seed packet or do a quick internet search to find out the ideal color for harvest.
Harvesting Techniques
Once you’ve determined that your beans are ready to be harvested, it’s time to get picking. There are a few different techniques you can use to harvest your beans.
The first method is simply using your fingers to snap the beans off the plant. Hold the bean firmly where it attaches to the plant and gently snap it off. This technique works well for both bush beans and pole beans.
If you have a large harvest or want to speed up the process, you can also use scissors or pruners to cut the beans off the plant. This method is especially useful for pole beans, as they can grow quite tall and be challenging to reach.
Regardless of the method you choose, be sure to handle the beans with care to avoid damaging the plant. A gentle touch will ensure that your plant continues to produce beans throughout the growing season.
Preparing And Cooking The Beans
Now that you’ve harvested your beans, it’s time to enjoy the fruits of your labor. Before cooking, you’ll need to prepare your beans by removing any strings or tough stems.
To remove the string from green beans, simply snap off the tip of the bean and pull downward along the length of the bean. The string should come off easily. If you notice any tough stems, trim them off with a knife or kitchen scissors.
Once your beans are prepared, there are countless delicious ways to cook and enjoy them. Green beans can be steamed, sautéed, roasted, or even enjoyed raw in salads. Experiment with different cooking methods and seasonings to find your favorite way to savor the freshness and flavor of your homegrown beans.
In conclusion, harvesting and enjoying your beans is a delightful experience. Determining the right moment to harvest by considering the size and color of the beans is essential. When it comes to harvesting techniques, you can either snap off the beans or use scissors or pruners. Finally, preparing and cooking your beans allows you to experience the true taste of your homegrown produce. So, get ready to enjoy the goodness of fresh beans straight from your garden!
Credit: www.allthatgrows.in
Frequently Asked Questions For Grow Bean Plant Step By Step
What Are The Stages Of The Growth Of A Bean Plant?
The growth stages of a bean plant include germination, seedling growth, flowering, and pod formation. During germination, the seed sprouts and develops roots, followed by the growth of leaves and stems in the seedling stage. Flowering leads to the production of pods that ultimately contain the beans.
How Do You Grow Beans In 3 Days?
To grow beans in 3 days, use a damp paper towel to germinate them in a plastic bag. Keep the bag in a warm, sunny spot and ensure the paper towel stays moist. After 3 days, the beans should have started to sprout and can be planted in soil.
Which Way Up Do You Plant Beans?
Plant beans with the pointed end facing down and the eye facing up for proper growth.
Do You Plant A Bean With The Sprout Up Or Down?
Plant a bean with the sprout facing up, towards the sky.
Conclusion
In cultivating bean plants, attention to details like soil, water, sunlight is crucial. Don’t forget patience. Feed your curiosity and joy of watching your bean plant grow into a flourishing creation. Embrace the process and savor each growth milestone with care.
Happy planting!