Bromeliads bring a vibrant touch of tropical beauty to our homes, making them a popular choice for indoor plants. If you’re ready to add these stunning plants to your collection, this guide will help you care for them like a pro! Read Interesting article: Discover the Best Bromeliad Varieties for Your Tropical Garden
Understanding Bromeliads
What are Bromeliads?
Bromeliads are fascinating plants that belong to the Bromeliaceae family. I remember the first time I encountered a bromeliad at a friend’s house; I was captivated by its unique shape and bright colors. These plants are native to tropical regions of the Americas, and they thrive in diverse environments, from rainforests to deserts. What’s particularly interesting is that many bromeliads are epiphytes, meaning they can grow on other plants without harming them, absorbing moisture and nutrients from the air and rain. This feature makes them incredibly adaptable and resilient.
Types of Bromeliads
There are over 3,000 species of bromeliads, and they come in a variety of shapes, sizes, and colors. Some of my favorites include:
- Aechmea: Known for its stunning inflorescence, the Aechmea is often referred to as the “Urn Plant” because of its cup-like leaves that can collect water.
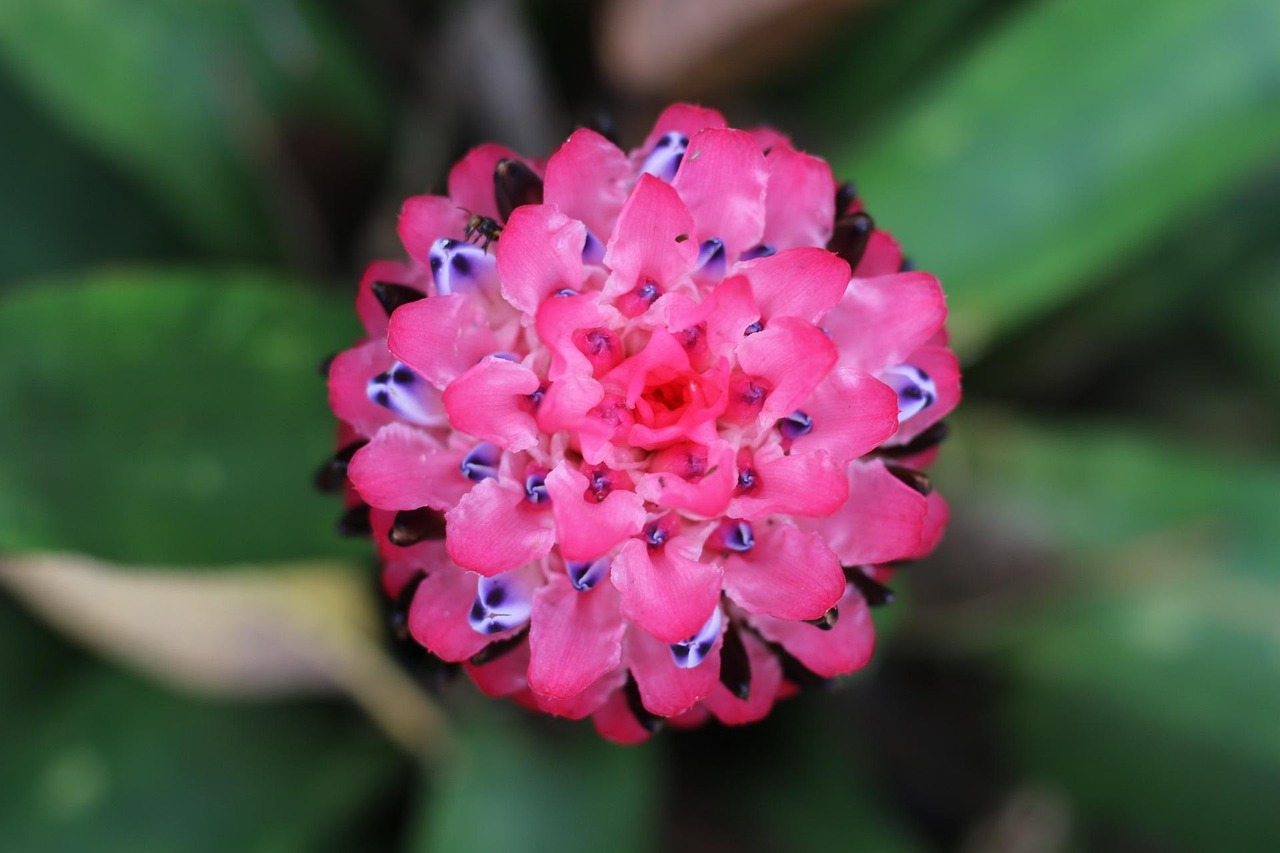
- Guzmania: This type has long, tubular flowers that add a vibrant pop of color to any space. I’ve seen them in bright reds and yellows, and they never fail to impress.
- Neoregalia: With their striking foliage and rosette shape, Neoregalia are perfect for adding a touch of elegance to your home.
- Cryptanthus: Also known as Earth Stars, they have a low-growing habit and come in a range of colors and patterns, making them a great choice for table displays.
Each type has its own unique appearance and care requirements, so I recommend doing a little research before deciding which bromeliads are best for you. Read Interesting article: Top 5 Stunning Palm Varieties for Tropical Gardens
Common Characteristics of Bromeliads
One of the things I love about bromeliads is their striking appearance. They typically have thick, waxy leaves that form a rosette shape. This design is not just for looks; it helps them collect water and nutrients efficiently. I’ve noticed that bromeliads can also produce bright flowers that last for several months, adding vibrant color to your indoor garden. Some varieties, like the Guzmania, have flowers that can bloom in stunning shades of red, yellow, or even purple. It’s like having a piece of the tropics right in my living room!
Another fascinating characteristic is their adaptability to various light conditions. Some varieties thrive in bright, indirect light, while others can tolerate lower light levels. I’ve experienced this firsthand; I have a few bromeliads placed in different areas of my home, and they all seem to be doing well, each adjusting to its specific environment. Plus, they are relatively low-maintenance plants, which works perfectly for my busy lifestyle.
Choosing the Right Bromeliad for Your Home
Popular Indoor Bromeliad Varieties
When it comes to choosing bromeliads for your home, some varieties are more popular than others for indoor spaces. For instance, the Aechmea ‘Blue Rain’ has striking blue and pink flowers, making it a favorite among many plant lovers. I remember seeing this one at a local nursery, and its colors just leapt out at me! Another winner is the Guzmania ‘Pink’ which not only brings vibrant color but is also quite easy to care for. I’ve had great success with it in my own home.
Considerations for Selecting Bromeliads
Before bringing a bromeliad home, consider a few key factors. First, think about the lighting conditions in your space. If you have bright, indirect light, many bromeliads will flourish there. However, if your home has lower light levels, you might want to opt for varieties that can tolerate those conditions. Also, consider the size of the plant; some bromeliads can grow quite large, while others stay smaller and are perfect for tabletops or shelves.
Where to Buy Bromeliads
You can find bromeliads at a variety of places, from local nurseries to big-box stores. I personally enjoy visiting local plant shops because they often have knowledgeable staff who can help answer questions and guide you toward the best choices for your home. Online shopping is another option, with many sites offering a wide selection. Just be sure to check reviews and ensure you’re buying from a reputable seller to avoid surprises upon arrival!
Optimal Conditions for Bromeliads
Light Requirements
One of the key things I’ve learned about bromeliads is their unique light requirements. While some plants thrive in full sun, bromeliads generally prefer bright, indirect light. I’ve found that placing them near a window with filtered sunlight works wonders. For example, I have a Guzmania that sits on my kitchen counter, just a few feet away from a window, and it seems to love it there. However, if you notice your bromeliad’s leaves getting scorched or bleached, it might be getting too much direct sunlight. On the flip side, if the plant’s color starts to fade, it might need a bit more light. Finding that sweet spot can make all the difference in keeping your bromeliad happy and healthy.
Temperature Preferences
Temperature is another important factor to consider. Bromeliads thrive in warmer temperatures, usually between 65°F and 80°F (18°C to 27°C). I remember once forgetting about a bromeliad I had left outside during a cool evening, and it didn’t appreciate that at all! Providing consistent warmth is crucial, especially during colder months. I keep my plants away from drafts and chilly windows, and they seem to be much more content. If you live in a cooler climate, using a grow light can help maintain those tropical temperatures that bromeliads crave.
Humidity Levels
Humidity is a game-changer for bromeliads. I’ve noticed that these plants thrive in higher humidity levels, mimicking their natural tropical habitats. In my home, I use a small humidifier in the winter to keep the air moisture up for my plants. If you don’t have a humidifier, misting your bromeliads regularly can help, though I’ve found that it’s not as effective as humidity from a dedicated source. You can also try placing your bromeliads on a pebble tray filled with water; just make sure the bottom of the pot isn’t sitting directly in the water to prevent root rot. Achieving the right humidity can make your bromeliads flourish, and you’ll notice their vibrant colors become even more pronounced!
Watering Bromeliads
How to Water Bromeliads
When it comes to watering bromeliads, I’ve learned that less is often more. These plants actually prefer to have their “cups” filled with water. I usually fill the rosette at the center of the plant, making sure to replace the water every week or so to keep it fresh. The leaves will also benefit from a light misting, especially if your home tends to be dry. Just be careful not to let the water sit stagnant for too long, as that can lead to issues. I’ve had to learn this the hard way, as a couple of my bromeliads suffered from root rot due to overwatering!
Signs of Overwatering vs. Underwatering
It’s important to recognize the signs of overwatering and underwatering. I’ve often found myself wondering whether I was giving my bromeliads too much or too little water. If your bromeliad’s leaves start to turn yellow or mushy, that’s usually a sign of overwatering. On the other hand, if the leaves begin to wrinkle or become crispy, it might be time to give it a drink. I like to check the soil regularly; if the top inch feels dry, it’s time to water. Finding that balance can be a bit tricky, but once you get the hang of it, your bromeliads will thrive!
Water Quality Considerations
The quality of water you use is also crucial for bromeliads. I’ve found that using distilled or rainwater is the best choice since tap water can contain chemicals like chlorine and fluoride that might harm my plants. If you must use tap water, letting it sit out for 24 hours helps to dissipate some of the chemicals. I’ve made it a habit to collect rainwater whenever possible; not only is it free, but my bromeliads seem to appreciate it. Taking care of the water quality can significantly improve the health of your bromeliads and keep them looking their best!
Feeding and Fertilizing Bromeliads
Best Fertilizers for Bromeliads
Feeding bromeliads is another aspect I had to research a bit. They don’t require heavy feeding, which I appreciate, but a little boost can help them flourish. I use a balanced, water-soluble fertilizer diluted to about a quarter of the recommended strength. It’s best to fertilize during the growing season, from spring through early fall. I usually mix the fertilizer into the water I use for the rosette, ensuring that it gets absorbed directly. It’s amazing how a little fertilizer can enhance the colors and overall health of the plant!
Feeding Schedule
In terms of a feeding schedule, I typically fertilize my bromeliads every 4-6 weeks during the growing season. I’ve found this to be a good rhythm for keeping my plants vibrant without overwhelming them. During the fall and winter months, I scale back and almost completely stop fertilizing, as they enter a period of dormancy. It’s important to adjust your routine based on seasonal changes, and I’ve learned that a little less is often better than too much.
Signs of Nutrient Deficiency
Recognizing signs of nutrient deficiency can be tricky, but I’ve learned to keep an eye out for certain indicators. If the leaves start to turn pale or lose their vibrant color, it might be time to give your bromeliad a little extra love. Yellowing leaves can also indicate a need for more nutrients. I once had a Neoregalia that looked a bit lackluster, and after a bit of fertilizer, it perked right up! Paying attention to your plants allows you to catch these signs early and respond accordingly.
Repotting and Propagating Bromeliads
When to Repot Bromeliads
Repotting bromeliads is something I didn’t think much about at first, but it’s an important part of keeping them healthy. Generally, it’s best to repot them every couple of years or when you notice that they’re becoming root-bound. I remember seeing one of my Aechmea plants struggling to thrive, and when I checked, its roots were tightly packed in the pot. Once I repotted it into a slightly larger container with fresh soil, it perked right up! The ideal time to repot is during the spring or early summer when the plant is actively growing. This way, it can quickly adapt to its new environment.
Step-by-Step Repotting Guide
If you’re thinking about repotting your bromeliad, here’s a simple guide I follow:
- Choose the Right Pot: Select a pot that is only slightly larger than the current one. I usually go for a container with good drainage holes to prevent water buildup.
- Prepare the Soil: Use a well-draining potting mix. I like to use a blend designed for orchids or a mix of potting soil with perlite and pine bark. This mimics their natural growing conditions.
- Remove the Plant: Gently take the bromeliad out of its old pot. I find it helpful to tap the pot lightly to loosen the roots. Be careful not to damage them!
- Inspect the Roots: Take a moment to check the roots for any signs of rot or disease. Trim away any unhealthy roots with clean scissors.
- Repot: Place the plant in the new pot, adding soil around it until it is secure. I usually leave the top of the root ball slightly above the soil line to allow for air circulation.
- Water Thoroughly: After repotting, water the plant well, but be sure to empty any excess water from the saucer to avoid root rot. I like to keep a close eye on it for the first few weeks.
Propagation Methods for Bromeliads
Propagation is another exciting aspect of bromeliads. Once I learned how to propagate them, I was hooked! The most common way to propagate bromeliads is through offsets, or pups, which are small plants that grow at the base of the parent plant. Here’s how I typically go about it:
- Wait for the Right Time: I usually wait until the pup is about one-third the size of the parent plant. This indicates it’s ready to be separated.
- Separate the Pup: Gently twist and pull the pup away from the parent plant. I find it useful to use a clean, sharp knife if it’s stubborn. Just be careful not to damage the roots.
- Let it Heal: Allow the pup to dry out for a few hours or overnight. This helps prevent rot when it’s planted.
- Plant the Pup: Use a small pot with a well-draining mix, just like with repotting. I make a small hole in the soil and place the pup in it, then cover the roots gently.
- Water and Care: Water the pup lightly, and place it in a warm location with bright, indirect light. I like to mist it occasionally to help it adjust.
Watching the pups grow into their own beautiful plants is incredibly rewarding. It’s like nurturing a little piece of my garden into a new life!
Pest and Disease Management
Common Pests Affecting Bromeliads
No plant care journey is without its challenges, and bromeliads are no exception. I’ve encountered a few pests along the way that can affect our beloved plants. The most common ones are mealybugs and aphids. I first noticed mealybugs hiding in the leaf axils of my Guzmania, where they can be hard to spot at first. They look like little white cotton balls and can harm the plant by sucking its sap. To tackle them, I use a cotton swab dipped in alcohol to wipe them off. For aphids, I find a gentle spray of insecticidal soap works wonders.
Identifying Diseases in Bromeliads
Aside from pests, bromeliads can also face diseases, although they are typically pretty resilient. One disease I’ve seen is root rot, which can happen if the plant sits in waterlogged soil. I’ve had to learn that good drainage is a must! Another issue is leaf spot, which can be due to excess moisture on the leaves. If I notice any unsightly spots, I immediately adjust my watering routine and ensure the plant has proper air circulation.
Preventive Measures and Treatments
To keep my bromeliads healthy, I’ve adopted some preventive measures that have really made a difference. Regular inspection is key; I always take a moment to check for pests and diseases. Keeping the leaves clean by gently wiping them with a damp cloth helps prevent dust buildup and allows the plant to breathe. I also make sure not to overcrowd my bromeliads, as good airflow is crucial for preventing issues. If I do spot any problems, I act quickly—removing affected leaves or treating pests immediately. Being proactive has saved quite a few plants for me!
Frequently Asked Questions
What are bromeliads?
Bromeliads are plants that belong to the Bromeliaceae family, native to tropical regions of the Americas. They are known for their unique shapes and bright colors, and many are epiphytes, meaning they can grow on other plants without harming them.
What are some popular types of bromeliads?
Some popular types of bromeliads include Aechmea, Guzmania, Neoregalia, and Cryptanthus. Each type has its own unique appearance and care requirements.
What light conditions do bromeliads prefer?
Bromeliads generally prefer bright, indirect light. Some varieties can tolerate lower light levels, but too much direct sunlight can scorch their leaves.
How often should I water my bromeliads?
It is recommended to fill the rosette at the center of the bromeliad with water, replacing it every week or so to keep it fresh. Additionally, a light misting of the leaves can be beneficial.
What signs indicate overwatering or underwatering in bromeliads?
Signs of overwatering include yellow or mushy leaves, while underwatering may cause leaves to wrinkle or become crispy. Checking the top inch of the soil can help determine when to water.
How can I propagate bromeliads?
Bromeliads can be propagated through offsets, or pups, which grow at the base of the parent plant. Once the pup is about one-third the size of the parent, it can be separated and planted in a small pot with a well-draining mix.
What pests commonly affect bromeliads?
The most common pests affecting bromeliads are mealybugs and aphids. Mealybugs can be found hiding in leaf axils, while aphids can be managed with a gentle spray of insecticidal soap.
What diseases can bromeliads encounter?
Bromeliads can face diseases such as root rot, which occurs from waterlogged soil, and leaf spot, which is often due to excess moisture on the leaves.
How often should I fertilize bromeliads?
Bromeliads should be fertilized every 4-6 weeks during the growing season (spring through early fall) using a balanced, water-soluble fertilizer diluted to about a quarter of the recommended strength.
What factors should I consider when choosing a bromeliad for my home?
When selecting a bromeliad, consider the lighting conditions in your space, the size of the plant, and whether the variety can tolerate the specific conditions in your home.