Creating a rustic patio with flagstones can enhance your outdoor space significantly. This guide provides you with a straightforward, step-by-step process to successfully install a flagstone patio that combines beauty and durability.
Table of Contents
Step 1: Plan Your Rustic Patio Design
Planning is the first and most crucial step in creating your rustic patio. It sets the stage for everything that follows. A well-thought-out design will ensure your patio is both beautiful and functional.
Define Your Outdoor Space and Needs
Start by assessing your outdoor space. What do you want from your patio? Consider the following:
- Size: Measure the area where you want to build. How much space do you have?
- Accessibility: Ensure it’s easy to access from your home.
- Sun Exposure: Think about how much sunlight the area receives. Do you want a sunny spot or a shaded retreat?
- Drainage: Make sure your design allows for proper drainage to avoid water pooling on your patio.
Sketch a Basic Design
Now that you have a feel for your space, it’s time to put pen to paper. Sketch a basic design. Don’t worry about being perfect; just get your ideas down. Here’s what to include:
- Shape: Is it a square, rectangular, or more organic shape?
- Pathways: Consider how people will move around your patio.
- Furniture Layout: Where will your seating and tables go?
You can even find landscaping software to help visualize your design.
Consider Your Budget and Material Choices
Next, think about your budget. Flagstone can vary in price, so it’s essential to know what you can afford. Here’s a quick breakdown:
- Type of Flagstone: Different types come at various costs. Research options that fit your aesthetic and budget.
- Additional Materials: Don’t forget about gravel, sand, and any edging materials. These can add up!
- Labor Costs: If you plan to hire help, get quotes to include in your budget.
Creating a rustic flagstone patio can be a rewarding project. By planning your design carefully, you’ll ensure it meets your needs and enhances your outdoor living space.
For your convenience, we’ve created a downloadable design template for you to use as you plan your patio!
Step 2: Gather Required Tools and Materials
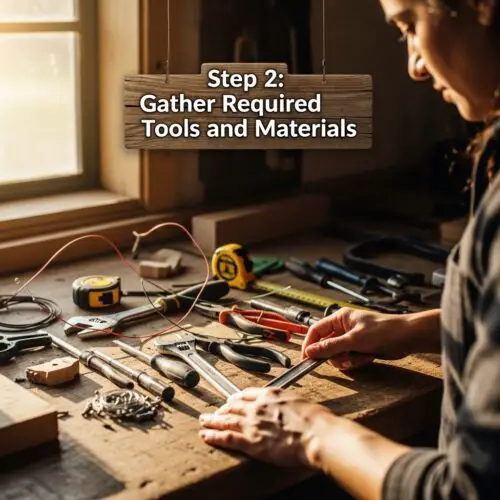
Before you dive into creating your rustic flagstone patio, it’s essential to gather all the tools and materials you’ll need. Being well-prepared makes the installation process smoother and more enjoyable.
Essential Tools for Installation
Here’s a list of tools you’ll need:
- Shovel: For digging and moving soil.
- Rake: To level the ground and spread gravel.
- Trowel: Useful for applying sand and mortar.
- Rubber Mallet: Helps to gently adjust flagstones into place.
- Carpenter’s Level: Ensures your stones are even.
- Hand Tamper: For compacting gravel layers.
- Measuring Tape: To measure your patio area accurately.
- Landscape Fabric (Optional): To prevent weeds.
Types of Flagstone to Consider
Choosing the right flagstone is key to your patio’s look and durability. Here are some common types:
- Bluestone: Known for its blue-gray color. Durable and great for high-traffic areas.
- Sandstone: Offers a warm, earthy tone. Ideal for a casual rustic vibe.
- Slate: Comes in various colors. Adds a unique texture to your patio.
Additional Materials for Base and Drainage
In addition to flagstones, you’ll need some other materials:
- Gravel: 3-4 inches for the base. This helps with drainage.
- Sand: About 1-2 inches to fill gaps between stones.
- Edging Materials: To define your patio boundaries. Options include wood, brick, or metal.
Cost Breakdown for Tools and Materials
Here’s a quick cost estimate to help you budget:
| Item | Estimated Cost |
|---|---|
| Shovel | $15 – $30 |
| Rake | $10 – $25 |
| Rubber Mallet | $10 – $20 |
| Carpenter’s Level | $15 – $30 |
| Hand Tamper | $25 – $50 |
| Flagstone (per sq. ft.) | $5 – $15 |
| Gravel (per ton) | $20 – $50 |
| Sand (per ton) | $15 – $35 |
| Edging Materials | $1 – $5 per ft. |
By gathering these tools and materials, you’re setting yourself up for success in creating a beautiful flagstone patio. Happy building!
Step 3: Prepare the Site for Excavation

Now that you have your design in place, it’s time to get your hands dirty! Preparing the site involves marking the area, excavating, and ensuring proper drainage. Let’s dive into the details.
Mark the Patio Area Using Stakes and String
Start by marking your patio area. Use stakes and string or spray paint to outline the shape. Here’s how:
- Measure the dimensions based on your design.
- Insert stakes at each corner.
- Tie string around the stakes to create a clear outline.
- Double-check your measurements before you start digging.
This step helps you visualize where your patio will sit and keeps everything in line.
Excavate to the Appropriate Depth for Base Layers
Next, it’s excavation time! You’ll want to dig down to the right depth so your flagstones fit perfectly. Here’s a quick guide:
- Aim for about 4 to 6 inches deep.
- Remove any grass, roots, or debris in the marked area.
- Keep the edges clean to maintain your shape.
Make sure to take out enough soil for both the base layer and the flagstones. Remember, the patio should be level with the surrounding ground.
Ensure Proper Drainage Slope Away from Structures
Proper drainage is crucial for a long-lasting patio. You want to avoid water pooling near your home. Here’s how to achieve that:
- Create a slight slope, about 1/4 inch for every foot of patio.
- Use a carpenter’s level to check your slope as you dig.
- Direct water away from your home and any structures.
A good drainage plan will protect your investment and keep your patio in great shape for years to come.
Common Excavation Mistakes to Avoid
Here are a few tips to steer clear of common pitfalls:
- Don’t rush the measurements: Always double-check before you dig.
- Avoid digging too deep: Too much excavation can lead to instability.
- Watch for underground utilities: Call before you dig to avoid hitting any lines.
By following these steps, you’ll set a solid foundation for your rustic flagstone patio. Happy digging!
Step 4: Build Your Base Layer
Creating a solid base for your flagstone patio is crucial. It ensures durability and prevents settling over time. Let’s dive into choosing the right materials and how to compact them effectively.
Choosing the Right Base Material
The base layer is the foundation of your patio. Here are some top choices:
- Crushed Stone: This is a popular option. It provides excellent drainage and stability.
- Gravel: Similar to crushed stone, gravel allows water to flow through, preventing pooling.
- Sand: Good for leveling but may not provide as much stability as stone or gravel.
For best results, consider a combination of these materials. Start with 4 to 6 inches of crushed stone or gravel. This thickness helps with drainage and gives your patio a solid footing.
Layering and Compacting Techniques
Once you’ve chosen your base material, it’s time to layer and compact it properly:
1. Spread the Base Material: Evenly distribute your crushed stone or gravel across the area.
2. Compact the Layer: Use a mechanical compactor or a homemade compactor (like a flat board with a pole) to compact the layer firmly. This prevents future settling.
3. Check for Level: After compacting, use a level to ensure an even surface. This step is vital for a successful flagstone installation.
Checking for Level and Slope
Make sure your base maintains a slight slope away from any structures. This ensures water drains properly, protecting your patio and home. Here’s how to check:
- Use a level to assess the surface. Adjust as needed.
- Measure the slope. A drop of about 1 inch for every 4 feet is ideal.
By following these steps, you will create a sturdy base that sets the stage for a beautiful rustic flagstone patio. Happy building!
Step 5: Install the Sand Bedding Layer
Now it’s time to lay down the sand bedding layer. This step is crucial for leveling your flagstones and ensuring proper drainage. Let’s dive into how to pick the right sand and get it spread out smoothly.
Choosing the Right Sand Type
Not all sand is created equal! Here are some options:
- Masonry Sand: This is a common choice. It’s easy to work with and provides good drainage.
- Decomposed Granite (DG): This packs down well and has a mix of fine and coarse particles. It’s perfect for walking on and helps prevent weeds.
- Polymer Sand: If you want extra stability, polymer sand is a solid choice. It binds together when wet, keeping your stones in place.
Proper Techniques for Spreading and Leveling Sand
To get a nice, even layer, follow these steps:
1. Spread the Sand: Use a rake to spread about 1-2 inches of your chosen sand evenly over your compacted base.
2. Level It Out: Grab a straight board or screed rail. Run it across the top of the sand to create a flat surface.
3. Check for Flatness: Use a level to ensure everything is even. This will make laying your flagstones much easier.
Moistening the Sand for Better Compaction
Moistening your sand can make a big difference. Here’s why:
- Better Compaction: Lightly mist the sand with water. This helps the particles stick together and compacts better.
- Avoid Overdoing It: Be careful not to flood it. Too much water can wash away the fine particles, leaving you with a mess.
Scenario: The Importance of Proper Sand Bedding
Imagine you skip the sand layer or don’t level it correctly. What happens? Over time, the flagstones might shift and crack. This leads to uneven surfaces and potential tripping hazards. Plus, water can pool in certain spots, causing erosion and damage. Proper sand bedding gives your patio longevity and stability.
By following these steps, you’ll create a solid foundation for your rustic flagstone patio. Happy building!
Step 6: Lay the Flagstones
Now comes the fun part—laying out your flagstones! This step is all about creating a beautiful, rustic patio that you’ll love for years to come. Let’s dive into how to do it right!
Arranging the Flagstones for a Rustic Appearance
Start by selecting your stones. Think about shapes and colors that fit your style. To achieve a rustic look, opt for irregularly shaped pieces. Here’s how to arrange them:
- Lay Out a Pattern: Begin at one corner. Place the first stone and then keep adding stones around it.
- Experiment: Try different configurations. Move the stones around until you find a layout that feels right.
- Consider Spacing: Leave gaps between stones for a natural feel. Aim for 1/2 inch to 2 inches, depending on your preference.
Adjusting Stones for a Snug Fit
Getting the stones to fit nicely will enhance both the look and durability of your patio. Here’s how:
- Check Level: Use a carpenter’s level as you go. This ensures a flat surface.
- Tap Gently: If a stone is uneven, use a rubber mallet to adjust it. A gentle tap works wonders.
- Trim as Needed: If some stones don’t fit well, you can use a mason’s chisel to shape them slightly. This way, they’ll sit snugly together.
Leaving Gaps for Joint Filling
The gaps between your flagstones can be filled with various materials. This not only enhances the rustic charm but also helps with drainage. Here’s what you can do:
- Choose Your Filler: Use sand, gravel, or even ground cover plants. Each option provides a unique look and feel.
- Add Depth: Filling the gaps adds interest to the design. Consider using a contrasting color for the filler to make your flagstones pop.
- Maintenance Tip: Keep the filler level with the stones. This prevents weeds and keeps your patio looking neat.
By following these steps, you’ll be well on your way to creating a stunning flagstone patio that shines with rustic charm. Happy laying!
Step 7: Fill the Gaps and Finalize the Patio
Now that your flagstones are in place, it’s time to fill the gaps. This step not only enhances the look of your rustic patio but also boosts its functionality. Let’s dive into how to do it right!
Choosing the Right Material for Gap Filling
You have several options for filling those gaps. Each material offers its own benefits:
- Sand: Affordable and easy to work with. It allows for good drainage but may wash away over time.
- Gravel: A bit more stable than sand. It provides a rustic look and helps with drainage.
- Topsoil and Grass: This option lets you add a little greenery. It’s great for a natural vibe but requires maintenance.
- Polymer Sand: This is a fantastic option. It hardens when wet, preventing weeds and erosion while securing the stones firmly in place.
Techniques for Filling Gaps Effectively
Filling the gaps might sound simple, but there’s a technique to it. Here’s how to do it:
1. Clean the Gaps: Remove any debris or dust from between the stones.
2. Fill the Gaps: Pour your chosen material into the gaps. Use a broom or a trowel to help distribute evenly.
3. Compact the Material: Gently tap down the filler to reduce air pockets and ensure it stays in place.
4. Sweep Away Excess: Once filled, sweep away any extra material from the flagstones to keep them clean.
Final Checks for Stability and Aesthetics
After you’ve filled the gaps, it’s time for a final inspection. Check that everything looks good and feels stable:
- Stability Test: Walk on the patio to ensure no stones shift. If they do, add more filler.
- Aesthetic Check: Take a step back and see if the colors and materials work well together. Adjust as needed to create visual harmony.
By carefully choosing your gap-filling material and applying these techniques, your rustic patio will not only look great but also stand the test of time. Happy patio building!
Maintenance Tips for Your Flagstone Patio
Keeping your flagstone patio in great shape is essential for its longevity and beauty. Regular upkeep prevents common issues and ensures your outdoor space remains inviting.
Regular Cleaning and Upkeep
To maintain your flagstone patio, regular cleaning is key. Here’s a quick checklist:
- Sweep Away Debris: Use a broom to clear leaves, dirt, and other debris. This prevents staining and keeps it looking fresh.
- Wash Periodically: Use a mild soap and water solution. Scrub with a soft brush to remove dirt. Rinse well to avoid residue buildup.
- Seal It Up: Consider applying a sealant every couple of years. This protects the stone from moisture and stains.
Dealing with Weeds and Moss
Weeds and moss can sneak in, but you can handle them easily:
- Pull Weeds by Hand: Regularly check for weeds and pull them out. It’s easier when they’re small.
- Use Boiling Water: Pour boiling water over stubborn weeds to kill them without chemicals.
- Moss Prevention: Keep the area well-drained and sunny. Moss thrives in shade and moisture.
Addressing Drainage Issues Over Time
Proper drainage is crucial for maintaining your patio’s health. Here’s how to manage it:
- Check for Puddles: After heavy rain, look for water pooling. This can indicate poor drainage.
- Adjust Slope if Needed: Ensure the patio slopes away from your home. This directs water flow and prevents erosion.
- Install Drainage Solutions: If drainage is a persistent issue, consider adding a French drain or gravel trenches.
Seasonal Maintenance Checklist
Here’s a handy checklist for seasonal maintenance:
- Spring: Sweep, wash, and check for cracks or loose stones.
- Summer: Inspect for weeds and moss. Apply sealant if needed.
- Fall: Clear leaves and debris. Prepare for winter weather.
- Winter: Remove snow carefully to prevent damage. Avoid using salt.
By staying on top of these maintenance tasks, your flagstone patio will look stunning for years to come!
Frequently Asked Questions
These quick answers cover the most common questions about this topic, including key details, practical tips, and common concerns.
What is the disadvantage of a flagstone patio?
One main disadvantage is that flagstone can be uneven and irregular, which may create tripping hazards if not installed carefully. Additionally, some types of flagstone are porous and may stain or require sealing to prevent water absorption. The cost can also be higher compared to other materials like concrete pavers or gravel.
How much does a 20×20 flagstone patio cost?
The cost of a 20×20 foot flagstone patio typically ranges from $2,000 to $6,000, depending on the type of flagstone, complexity of the design, and labor fees. Material costs are usually $10 to $30 per square foot, with additional expenses for excavation, base materials, and professional installation if needed.
What is the easiest DIY patio?
A concrete or gravel patio is generally the easiest for DIY installation. Concrete slabs require minimal preparation and can be laid directly on a prepared base, while gravel patios involve simple excavation and layering. Flagstone can be DIY-friendly if you have some experience, but irregular shapes and leveling make it more challenging.
How to lay flagstones for a patio?
Start by preparing a level base with gravel and sand layers. Arrange the stones in your desired pattern, adjusting their position for a snug fit. Use a rubber mallet to tap stones into place and ensure they are level. Fill gaps with sand or gravel, then compact and sweep to finish.
What tools do I need for a flagstone patio?
Essential tools include a shovel, rake, rubber mallet, level, measuring tape, and a trowel. You may also need a masonry chisel for shaping stones, a hand tamper for compacting base layers, and a wheelbarrow for transporting materials.
How do I maintain my flagstone patio?
Regularly sweep away debris and wash the surface with mild soap and water. Check for weeds between stones and remove them promptly. Seal the stones every few years to prevent staining and water absorption. Address drainage issues and repair loose or cracked stones as needed.
Can I install a flagstone patio on my own?
Yes, with proper planning and the right tools, you can install a flagstone patio yourself. Focus on thorough site preparation, precise leveling, and careful arrangement of stones. However, complex designs or large areas may benefit from professional help to ensure stability and durability.
What should I consider before starting a patio project?
Evaluate your budget, site conditions, and your DIY skill level. Ensure proper drainage and plan for materials and tools needed. Consider the type of flagstone and design that fits your aesthetic. Think about future maintenance and sealing requirements to maintain your patio’s appearance.