If you’re looking to elevate your indoor garden, tropical ferns are a fantastic choice. Their lush foliage and vibrant shades can transform any space into a mini tropical paradise. For more inspiration, check out Top 5 Tropical Ferns for Lush Indoor Spaces.
Understanding Tropical Ferns
What are Tropical Ferns?
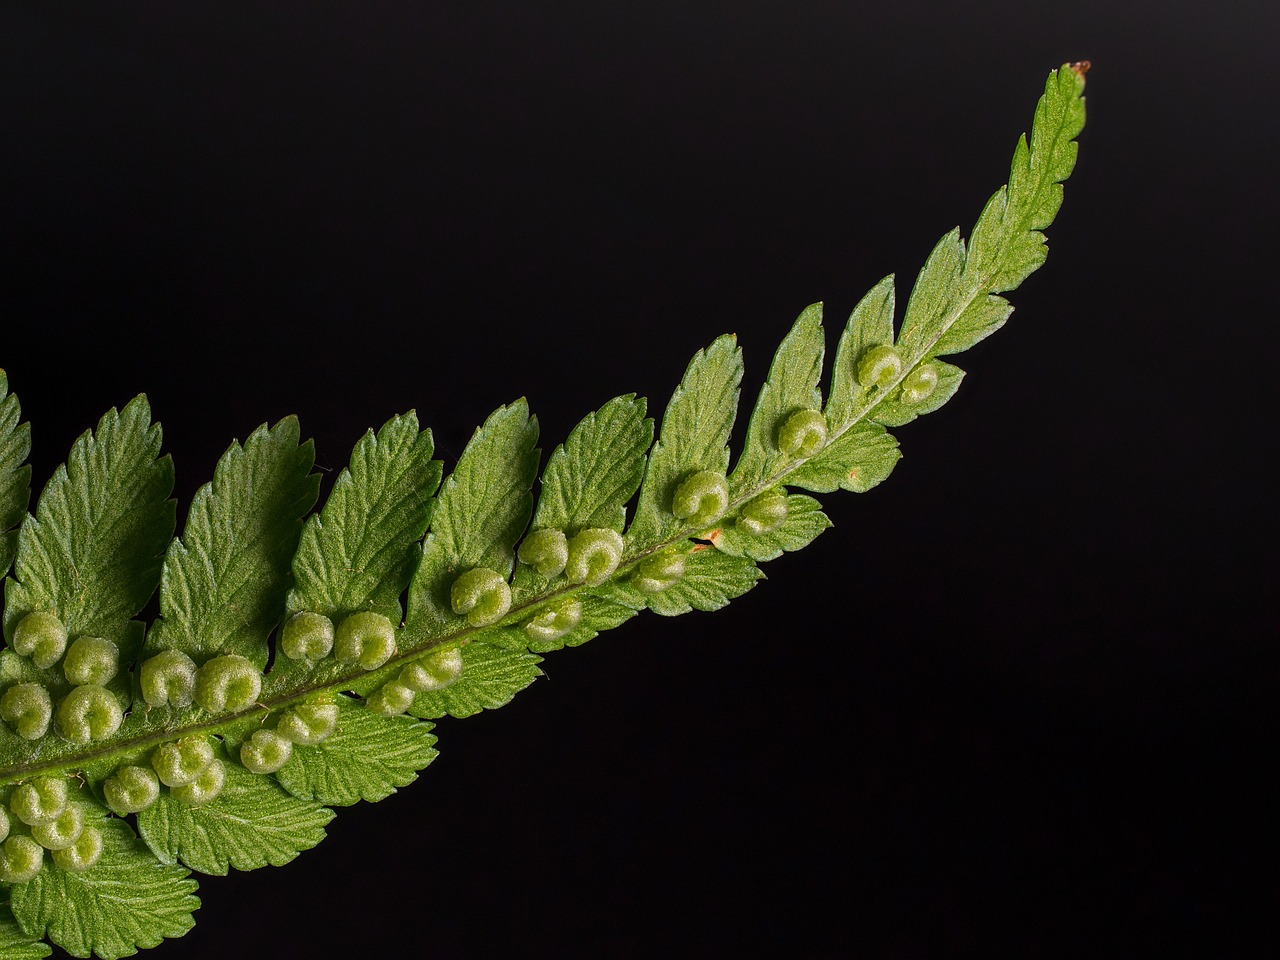
Tropical ferns are fascinating plants that thrive in warm, humid climates. Unlike their temperate counterparts, they flourish in areas with consistent moisture and filtered light. I remember the first time I laid my eyes on a tropical fern; its intricate leaves and deep green color instantly drew me in. These plants belong to a diverse group that includes various species, each bringing unique beauty to our homes and gardens. They reproduce via spores rather than seeds, which can be quite interesting to learn about if you’re new to gardening.
Common Types of Tropical Ferns
As I started exploring tropical ferns, I discovered several popular types that have become favorites among plant enthusiasts. Here are a few that I think you might enjoy:
- Boston Fern (Nephrolepis exaltata): Known for its arching fronds, this fern is great for hanging baskets.
- Bird’s Nest Fern (Asplenium nidus): With its unique rosette shape, it adds a touch of elegance to any space.
- Maidenhair Fern (Adiantum): This delicate fern has lacy leaves that are simply gorgeous.
- Staghorn Fern (Platycerium): A unique epiphytic fern often mounted on wood or hung on walls.
Each type has its charm and specific care needs, which I’ve learned can vary widely. I often find myself researching the best ways to care for each one to keep them thriving! For more on tropical plants, you might also want to check out Top 5 Stunning Palm Varieties for Tropical Gardens.
Natural Habitat and Growth Conditions
Understanding where tropical ferns thrive in nature can really help us replicate the right conditions at home. Typically, these ferns grow in rainforest understories, where they receive dappled sunlight and high humidity. I’ve noticed that when I mimic these conditions, my ferns seem to flourish. They prefer temperatures between 65°F and 80°F (18°C to 27°C) and enjoy a moist environment without standing water.
When I set up my fern corner, I used a combination of potting soil that retains moisture and added organic materials like peat moss. This mimics their natural habitat and allows for proper drainage. I also learned that many tropical ferns can handle some indirect sunlight, but too much direct light can scorch their delicate leaves. It’s all about finding that sweet spot to ensure they thrive!
Essential Care Tips for Tropical Ferns
Choosing the Right Location
Finding the perfect spot for your tropical fern can make all the difference. I’ve experimented with various locations in my home, and I found that bright, indirect light works wonders for them. A south-facing window with sheer curtains has become my go-to spot. If you don’t have that option, consider placing your fern near a bright window but shielded from direct sunlight to avoid leaf burn.
Optimal Lighting Conditions
Lighting is vital for tropical ferns. They thrive in bright, filtered light but can get stressed in direct sunlight. I’ve learned to observe my ferns closely; if they start to yellow or brown at the edges, it’s a sign they might be getting too much sun. Conversely, if they become leggy and sparse, they might need a bit more light. I often rotate my ferns every few weeks to ensure even growth and exposure.
Watering Needs and Techniques
Watering can be tricky, but I’ve found a rhythm that works for me. Tropical ferns love moisture, but overwatering can lead to root rot. I usually check the top inch of the soil; if it feels dry, it’s time to water. I prefer using room temperature water because it’s gentler on the roots. When I water, I soak the soil thoroughly, allowing excess water to drain out from the bottom. This method keeps the roots healthy and thriving.
Humidity Requirements
Humidity is perhaps the most crucial factor for tropical ferns. I’ve noticed that they thrive in environments with at least 50% humidity. To boost humidity, I often mist my ferns regularly and place them on trays filled with pebbles and water. This simple trick creates a mini humid zone around the plants. I also keep an eye on the room’s overall humidity, especially during dryer months. A small humidifier can do wonders if you live in a dry climate!
Soil and Fertilization
Choosing the right soil is another essential aspect of fern care. I prefer a well-draining potting mix, often enriched with organic matter. Mixing in some perlite or orchid bark can improve drainage, which is important for tropical ferns. As for fertilization, I usually feed my ferns with a diluted liquid fertilizer every 4-6 weeks during the growing season. This keeps them vibrant and healthy, and I’ve seen fantastic results!
Pest and Disease Management
Common Pests Affecting Tropical Ferns
As I dove deeper into the world of tropical ferns, I quickly learned that pests can be a real challenge. I remember the first time I noticed tiny little specks on my Boston fern; I was worried that I was losing it. Some of the most common pests include spider mites, aphids, and mealybugs. Spider mites are particularly sneaky; they thrive in dry conditions and can cause significant damage before you even notice them. I often find that a good inspection of the leaves, especially the undersides, helps catch these pests early.
Aphids are another pest that can show up unexpectedly. They tend to cluster on new growth, sucking the sap from the leaves. Mealybugs, with their cotton-like appearance, are easy to spot but can take over if not addressed. I’ve learned that keeping a close eye on my ferns helps me catch these pests before they become a bigger problem.
Signs of Disease in Tropical Ferns
It’s just as important to know the signs of disease affecting tropical ferns. I’ve found that leaves turning yellow or brown can indicate stress from pests or improper care. Another sign to watch out for is wilting; it can suggest either overwatering or underwatering. I remember when my maidenhair fern had droopy fronds, and I was unsure if it was thirsty or if I had watered it too much. It took some experimenting to pinpoint the issue!
Fungal diseases are also a concern, especially if the humidity is too high or if there’s poor air circulation. I once had a case of leaf spot on my bird’s nest fern, which was both alarming and a valuable learning experience. Keeping an eye out for unusual spots or moldy patches is crucial for maintaining our ferns’ health.
Preventative Measures
Prevention is always better than cure, and I’ve found that a few simple practices can save a lot of headaches down the road. For starters, ensuring proper air circulation around my ferns has been a game-changer. I try to avoid overcrowding my plants, which can create a humid environment ripe for pests and diseases. Regularly cleaning the leaves with a damp cloth not only keeps them looking fresh but also helps reduce dust that can attract pests.
Misting my ferns is a favorite routine of mine, but I’ve learned to do it early in the day so that the leaves have time to dry out before evening. This simple habit helps to prevent fungal issues while ensuring my ferns get the humidity they crave. I also make it a point to inspect new plants thoroughly before introducing them to my collection. It’s a small step that can prevent a big headache later!
Treatment Options
If I do spot pests or diseases, I’ve found that acting quickly is essential. For spider mites, a gentle spray of water can dislodge them, and if that doesn’t work, I sometimes resort to insecticidal soap or neem oil. I remember the first time I used neem oil; I was amazed at how effective it was! Just be sure to follow the instructions carefully, as it can be potent.
For mealybugs, I often use a cotton swab dipped in alcohol to remove them directly. It’s a bit of a painstaking process, but seeing my fern recover makes it worth the effort. If I notice any signs of fungal infections, I usually remove the affected leaves and increase airflow around the plant. In some cases, I’ve had to apply a fungicide, but I always try to go for organic options when possible.
Throughout my fern journey, I’ve realized that being proactive and attentive to my plants can make all the difference. The time and effort I put into pest and disease management not only keeps my ferns healthy but also deepens my connection with them. Each successful recovery feels like a little victory, reminding me why I fell in love with tropical ferns in the first place.
Propagation Techniques
Methods of Propagation
When I first ventured into propagating my tropical ferns, I was excited to discover the different methods available. There are a few primary techniques that I found effective: spore propagation, division, and offsets. Each method has its own unique charm and can lead to new plants that add to your lush indoor garden.
Spores are the way ferns reproduce in the wild, and while it can be a bit more challenging for beginners, it’s a rewarding process. I remember collecting spores from my Boston fern and carefully placing them on a moist, sterile medium. It took patience, but eventually, I saw tiny new ferns sprouting, which felt like a little miracle!
Division is probably the easiest method, especially for ferns like the Maidenhair or Bird’s Nest Fern. I usually wait until spring, when the plant is actively growing, and gently remove it from its pot. After carefully separating the root ball into sections, I replant them in their own pots. It’s amazing how quickly they adapt and start growing on their own.
Offsets are another fun way to propagate. Some ferns, like the Staghorn Fern, produce small plantlets or pups around their base. I just wait until these pups are a decent size, then I can gently twist or cut them off and pot them separately. Watching them thrive in their new home is incredibly satisfying!
When to Propagate Tropical Ferns
Timing can make a big difference when it comes to propagation. I’ve found that spring is the best time to propagate tropical ferns. During this season, the plants are waking up from their dormancy and are eager to grow. I always keep an eye on the health of my ferns; if they’re looking robust and green, I know it’s a great time to divide or take offsets.
For spore propagation, timing can be less critical, but I’ve learned that it’s best to collect spores when they’re mature, usually in late spring or early summer. I remember the thrill of checking the underside of my ferns for those tiny brown dots—those were the spores just waiting to give life to new ferns!
Steps for Successful Propagation
Having a clear plan has been key to my success with fern propagation. Here’s a simple guide that I follow:
- Choose the Right Time: As I mentioned, spring is the ideal season for most propagation methods.
- Gather Your Tools: I always make sure to have clean pots, fresh potting mix, and a spray bottle handy for misting.
- Prepare the Parent Plant: Whether I’m dividing or taking offsets, I ensure the parent plant is well-watered a few days prior. This helps ease the process and reduces stress on the plant.
- Divide or Collect Offsets: For division, I gently separate the root ball into several sections, ensuring each has roots and fronds. For offsets, I carefully detach them from the parent plant.
- Potting: I fill my pots with a well-draining potting mix and plant each section or offset at the same depth they were growing before. I lightly press down the soil and water them in.
- Care for New Plants: I place the newly potted plants in a warm, humid spot with indirect light. Misting them regularly helps promote growth until they establish roots.
After following these steps, I’ve had great success with my fern propagation, and it’s given me so much joy to see them grow into beautiful new plants!
Seasonal Care Tips
Spring Care for Tropical Ferns
Spring is like a breath of fresh air for my tropical ferns. As the days get longer and warmer, I take this opportunity to give my ferns a little extra attention. I usually start by checking the soil for any signs of compaction or nutrient depletion. A gentle repotting into fresh, nutrient-rich soil can work wonders for their growth. I also begin to fertilize them every 4-6 weeks, which helps boost their energy as they grow.
I find that this is the perfect time to propagate, as discussed earlier. The excitement of new growth and new plants really makes spring one of my favorite seasons for fern care!
Summer Care for Tropical Ferns
Summer brings warmth and humidity, which tropical ferns absolutely love! However, I’ve learned that I need to keep an eye on their water needs during this time. They tend to drink more, so I make sure to check the soil frequently. I also increase my misting routine, especially on particularly hot days, to maintain humidity levels.
It’s also a great time to enjoy their lush foliage. I often rearrange my ferns to make sure they’re getting enough light and space to grow. Sometimes, I’ll even take them outside for a little natural sunlight—just a few hours in the morning is usually all they need to perk up!
Fall Care for Tropical Ferns
As the weather cools down in fall, I start to prepare my ferns for the changing environment. I reduce watering since the humidity in my home can drop significantly. I’ve found that misting becomes even more important during this season. I also keep an eye on their light exposure, making sure they’re still getting enough filtered light as the days shorten.
This is also a good time to check for pests, as they can sometimes thrive in the indoor warmth. A quick inspection helps catch any issues early.
Winter Care for Tropical Ferns
Winter care can be a bit tricky. I’ve learned that my ferns need a little extra love during this time. I keep my ferns away from drafty windows or heating vents, which can dry them out. I also tend to reduce fertilization during the winter months, as most ferns enter a dormant phase.
Humidity is crucial! I often run a humidifier or place trays of water near my ferns to keep the air moist. This has made a noticeable difference in their health throughout the colder months. I’ve found that even during winter, my ferns can thrive with a little extra attention and care!
Common Mistakes to Avoid
Overwatering vs. Underwatering
I’ve made my fair share of mistakes when it comes to watering my tropical ferns. One of the most common pitfalls is overwatering. I remember when I was new to caring for ferns; I thought they needed constant moisture, so I watered them too often. This led to root rot in a couple of my plants, which was heartbreaking. Now, I always check the soil moisture before watering. If the top inch feels dry, I give them a drink. Learning to balance their water needs has been crucial in keeping my ferns healthy.
Poor Lighting Choices
When I first started with tropical ferns, I didn’t fully understand their lighting needs. I thought any bright spot would be fine, but I quickly learned that not all light is equal. I placed one fern too close to a south-facing window without any protection, and the leaves started to scorch. I’ve since learned to pay close attention to how my ferns respond to light. Now, I prefer to use sheer curtains to diffuse harsh sunlight and ensure my ferns get bright, indirect light instead.
Neglecting Humidity Needs
Humidity is a major factor for tropical ferns, and it wasn’t something I considered at first. I remember seeing the fronds on my maidenhair fern start to curl, and I was confused about what was happening. After some research, I discovered that the air in my home was too dry, especially during winter. I began misting my ferns regularly and investing in a small humidifier. It’s amazing how quickly they perked up once I addressed their humidity needs!
Ignoring Pests and Diseases
In the excitement of nurturing my ferns, I sometimes overlooked the signs of pests and diseases. I remember being shocked when I found spider mites on my Boston fern after a few months of neglecting to check the undersides of the leaves. Now, I’ve made it a habit to inspect my ferns regularly. It’s a small effort, but it pays off in maintaining their health. Plus, being proactive means I can avoid larger infestations down the road.
Frequently Asked Questions
How often should I water my tropical fern?
Watering frequency can vary, but I usually check the top inch of soil. If it feels dry, it’s time to water. During the growing season, I often find myself watering once a week, but this can change based on your home’s humidity and temperature.
What type of soil is best for tropical ferns?
I recommend using a well-draining potting mix enriched with organic matter. Mixing in materials like perlite or orchid bark can improve drainage as tropical ferns prefer to stay moist, not soggy.
Can tropical ferns survive indoors?
Absolutely! I have several tropical ferns thriving indoors. As long as you provide them with the right light, humidity, and care, they can flourish in an indoor environment.
How do I know if my fern is getting enough light?
Look for signs such as leggy growth or yellowing leaves, which can indicate that your fern needs more light. Conversely, if the leaves are scorched or browning at the edges, it might be getting too much direct sunlight. Adjusting its position can usually help achieve the right balance.
Final Thoughts
Caring for tropical ferns has been a rewarding journey for me. Each plant has its unique personality, and I’ve learned to embrace the quirks and challenges that come with them. From choosing the right location to understanding their specific needs, every step has deepened my appreciation for these beautiful plants. I encourage anyone interested in indoor gardening to explore the world of tropical ferns. With a little patience and love, you can create your very own lush paradise at home. Remember, every fern is a reflection of the care you provide, and watching them thrive is one of the most satisfying experiences a plant lover can have!
Read Interesting article: Transform Your Tropical Container Garden with Seasonal Care