As a plant enthusiast, I know that growing houseplants can be a rewarding experience, but not all plants are created equal. Here are 7 tough-to-grow houseplants that are definitely worth the effort:
| 1. Moth Orchid: | This stunning plant requires bright but not direct sunlight and careful watering. With the right conditions, the blooms can last for months. |
| 2. Croton: | This colorful plant needs bright, indirect light and consistent moisture. It can be prone to dropping leaves, so be patient and provide the care it needs. |
| 3. Tradescantia: | This fast-growing plant needs bright, indirect light and regular watering. It’s also prone to spider mites, so keep a close eye on it. |
| 4. Elephant’s Ear: | This dramatic plant requires bright, indirect light and plenty of humidity. It’s also susceptible to root rot, so make sure it’s not sitting in water. |
| 5. Fiddle-Leaf Fig Tree: | This plant has become popular in recent years, but it can be tricky to care for. It needs bright, indirect light and consistent watering. It’s also prone to leaf drop, so try not to move it around too much. |
| 6. Bird’s Nest Fern: | This plant requires moderate, indirect light and consistent moisture. It’s also sensitive to chemicals, so be careful not to expose it to any harsh products. |
| 7. Boston Fern: | This classic plant needs bright, indirect light and plenty of humidity. It’s also prone to spider mites and other pests, so keep a close eye on it and take action if needed. |
Pro tip: Don’t be discouraged if you struggle with any of these tough-to-grow houseplants. With patience and research, you can eventually create the right growing conditions and enjoy their beauty for years to come.
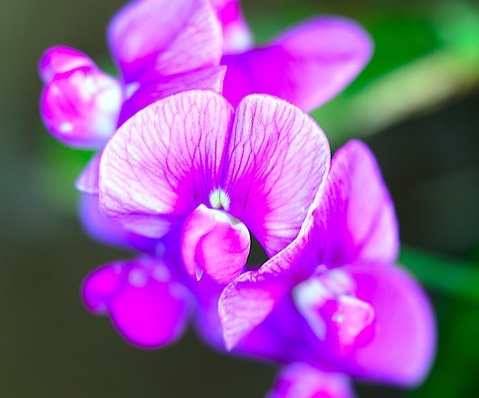
Moth Orchid
Houseplants are a great way to bring life and color into any home, but some plants can be a bit challenging to grow. The Moth Orchid is one of those plants that is worth the effort as it rewards you with stunning blooms.
Let’s explore the unique care requirements of the Moth Orchid and how it can easily fit into your home.
Ideal environment for Moth Orchid growth
I have noticed that Moth Orchids can be quite finicky and require specific environmental conditions to grow successfully. Here’s what I’ve learned:
Table of Contents
| Light | Moth Orchids prefer bright, indirect light. Too much direct sunlight can cause leaf burn, while low light levels can inhibit flowering. |
|---|---|
| Temperature | Moth Orchids thrive in temperatures between 70-80°F during the day and 60-65°F at night. |
| Humidity | These orchids require high humidity levels between 50-70%. You can increase humidity by misting the leaves and placing a saucer filled with water near the plant. |
| Watering | Water your Moth Orchid once a week or when the top inch of soil feels dry to the touch. Avoid overwatering, which can lead to root rot. |
| Potting mix | Use a well-draining potting mix that allows air to circulate around the roots. |
| Fertilizer | Feed your Moth Orchid with a balanced, water-soluble fertilizer every 2-3 weeks during the growing season (spring and summer). |
By providing your Moth Orchid with the ideal environment, you can enjoy its beautiful blooms for years to come!
Watering and fertilizing Moth Orchid
As an avid gardener, I know that keeping a moth orchid healthy can be a challenge. To help you with that, here are some tips for watering and fertilizing your moth orchid:
| Watering: | Fertilizing: |
| Water your moth orchid once a week, making sure that the soil is thoroughly soaked. Allow the excess water to drain out of the pot. Avoid overwatering, as it can lead to root rot and the death of your plant. | Use a balanced fertilizer every 2-3 weeks during the growing season (spring and summer). Reduce the frequency of fertilization during the dormant period (fall and winter) to once a month. Dilute the fertilizer to half its strength, as a full dose can damage the roots of your moth orchid. |
By following these tips, you can enjoy the beauty of your moth orchid for years to come.
Common issues and how to overcome them
Moth orchids are undoubtedly beautiful, but they are not without their challenges. Here are some common issues with moth orchids and how to overcome them:
| Yellowing Leaves: | If your orchid’s leaves start to yellow and wilt, it may be due to overwatering or root rot. Make sure your orchid is not sitting in standing water, and allow the soil to dry out between watering. |
| Lack of Flowers: | Lack of flowering can be caused by insufficient light or incorrect fertilization. Place your orchid in a bright and indirect light source, fertilize it with a high-phosphorous fertilizer, and maintain consistent temperatures. |
| Root Problems: | If you notice mushy or brown roots, it may indicate root rot. Repot your orchid in fresh soil and isolate it from other plants to prevent the spread of the disease. |
| Pests: | Common orchid pests include spider mites and mealybugs. Use a horticultural oil or insecticidal soap to control these pests. |
By being aware of these common issues, you can successfully grow and care for moth orchids in your home.
Croton
Want to add a splash of vibrant color to your indoor space? Croton is a popular houseplant that’s known for its amazing foliage with vibrant shades of pink, yellow, green, purple, and more. It’s easy to see why a Croton plant is often used as a statement piece for decorating interiors.
But, growing a croton plant can be a bit tricky. In this article, I will shed some light on the care and maintenance needed to successfully grow a beautiful croton plant indoors.
Ideal environment for Croton growth
Croton is a tough-to-grow houseplant that’s worth the effort, but it requires a specific environment to grow and thrive.
Here’s what you need to know about creating an ideal environment for your croton plant:
| Light | Temperature | Humidity | Water | Soil |
|---|---|---|---|---|
| Croton requires bright, direct sunlight for at least six hours a day. Without enough sunlight, the plant will lose its vivid color and won’t grow well. | Croton thrives in temperatures between 60°F and 85°F. Anything below 60°F can damage the plant, and temperatures below 50°F can be fatal. | Croton prefers high humidity levels of at least 50%. You can achieve this by placing a humidifier near the plant or by misting it regularly. | Croton needs to be watered regularly, but make sure not to overwater it. Allow the top inch of the soil to dry out between waterings. | Croton requires well-draining soil that’s rich in nutrients. |
By creating an environment that meets these requirements, you can successfully grow and enjoy your croton plant.
Watering and fertilizing Croton
As someone who has grown the notoriously finicky croton plant, I can attest that proper watering and fertilization are key to keeping it healthy and vibrant.
| Watering | Fertilizing |
|---|---|
| Crotons need well-draining soil and adequate water to thrive. To avoid root rot, wait until the top inch of soil is dry before watering. When you do water, make sure to thoroughly saturate the soil. | Crotons benefit from regular fertilization during the growing season (spring and summer). Use a balanced, water-soluble fertilizer every two weeks to provide essential nutrients. |
Pro tip: Avoid misting croton leaves – this can cause fungal growth. Instead, use a damp cloth to gently wipe down the leaves and keep them dust-free.
Common issues and how to overcome them
As a houseplant enthusiast, I’ve had my fair share of struggles with various species, but Crotons have a special place on that list. Some common issues I’ve encountered while growing Crotons and their solutions include:
| Issue | Solution |
|---|---|
| Yellowing leaves | This can be due to overwatering, poor drainage, or pests. To solve this issue, trim the affected leaves and adjust your watering habits. If pests are the cause, use insecticide to treat the plant regularly. |
| Wilting | Wilting can be a result of poor soil or underwatering. To fix this, repot the plant in well-draining soil and adjust your watering schedule. |
| Dropping leaves | If your Croton is dropping leaves, it may be due to extreme temperature changes or pests. Move the plant to a more stable temperature and treat pests regularly. |
| Root rot | Root rot is caused by overwatering and poor drainage. Repot your plant with fresh soil and ensure proper drainage to prevent further root rot. |
Crotons are a beautiful and colorful addition to any home, but they require proper care and attention. By monitoring common issues and taking corrective measures, you can ensure that your Croton thrives.
Tradescantia
Tradescantia is a striking houseplant that is difficult to grow but is worth the effort. This plant features interesting foliage and attractive colors that can bring a beautiful look to any room.
The most challenging aspects of growing Tradescantia is getting it to thrive in different light levels, providing it with consistent humidity, and avoiding overwatering. But with the right care, Tradescantia is a beautiful and rewarding houseplant.
Ideal environment for Tradescantia growth
Tradescantia is a houseplant that requires specific environmental conditions to thrive. Here’s how to achieve them:
| Lighting | Tradescantias require bright, indirect light. Direct sunlight can scorch their leaves, but too little light can cause leggy growth. |
|---|---|
| Temperature | These plants prefer temperatures between 60-85°F (15-29°C). However, they can tolerate temperatures as low as 50°F (10°C) for short periods. |
| Watering | Tradescantias prefer to be kept evenly moist. Allow the top inch of soil to dry out between waterings. |
| Humidity | These plants thrive in high humidity environments. Consider using a humidifier or placing a tray of water near the plant to increase humidity levels. |
| Soil | Tradescantias prefer well-draining soil. A mix of peat moss, perlite, and vermiculite works well. |
| Fertilizer | Feed your Tradescantia with a balanced indoor plant fertilizer every 2-3 months during the growing season. |
Pro Tip: If your Tradescantia starts to look leggy, cut back the stems to encourage bushier growth.
Watering and fertilizing Tradescantia
Watering and fertilizing Tradescantia can be challenging, but it is a great houseplant worth the effort. Here are some tips to help you care for your Tradescantia plant:
| Watering | Fertilizing |
|---|---|
| Tradescantia plants thrive in moist soil, so it’s essential to keep the soil slightly moist at all times. One way to achieve this is to water your plant regularly, making sure that the soil doesn’t dry out completely between waterings. Another tip is to use distilled water or rainwater instead of tap water, which can contain chemicals that are harmful to the plant. | Tradescantia plants benefit from regular fertilization during the growing season (spring and summer). Use a balanced fertilizer with equal amounts of nitrogen, phosphorus, and potassium, and follow the instructions on the label. Avoid fertilizing during the fall and winter to allow the plant to rest. |
Pro tip: Trim your Tradescantia regularly to promote bushy growth and prevent legginess.
Common issues and how to overcome them
When it comes to Tradescantia, there are several common issues that can be frustrating for any plant owner but with a few simple steps, you can easily overcome them.
| 1. Yellow leaves: | Yellowing of leaves is a common issue with Tradescantia, which could be due to over-watering or direct sunlight. To fix this, reduce watering and move your plant to a spot that receives bright, indirect light. |
| 2. Root rot: | Root rot is another common issue caused due to over-watering. To avoid this, ensure that your soil is well-drained and water only when the top inch of soil is dry. |
| 3. Leggy growth: | Tradescantia tends to grow leggy when not receiving enough light. Move your plant to a brighter location and pinch off the top growth to encourage a fuller plant. |
Remember, with little care and attention, Tradescantia can flourish and make for a beautiful addition to your indoor garden.
Elephant’s Ear
For those who love a challenge and want to add an exotic touch to their home, elephant’s ear is the perfect houseplant. Native to tropical regions like Southeast Asia, it can be tricky to care for, but the rewards are worth it. With its stunning variegated leaves, this houseplant adds a tropical vibe to any space. In this article, let’s explore how you can successfully care for elephant’s ear.
Ideal environment for Elephant’s Ear growth
Elephant’s Ear is a beautiful and exotic houseplant that can thrive in a variety of indoor conditions. For optimal growth, provide your Elephant’s Ear with the following environment:
| Soil | Use a well-draining potting soil mixture that is rich in organic matter. |
|---|---|
| Water | Water your plant regularly, keeping the soil consistently moist but not waterlogged. Elephant’s Ear prefers high humidity, so misting the leaves regularly can help mimic its natural environment. |
| Light | Although Elephant’s Ear can tolerate low-light conditions, the plant prefers bright, indirect light. Keep it away from direct sunlight, which can scorch its leaves. |
| Temperature | Elephant’s Ear prefers warm temperatures above 60 degrees Fahrenheit. Keep it away from cold drafts and air conditioning vents. |
With the right growing environment in place, your Elephant’s Ear plant will thrive and make a stunning addition to your indoor garden.
Watering and fertilizing Elephant’s Ear
I have found that watering and fertilizing Elephant’s Ear can be a bit tricky, but it’s worth the effort once you get the hang of it. Here are some tips that may help:
| Watering | Fertilizing |
|---|---|
| Elephant’s Ear plants like consistently moist soil that is well-drained. Avoid letting the soil dry out completely, but be careful not to overwater as this can lead to root rot. You can mist the foliage occasionally to increase humidity. | Elephant’s Ear plants benefit from regular fertilization during their growing season, which is spring and summer. Use a balanced, water-soluble fertilizer at half strength every 2-4 weeks. |
With proper care, your Elephant’s Ear plant can thrive and add a unique touch of greenery to your home.
Common issues and how to overcome them
Elephant’s Ear is a tough-to-grow houseplant that often faces common issues that lead to its decline. Here are some of the problems you may encounter while growing Elephant’s Ear and solutions to overcome them:
| Problem | Solution |
|---|---|
| Overwatering | Ensure proper drainage and do not water excessively. |
| Pests | Regularly inspect your plant and use insecticides, neem oil or soap spray to deal with infestations. |
| Lack of humidity | Increase humidity levels by frequently misting the plant, placing it on a pebble tray, or using a humidifier. |
By addressing these common issues, you can successfully grow and maintain an Elephant’s Ear plant in your home. Remember to provide appropriate light, soil, and water conditions for optimal growth.
Pro tip: Always use a well-draining soil mix and do not leave your Elephant’s Ear in direct sunlight, as it can scorch the leaves.
Fiddle-Leaf Fig Tree
Fiddle-Leaf Fig Tree is a great choice for a houseplant if you want to add some color and depth to your space. It has beautiful large leaves with a unique fiddle shape, and can be a conversation starter with its vibrant green color.
Despite the beauty of this plant, it can be difficult to grow. However, it’s worth the effort as it can bring a unique element of nature into your home.
Ideal environment for Fiddle-Leaf Fig Tree growth
As an owner of Fiddle-Leaf Fig Tree, I can say that it is a high-maintenance houseplant that requires specific environmental conditions to thrive. Here are some of the ideal conditions for optimal Fiddle-Leaf Fig growth:
| Sunlight | Temperature | Humidity | Soil |
|---|---|---|---|
| Fiddle-Leaf Fig Trees require bright, indirect sunlight to develop their large, glossy leaves. Direct sunlight can scorch the leaves, so it’s important to place the plant near a window that filters out harsh sunlight or to use a sheer curtain as a barrier. | Fiddle-Leaf Fig Trees thrive in consistently warm temperatures between 65-75 degrees Fahrenheit. Cold drafts and sudden temperature changes can cause the leaves to wilt or drop. | Fiddle-Leaf Fig Trees prefer high humidity levels, so it’s a good idea to mist the leaves regularly or place a humidifier near the plant. | The soil should be well-draining and moist but not waterlogged, as overly wet soil can lead to root rot. |
Following these ideal environmental conditions can help your Fiddle-Leaf Fig Tree flourish and add a touch of greenery to your home decor.
Watering and fertilizing Fiddle-Leaf Fig Tree
Watering and fertilizing a Fiddle-Leaf Fig Tree can be a bit tricky, but it’s essential to help the plant grow and thrive. Here are some tips to remember:
| Watering: |
|---|
| Fiddle-Leaf Fig Trees require moderate watering – too much or too little water can damage the plant. Water your plant once a week or when the soil is dry to the touch, but not completely dry. Ensure proper drainage to prevent over-watering. |
| Fertilizing: |
| Use a balanced liquid fertilizer once a month during the growing season (spring and summer) to promote healthy growth. Avoid fertilizing in the winter when the plant is dormant. |
Keep in mind that Fiddle-Leaf Fig Trees are one of the seven tough-to-grow houseplants that are worth the effort. Remember to give it the proper care it needs and enjoy the benefits of having a beautiful and healthy plant in your home.
Common issues and how to overcome them
As a plant enthusiast, I know that growing houseplants can be a delightful experience until you face issues. Here are some common problems and how to overcome them when growing a Fiddle-Leaf Fig tree.
| Problem | Solution |
|---|---|
| Pest infestation | Treat the plant with neem oil or insecticidal soap and apply it to the entire plant, including the undersides of the leaves. |
| Overwatering | Ensure that the soil is well-draining, water the plant only when the top 1-2 inches of soil are dry, and use a pot with drainage holes. |
| Underwatering | Water the plant regularly and consistently to maintain its moisture levels and avoid fluctuations. |
| Lack of sunlight | Place it near a window with filtered light, and turn the plant every few weeks for even growth. |
Remember, the right amount of care and attention is vital when growing any houseplant; it is crucial to be patient and persistent to see it thrive.
Bird’s Nest Fern
If you’re looking for an attractive houseplant that requires minimal effort, the Bird’s Nest Fern could be the right choice for you. This beautiful fern is a tough-to-grow houseplant but it is worth the effort to keep it alive because it adds a unique look to your home while also helping to purify the air.
Let’s learn a little bit more about this plant and how you can keep it healthy and thriving.
Ideal environment for Bird’s Nest Fern growth
As a proud owner of a Bird’s Nest Fern, I have learned that the ideal environment for its growth involves mimicking its native habitat in the tropical rainforests.
Here are a few tips to create the perfect environment for your Bird’s Nest Fern:
| Light | Place your plant in bright, indirect light. Avoid direct sunlight, as it can scorch the leaves. |
|---|---|
| Temperature | Keep the temperature between 60 and 80°F (15 to 27°C). Avoid placing the plant near cold drafts or hot air vents. |
| Humidity | These plants love humidity, so mist them often or place them in a tray of pebbles filled with water. |
| Soil | Use well-draining, peat-based soil. Do not use soil that retains too much moisture, as it can lead to root rot. |
| Water | Keep the soil moist, but not too wet. Water thoroughly and allow the soil to drain completely before watering again. |
Following these simple tips can help your Bird’s Nest Fern thrive and add a touch of tropical elegance to your home.
Watering and fertilizing Bird’s Nest Fern
Watering and fertilizing a Bird’s Nest Fern require extra care and attention but are worth the effort to keep this attractive houseplant growing and thriving. Here are some tips to help you take care of your Bird’s Nest Fern:
| Watering | Fertilizing | Temperature | Humidity | Light |
|---|---|---|---|---|
| This fern prefers to be kept in moist soil. Water your fern once a week or when the top inch of soil feels dry to the touch. Avoid overwatering, which can lead to root rot. | Use a balanced liquid fertilizer once a month during the growing season (spring and summer). Dilute the fertilizer to half the recommended strength, as too much fertilizer can cause leaf burn. | Bird’s Nest Ferns prefer a warm and humid environment, with temperatures between 60°F (15°C) and 75°F (24°C). | This fern thrives in high humidity levels. Mist your plant daily or place it on a pebble tray filled with water. | Bird’s Nest Ferns prefer indirect light or partial shade, so place them near a north-facing window or away from direct sunlight. |
With proper watering, fertilizing, and care, your Bird’s Nest Fern will reward you with lush green foliage for years to come.
Common issues and how to overcome them
As a plant owner, one of the biggest challenges can be keeping your houseplants healthy and thriving. The Bird’s Nest Fern, along with the other 6 difficult-to-grow houseplants, requires a lot of effort and attention. Here are some of the most common issues with Bird’s Nest Fern and tips to overcome them:
| Issues | Solutions |
|---|---|
| Brown fronds | Too much direct sunlight, underwatering, or dry air can cause the fronds of your Bird’s Nest Fern to turn brown. Move your plant to a shadier spot, increase watering frequency, or use a humidifier to prevent this issue. |
| Pest infestations | Spider mites or mealybugs can attack your Bird’s Nest Fern. Use an insecticidal soap or neem oil to control these pests. |
| Soil problems | Overwatering can cause root rot and poor drainage can cause the soil to dry out too quickly. Make sure your Bird’s Nest Fern is planted in a well-draining pot and water it when the topsoil is dry to the touch. |
Taking care of your Bird’s Nest Fern may be a challenge but with the right knowledge and attention, you can enjoy its beautiful and unique foliage for years to come.
Boston Fern
The Boston Fern is a beautiful, tough-to-grow houseplant that is worth the effort. Its long, lacy fronds are perfect for adding a touch of the outdoors to indoor spaces.
This type of fern does best in humid conditions, with plenty of indirect light and moist soil. Whether you’re a novice or an experienced green thumb, the Boston Fern can add a touch of beauty to any room.
Ideal environment for Boston Fern growth
Boston Ferns tend to grow best in a humid environment, with consistent moisture and indirect light. Here are some growing tips to help your Boston Fern thrive:
| Humidity | Moisture | Light | Temperature |
|---|---|---|---|
| Boston Ferns prefer high humidity, which can be achieved through regular misting or placing a tray of water nearby. Consider using a humidifier or grouping plants together to create a microclimate. | Keep the soil consistently moist but not waterlogged, allowing the top inch of soil to dry out between waterings. Avoid letting the soil become completely dry, as this can cause the fern to wilt and drop leaves. | Boston Ferns thrive in bright, indirect light. Avoid exposing them to direct sunlight or placing them in low-light areas. | Boston Ferns prefer temperatures between 60-75 degrees Fahrenheit (15-24 degrees Celsius). Avoid placing them near drafts or in areas with extreme temperature fluctuations. |
With proper care, your Boston Fern can be a beautiful addition to your indoor garden.
Watering and fertilizing Boston Fern
As a proud owner of a Boston Fern, I can attest to the fact that keeping it healthy and thriving requires consistent watering and fertilizing. Here are some tips to follow:
| Watering: | Boston Ferns require consistent moisture, but not soaking wet soil. Water your fern when the top inch of soil feels dry to the touch, and be sure to use room-temperature water to prevent shock to the roots. |
| Fertilizing: | Fertilize your Boston Fern every two weeks with a balanced, water-soluble fertilizer. Be sure to dilute the fertilizer to half-strength and avoid fertilizing during the winter months when the plant is less active. |
| Pro tip: | To increase humidity levels, place a tray of pebbles underneath your Boston Fern’s pot and keep it filled with water. This will create a micro-climate for your fern to thrive in. |
Common issues and how to overcome them
Boston Fern is a popular houseplant known for its lush foliage and air-purifying qualities. However, like many indoor plants, Boston Fern can face several issues that can affect its growth and overall health. Here are some common problems and how to overcome them:
| Browning fronds: | If the fronds are turning brown or crispy, it could be a sign of low humidity or overwatering. Increase humidity by misting the plant or placing a tray of water nearby. Reduce watering frequency and ensure the soil is well-drained. |
| Yellowing leaves: | If the leaves are turning yellow, it could indicate under-watering or nutrient deficiency. Water the plant adequately and fertilize every 2-3 months. |
| Pest infestation: | Boston Fern is susceptible to mealybugs, spider mites, and scale insects. Treat an infestation by applying insecticidal soap to the foliage and wiping down the leaves with a damp cloth. |
| Tip burn: | Tip burn occurs due to excessive exposure to dry air or direct sunlight. Move the plant away from direct sunlight and place it in a cooler area. |
By identifying the problem and taking the necessary steps, you can ensure your Boston Fern thrives and remains healthy.