A fresh, juicy slice of watermelon in your hands while you relax in the backyard on a hot summer day with the sun beaming brilliantly above. Biting into a slice of homegrown watermelon and feeling the sweetness explode in your mouth as the liquid drips down your chin is very pleasurable. It was this amazing experience that gave me the idea to start growing watermelons, which has been an interesting and rewarding journey.
Table of Contents
Growing watermelons is more than simply a pastime for me; it’s a labor of love that connects me to nature and teaches me about the challenging steps involved in nurturing these delicious fruits from seed to harvest. I’ve learned important lessons over the years about the ten phases of watermelon growth and the care needed at each stage to guarantee a plentiful and delectable harvest.
According to information at clemson.edu, watermelons (Citrullus lanatus) are classified as warm-season crops, and they thrive when exposed to average air temperatures ranging from 70 to 85 °F.
According to a resource on Penn State University, it is recommended to hand-harvest watermelons when they have reached full maturity in order to achieve the best taste and texture.
I’ll take you on a journey through the 10 phases of watermelon growth in this post, from planting the seeds in rich, well-drained soil to eventually harvesting the ripe, juicy fruits that capture the spirit of summer. You may experience the satisfaction of developing your watermelons and enjoying their sweet, reviving flavor by being aware of these phases and giving them the right care and attention.
The 10 Watermelon Growing Stages
Stage 1: The Seed Stage
The first step in the journey to grow watermelon is to plant the seeds. To guarantee a healthy growth, it’s essential to choose high-quality seeds from a reliable supplier. Setting the stage for optimal growth also entails amending the soil with organic matter and keeping the pH between 6.0 and 6.5.
Planting the seeds on elevated hills or mounds will provide appropriate drainage, which is essential for optimum seed growth. These mounds should typically be 12 inches tall, 24 inches broad, and spaced 8 to 10 feet apart. It’s also crucial to plant watermelon seeds at the proper time. In colder regions, either wait until the last frost has past or start seeds inside and transfer them outside when the conditions are right.
It’s crucial to supply the seeds with a warm, moist environment while they are still in the seed stage. Make sure the soil is continuously moist but not soggy. Seed germination, which typically takes 7 to 10 days, is encouraged by soil temperatures over 65°F. Be patient since germination rates might change based on the kind of seed and the surrounding conditions.
In conclusion, the seed stage lays the groundwork for a watermelon’s effective growth. You may ensure a plentiful harvest by choosing high-quality seeds, planting them in well-drained soil, and creating the ideal environmental conditions.
Stage 2: Seed Germination
Once the soil temperature reaches more than 65°F, the seed germination stage begins. It’s important to hold off on planting in colder locations until after the last frost has gone. As an alternative, you might start your seeds inside and then transfer them outside whenever the weather is suitable.
Watermelon seed germination requires constant wetness for proper sprouting. Regular watering of the seeds is necessary to keep the soil wet but not drenched. Normally, germination takes 7–10 days, however the length of time may vary based on the kind of seed and the surrounding conditions. During this stage, patience is essential since germination rates might vary.
The first genuine leaves that appear after a successful germination signal the start of the next growth phase. Monitor the germination process carefully, provide the ideal climatic conditions, and maintain the ideal soil moisture to give your watermelon seedlings a solid start.
Stage 3: Sprouting and Vining Stage
The watermelon plant’s first genuine leaves will appear after germination. This stage is exciting because the plants are starting to grow vines that will ultimately engulf the surrounding region. Because young seedlings are vulnerable, it’s important to safeguard them against harmful elements, parasites, and illnesses.
In order to properly care for seedlings throughout the sprouting and vining stages, watering is essential. The soil should always be maintained wet but not soggy. Root rot may result from overwatering, whereas growth might be stunted by underwatering. In addition, keeping the pH level of the soil regulated will promote healthy growth.
Make sure there is enough room for the watermelon plants to grow and the vines to spread as they do. Better air circulation, lower disease risk, and improved plant health are all benefits of spacing plants correctly. You may need to build support structures like trellises or train the vines to grow in the appropriate direction as they continue to grow.
In conclusion, the sprouting and vining stage is a crucial stage in the growth of the watermelon. You can encourage plant growth and set the stage for optimal fruit development by giving your plants the right care and environmental conditions.
Stage 4: Vegetative Phase and Branching
Watermelon plants experience quick growth and start to branch out during the vegetative stage.
At this stage, it’s essential to give the vines enough of room to expand and grow, since doing so will improve fruit output. Better air circulation, lower disease risk, and improved plant health are all benefits of spacing plants correctly.
The nutritional requirements of watermelon plants rise at this stage. A balanced fertilizer application and a sufficient water supply will promote robust branching and healthy growth. Additionally, it’s crucial to keep an eye out for pests and illnesses that might possibly hurt the plants and impede their growth.
The garden can be kept organized and the plants may avoid becoming tangled up with one another if you provide supports for the vines, such trellises. You may need to train the vines to grow in a certain direction or trim them to promote greater fruit production as they continue to grow.
In conclusion, for watermelon plants to establish a solid foundation for fruit growth, the vegetative phase and branching stage are essential. Your plants may flourish and get ready for the next stage of growth, blooming, by receiving the appropriate care, space, and nutrients.
Stage 5: Flowering Stage
The male and female flowers first develop during the blooming stage, which is an exciting turning point in the growth of watermelon plants. Usually, the female flowers open first, then the male blooms. The base of the female flowers has a slight, rounded protrusion that will later develop into the fruit, making them easy to identify.
Plant flowers nearby to attract bees and other pollinators to enhance pollination. Because they spread pollen from male to female flowers, allowing for fertilization, these helpful insects are essential to the growth of watermelons. Fruit growth will be more successful if pollinators are welcomed in the environment.
Keep checking your plants for indications of pests and illnesses when they enter the blossoming stage. The blossoms may be harmed by insects like aphids, and fungi infections can cause the flowers to fade too soon. To promote good blooming, keep a regular watering plan and give out a balanced fertilizer.
In conclusion, the watermelon growth process undergoes a significant turning point at the blooming stage. You may aid in ensuring a smooth transition to the next stage, pollination, by luring pollinators, giving suitable care, and safeguarding the plants from insects and illnesses.
Stage 6: Pollination Stage
For the fruit to grow on the watermelon plant, the pollination stage is crucial. As bees or other insects visit the blooms at this stage, pollen is transferred from the male to the female blossoms. It is necessary to provide a friendly atmosphere for these helpful insects since this procedure is essential for fruit production.
Hand pollination may be required in certain situations, such as when pollinators are few or the plants are being cultivated inside. To manually pollinate flowers, move pollen from the male flower to the female bloom using a tiny paintbrush or cotton swab. When natural pollination is not a possibility, this delicate touch may aid in fruit production.
A little bulge develops beneath the female flower after successful pollination, and this protrusion will eventually grow into a watermelon. At this stage, keep giving the plants the nutrients and water they need since fruit growth will require more energy from the plants.
In conclusion, the watermelon plant’s pollination stage is critical for the growth of the fruit. You may set the stage for the growth of delectable watermelons by promoting natural pollination or turning to manual pollination when necessary.
Stage 7: Fruiting Stage
Initial Fruit Development
A tiny bulge forms behind the female flower after successful pollination, signaling the start of the fruiting stage, which lasts until the watermelon has grown fully. The plants will need additional energy to promote fruit growth at this stage, so it’s critical to keep giving them enough water and nutrients.
Thinning and Supporting
You may need to remove lesser fruits as the trees grow so that the stronger ones can ripen. By giving the growing watermelons support, you may keep them from hitting the ground and lower their danger of rotting and insect damage. For support, you might make use of cushioned constructions or mesh slings.
In conclusion, your watermelon plants start to produce the fruits you’ve been looking forward to throughout the fruiting stage. You may contribute to healthy growth and a plentiful harvest by nurturing the growing fruits and giving them the appropriate care.
Stage 8: Fruit Development
The watermelons will continue to enlarge throughout the fruit development stage, and seeds will start to form within the flesh. Depending on the watermelon type and the growing environment, this stage may last many weeks.
During this stage, keep an eye on the plants and make any necessary adjustments to the water and fertilizer supply. Keep in mind that too much water might cause the fruits to crack, while not enough water can result in a fruit that is dry and lacking in taste.
The watermelons begin to take on their final form during the fruit development stage, preparing them for ultimate harvest. You can guarantee your watermelons grow healthily and taste wonderful by keeping an eye on the plants and giving them the care they need.
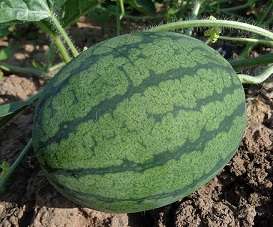
Stage 9: Maturity
Watermelons reach full maturity about a month after initial fruiting, depending on the variety and weather. Several signs indicate that the watermelon is ripe and ready for harvest:
- The tendril in front of the fruit stem dries out and becomes brown.
- Where the fruit contacts the ground, an area on the ground changes from white to a cream or yellowish tint.
- When tapped, the watermelon makes a loud, hollow sound.
Prior to picking your watermelon, it is critical to exercise patience and watch for these maturity indicators. A watermelon that is picked too soon could be unripe and flavorless.
Stage 10: Harvesting
When the watermelons attain the right size and level of maturity, they are picked. To harvest, remove the fruit off the vine using a sharp knife or pruning shears, keeping approximately an inch of stem intact to avoid spoiling.
Watermelon may be kept for up to three weeks in a cool, dark area after harvest or up to two weeks at room temperature. Slice into the luscious, refreshing fruits of summer to finally enjoy the fruits of your effort.
The journey of raising watermelons from seed to plate is, in sum, a rewarding and intriguing one. You’ll be well on your way to a fruitful harvest and the pleasure of enjoying homegrown watermelons by comprehending and nurturing the plants through each of the 10 phases of plant growth.
Watermelon Growing Tips
- Select the right variety: Choose a watermelon variety suitable for your climate and the available space. Smaller or “icebox” varieties are ideal for limited space, while larger varieties thrive in spacious gardens with longer growing seasons.
- Start seeds indoors: In colder climates or shorter growing seasons, start seeds indoors 3-4 weeks before the last frost. This gives the plants a head start and ensures a longer growing period.
- Prepare the soil: Watermelons prefer well-draining soil with a pH between 6.0 and 6.8. Amend the soil with organic matter, such as compost or well-rotted manure, to improve fertility and drainage.
- Plant in full sun: Choose a planting location that receives at least 6 to 8 hours of direct sunlight per day. Watermelons need ample sunlight for optimal growth and fruit development.
- Provide ample space: Space plants about 36 to 60 inches apart in rows, with rows spaced 5 to 8 feet apart, to allow enough room for vine growth and to ensure proper air circulation.
- Water consistently: Watermelons require consistent, moderate moisture. Water deeply and regularly, allowing the soil to dry slightly between waterings. Avoid wetting the foliage to prevent disease.
- Mulch to conserve moisture: Apply organic mulch, such as straw or wood chips, around the base of the plants to help conserve moisture, suppress weeds, and regulate soil temperature.
- Support the vines: Consider using a trellis or other support structure for smaller watermelon varieties to save space and improve air circulation, reducing the risk of disease.
- Monitor for pests and diseases: Regularly inspect plants for pests, such as aphids, cucumber beetles, and squash bugs, as well as diseases like powdery mildew or fusarium wilt. Implement preventive measures and treat problems promptly.
- Harvest at the right time: Harvest watermelons when they are fully ripe, indicated by a dull, matte finish, a creamy yellow spot where the fruit touches the ground, and a deep, hollow sound when tapped.
Common Issues With Watermelons
- Blossom-end rot: A calcium deficiency, irregular watering, or extreme fluctuations in soil moisture can cause blossom-end rot, resulting in dark, sunken spots on the fruit’s blossom end.
- Powdery mildew: This fungal disease causes a white, powdery coating on leaves, which can lead to leaf yellowing, distortion, and defoliation. Ensure proper air circulation and avoid wetting the foliage.
- Fusarium wilt: This soil-borne fungal disease causes wilting, yellowing, and eventual death of the plant. Remove and destroy infected plants, and practice crop rotation to prevent recurrence.
- Aphids: These small, sap-sucking insects can cause curled, distorted leaves and transmit diseases. Use insecticidal soap, neem oil, or introduce beneficial insects like ladybugs to control them.
- Cucumber beetles: These pests can cause significant damage to leaves and transmit bacterial wilt. Use floating row covers, yellow sticky traps, or insecticides approved for cucumber beetles to control their populations.
- Squash bugs: These insects feed on the sap of the plant, causing wilting and death. Handpick and destroy eggs, nymphs, and adults, or use insecticides labeled for squash bugs.
- Inadequate pollination: Insufficient pollination can result in underdeveloped or misshapen fruits. Encourage pollinators, like bees, by planting flowers nearby or gently shaking the plants during the flowering stage to help distribute pollen. You can also hand-pollinate the flowers using a small paintbrush or cotton swab to transfer pollen from male to female flowers.
- Poor fruit set or fruit drop: Extreme temperatures, excessive nitrogen, or irregular watering can lead to poor fruit set or fruit dropping before maturity. Maintain consistent moisture, ensure balanced fertilization, and provide shade during periods of extreme heat.
- Cracked fruit: Overwatering or inconsistent watering can cause the fruit to crack. Maintain a consistent watering schedule and avoid overwatering.
- Sunscald: Intense sunlight can cause sunscald, which appears as white or yellow patches on the fruit’s surface. Provide light shading during periods of extreme heat or intense sunlight.
- Weeds: Weeds compete with watermelon plants for nutrients, water, and sunlight. Keep the planting area weed-free by regularly weeding and using organic mulch to suppress weed growth.
Frequently Asked Questions
How Long Does a Watermelon Take to Grow?
Watermelons typically require 70 to 90 days to grow from seed to harvest. The growth duration depends on the variety and the specific growing conditions, such as temperature, sunlight, and soil nutrients.
What Do Early Watermelons Look Like?
In their early stages, watermelons look like tiny green marbles or peas. As they grow, they gradually develop their distinct striped or mottled patterns, eventually reaching their full size and shape.
What Is a Watermelon’s Lifespan?
A watermelon’s lifespan, from planting the seed to harvesting the fruit, lasts approximately 70 to 90 days. Once harvested, a watermelon can remain fresh for 2 to 3 weeks if stored correctly.
How Long Should a Watermelon Stay on the Vine?
A watermelon should stay on the vine until fully ripened, which typically takes 70 to 90 days. Signs of ripeness include a dull, matte finish, a creamy yellow spot where it touches the ground, and a hollow sound when tapped.
Can You Water Watermelons Too Much?
Yes, overwatering can cause issues for watermelons. Excessive water can lead to fruit cracking, poor flavor, and increased susceptibility to diseases. It is crucial to provide consistent, moderate moisture and allow the soil to dry slightly between waterings.
What Is the Average Weight of a Watermelon?
The average weight of a watermelon varies depending on the variety. Small, personal-sized watermelons can weigh between 2 to 4 pounds, while larger varieties can range from 20 to 25 pounds, with some even reaching up to 35 pounds or more.
How Can You Differentiate Between a Green and Ripe Watermelon?
To differentiate between a green and ripe watermelon, look for a dull, matte finish, a creamy yellow spot where the fruit touches the ground, and a deep, hollow sound when tapped. Green watermelons usually have a shinier surface, a lighter or non-existent ground spot, and a higher-pitched sound when tapped.
How Many Watermelons Do You Get From One Seed?
From one watermelon seed, you can expect to grow one plant. The number of fruits per plant varies depending on the variety and growing conditions, but generally, a healthy watermelon plant can produce two to four watermelons.
Conclusion: The Rewarding Journey of Growing Watermelons
The journey of growing watermelons is one that is full with expectation, excitement, and eventually, fulfillment. Each stage of the process has its own special difficulties and pleasures, from the first sprouts poking through the dirt to the moment you slice into a ripe, luscious fruit. You may experience the thrill of nurturing these delectable fruits from seed to harvest by being aware of the 10 phases of growth and giving them the proper care and attention.
Remember that dedication, patience, and a real passion for the process are essential components for success as you set out on your own watermelon-growing quest. Nothing compares to the satisfaction of biting into a fresh, juicy watermelon that you have grown yourself and realizing that the care and effort you put into it have paid off in the delicious taste of summer.
Why not give it a go then? Begin your journey to grow watermelons and enjoy the feeling of success, the closeness to nature, and the unmistakable pleasure of eating the fruits of your effort. Enjoy your garden.
Related Posts:
Sugar Baby Watermelon – Yield per plant, Calories (Growing, Caring)
Growing Dahlias In Pots – 13 Tips for Success
7 Tough-to-Grow Houseplants that Worthy to Try Out
How to Grow Multiple Heads on Your Ponytail Palm – Care Guide