Replacing the bunk tent canvas on a Shamrock or Roo hybrid camper is an essential maintenance task for ensuring comfort and durability. This guide provides step-by-step instructions to help you replace the bunk canvas effectively.
Understanding the Shamrock/Roo Hybrid Camper Bunk
The bunk tent canvas is a crucial part of your Shamrock or Roo hybrid camper. It keeps you comfortable and protected from the elements. Understanding its role will help you know why a replacement is necessary.
The Role of the Bunk Tent in Hybrid Campers
The bunk tent canvas serves several important functions:
- Protection from Weather: It shields you from rain, wind, and sun. Without it, your camping experience can quickly turn uncomfortable.
- Insulation: A well-maintained canvas helps regulate temperature inside the bunk, keeping it cozy during chilly nights.
- Space Efficiency: The canvas expands the living space of your camper, giving you extra room to relax or sleep.
Common Issues Leading to Canvas Replacement
Over time, your bunk tent canvas can face several challenges. Here are some common issues that might push you to replace it:
- Tears and Rips: Frequent use can lead to wear and tear. A small tear can quickly grow if not addressed.
- Mold and Mildew: If moisture gets trapped, it can lead to unpleasant odors and damage. This is especially problematic in humid climates.
- Fading and Discoloration: Exposure to sunlight can cause the canvas to fade, impacting its appearance and waterproofing ability.
Benefits of Timely Replacement
Replacing your bunk tent canvas on time has several advantages:
Table of Contents
- Enhanced Comfort: A new canvas means better protection from the elements, which leads to a more enjoyable camping experience.
- Improved Longevity: Regular maintenance and timely replacements can extend the life of your camper.
- Resale Value: A camper in good condition, complete with a fresh canvas, retains its value better than one that’s showing signs of wear.
For instance, campers that regularly replace their canvas can expect to enjoy their hybrid camper for many more years. Statistics suggest that well-maintained campers can last well over a decade, making timely replacements a wise investment.
Tools and Materials Needed for Replacement

Replacing the bunk tent canvas on your Shamrock or Roo hybrid camper requires some essential tools and materials. Having everything ready makes the process smoother and easier. Here’s what you’ll need.
Essential Tools for the Job
Gather these tools to get started:
- Cordless Drill: For fastening screws securely.
- Screwdrivers: Both Phillips and flathead for various screws.
- Wrenches: For loosening or tightening bolts.
- Jigsaw: Useful for cutting adjustments in wood.
- Utility Knife: To cut old canvas cleanly.
- Caulking Gun: For applying adhesive caulk.
Recommended Replacement Materials
Here’s a list of materials you’ll need to replace the canvas:
- Replacement Canvas: Purchase directly from Lippert for quality and cost-effectiveness.
- Plywood Paneling: Use this for any structural repairs.
- Lumber Posts: For support if needed.
- Clear Caulk: Loctite Power Grab is recommended for strong adhesion.
- Handles and L-Brackets: For easy setup and stability.
Cost Estimation for Tools and Materials
Here’s a rough cost breakdown to help you budget:
| Item | Estimated Cost |
|---|---|
| Replacement Canvas | $410 |
| Shipping | $46 |
| Cordless Drill | $50 |
| Jigsaw | $60 |
| Caulking Gun | $10 |
| Clear Caulk | $8 |
| Plywood Paneling | $30 |
| Lumber Posts | $20 |
| Handles and L-Brackets | $25 |
Total Estimated Cost: Approximately $700 (depending on existing tools).
DIY vs. Professional Replacement
Deciding between doing it yourself or hiring a pro? Here’s a quick comparison:
| Option | Pros | Cons |
|---|---|---|
| DIY | Cost-effective, rewarding | Time-consuming, requires skills |
| Professional Service | Quick, expert installation | Higher cost, less personal control |
By weighing these options, you can choose the route that fits your budget and comfort level.
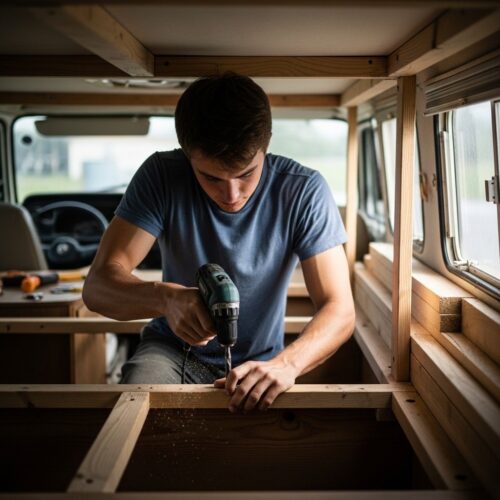
Step-by-Step: Removing the Old Bunk Tent Canvas
Removing the old bunk tent canvas from your Shamrock/Roo hybrid camper can seem daunting, but with the right steps, it’s manageable. Let’s break it down into clear, simple steps to make the process smooth.
Preparation for Canvas Removal
Before you get started, gather your tools. Here’s a quick checklist:
- Screwdriver
- Utility knife
- Caulk remover (or a flathead screwdriver)
- Safety goggles
- Gloves
Make sure you have a clean workspace. This will help prevent any damage to your camper or the new canvas.
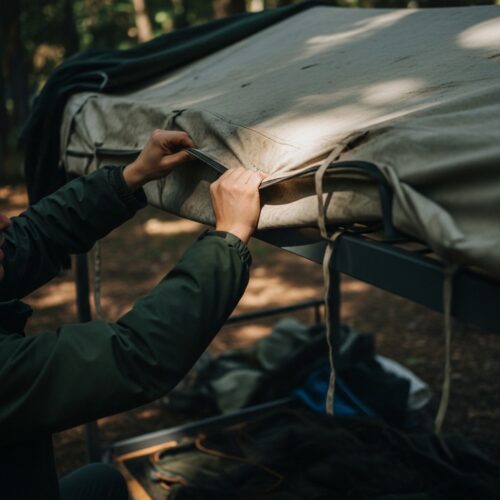
Step-by-Step Removal Process
1. Remove the Screws: Start by locating and unscrewing the screws holding the canvas in place. These are typically found on the bunk door and at the top of the canvas.
2. Detach the Canvas from the Channel: Carefully press the rubber channel away from the camper. The canvas should slide out easily. If it feels stuck, check for any screws you might have missed.
3. Cut the Caulk: Use your utility knife or caulk remover to slice through any caulk securing the canvas. This can be tricky but take your time to avoid damaging the camper.
4. Remove the Canvas: Once the screws and caulk are out, gently pull the canvas away from the camper. If you’re having trouble, ask a friend for help. Having an extra set of hands can make this easier.
5. Clean the Area: After removing the canvas, clean up any leftover caulk. A screwdriver can help you scrape away stubborn bits. Make sure the area is smooth for the new canvas.
Tips for Avoiding Damage During Removal
- Go Slow: Rushing can lead to mistakes. Take your time and double-check each step.
- Use Proper Tools: Using the right tools can prevent damage to your camper. Don’t improvise with tools that aren’t suited for the job.
- Watch for Hidden Screws: Sometimes, screws are hidden under caulk or fabric. Inspect carefully to avoid breaking anything.
- Follow the Manual: If you have the owner’s manual, consult it for specific instructions related to your model.
By following these steps, you’ll have the old bunk tent canvas off in no time, setting you up for a successful replacement. Remember, preparation and patience are key!
Step-by-Step: Installing the New Bunk Tent Canvas
Installing the new bunk tent canvas on your Shamrock or Roo hybrid camper can feel daunting, but it’s totally manageable! With the right approach, you’ll have your camper ready for adventure in no time.
Preparing the New Canvas for Installation
Before jumping into installation, prep work is essential. Here’s what you need to do:
- Inspect the New Canvas: Check for any defects or damages. Make sure it’s the right size for your camper.
- Gather Your Tools: You’ll need a caulk gun, scissors, a screwdriver, and a utility knife. Having everything on hand will save you time.
- Lay Out the Canvas: Spread the new canvas flat to eliminate creases. This helps during installation.
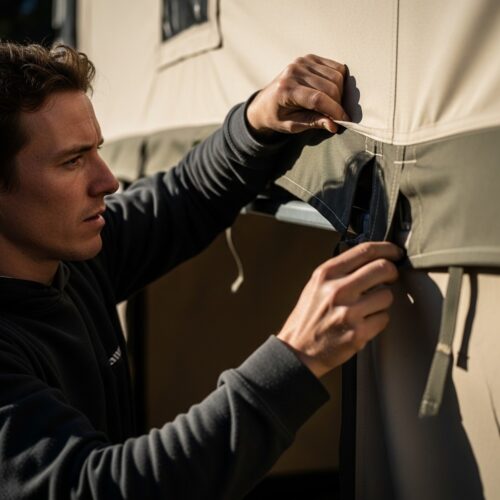
Installation Step-by-Step
Let’s break it down into easy steps:
1. Start at the Top: Begin by attaching the canvas at the top channel. Apply a bead of caulk in the channel first. This seals the area and keeps everything snug.
2. Secure the Sides: Work your way down to the sides, securing the canvas in place. Press it firmly into the channels. Use screws or clips as needed to hold it tight.
3. Finish with the Bottom: Finally, secure the bottom edge. Make sure the canvas is taut but not overstretched. This ensures a clean look and prevents any sagging.
4. Trim Excess Canvas: After everything is secured, trim any excess canvas with your utility knife. Be careful to leave enough material to ensure a good seal.
Sealing and Securing Tips
To ensure your installation lasts, follow these sealing tips:
- Double-Check Seals: After installation, go over all sealed areas with more caulk if necessary. This helps prevent leaks.
- Clean Up: Wipe away any excess caulk before it dries. This keeps everything looking neat and tidy.
- Let It Cure: Allow the caulk to cure for at least 24 hours before using the bunk. This ensures a strong bond.
Quick Checklist for Installation:
- [ ] Inspect the new canvas
- [ ] Gather tools: caulk gun, screws, scissors
- [ ] Start installation from the top
- [ ] Secure sides and bottom
- [ ] Trim excess canvas
- [ ] Double-check seals and clean up
- [ ] Let caulk cure for 24 hours
By following these steps, you’ll have a solid installation that keeps your camper cozy and ready for your next trip!
Maintenance Tips for Longevity of Your Bunk Tent Canvas
Taking care of your new bunk tent canvas is key to extending its lifespan. Regular maintenance can prevent costly repairs down the line and keep your camper cozy for years to come. Here are some essential tips to help you maintain your Shamrock/Roo hybrid camper bunk tent.
Regular Inspection for Wear and Tear
Check your canvas often. Look for signs of wear, like fraying or holes. Inspect the seams and edges where the canvas meets the frame. Catching small issues early can save you from bigger problems later.
- Frequency: Inspect every month during camping season.
- What to Look For:
- Frayed edges
- Loose seams
- Signs of mold or mildew
Cleaning and Care Instructions
Keep your bunk tent canvas clean. Dirt and grime can wear down the material over time. Use a mild soap solution and a soft brush. Avoid harsh chemicals that can damage the fabric.
- Cleaning Steps:
1. Remove any dirt with a soft brush.
2. Mix mild soap with warm water.
3. Gently scrub the canvas with a soft cloth.
4. Rinse thoroughly and allow to air dry completely.
Signs That the Canvas Needs Attention
Be aware of signs that your canvas needs repairs. If you notice leaks when it rains or drafts when it’s windy, it’s time to take action.
- Common Signs:
- Water leaks
- Unpleasant odors (a sign of mold)
- Excessive fading or discoloration
Real-World Example
Consider Jane, a fellow camper. She regularly inspected her bunk tent canvas and caught a small tear early. She patched it up with a simple repair kit. By being proactive, she saved herself from a costly canvas replacement later.
Quick Maintenance Checklist
- [ ] Inspect for wear and tear monthly
- [ ] Clean canvas with mild soap every season
- [ ] Check for leaks before each trip
- [ ] Store the camper in a dry place when not in use
By following these maintenance tips, you can keep your Shamrock/Roo hybrid camper bunk tent in great shape, ensuring many memorable adventures ahead!
Troubleshooting Common Issues During Installation
Replacing the bunk tent canvas on your Shamrock/Roo hybrid camper can be a bit tricky. Here are some common issues you might face during installation and how to tackle them.
Common Installation Issues and Solutions
1. Misaligned Canvas
If the canvas isn’t fitting right, double-check your measurements. Make sure you measured the frame correctly before cutting the new canvas. Use a level to ensure everything is straight.
2. Excess Caulk
Too much caulk can create a mess. Apply it sparingly in the top channel. It should cover the canvas but not ooze out. If you find excess caulk, clean it up promptly with a cloth before it dries.
3. Difficulty with Electrical Components
If you find the electrical components are in the way, disconnect them temporarily. Take pictures of the wiring. This will help you reconnect everything correctly later.
How to Correct Mistakes During Installation
1. If You Cut Canvas Too Short
It happens! If your canvas is too short, you can either buy a new piece or add a fabric extension. Just ensure it’s securely fastened to prevent leaks.
2. If the Canvas is Too Loose
A loose canvas can lead to flapping and wear. You can tighten it by adjusting the tension at the support brackets. Make sure it’s snug but not overly tight.
3. If the Canvas is Ripped During Installation
Don’t panic! If you accidentally tear the new canvas, you can patch it with a repair kit. Cut a small piece of the same material and use a strong adhesive to secure it.
When to Seek Professional Help
If you encounter these scenarios during installation, consider calling in a pro:
- You’re unsure about the electrical components or their disconnection.
- The canvas replacement becomes overwhelming, and you’re losing patience.
- You’re worried about potential leaks after installation.
Quick Troubleshooting Checklist
- [ ] Measure the frame twice before cutting.
- [ ] Apply caulk sparingly to avoid mess.
- [ ] Disconnect electrical components with care.
- [ ] Check for tension and fit before securing.
- [ ] Keep a repair kit handy for accidents.
By keeping these tips and tricks in mind, you can navigate the installation process like a pro!
Frequently Asked Questions
These quick answers cover the most common questions about this topic, including key details, practical tips, and common concerns.
How are bunk beds attached in a Shamrock or Roo hybrid camper?
Bunk beds are typically attached using screws, bolts, or brackets that secure the frame to the camper’s structure. The bunk tent canvas is often secured in channels or with clips that hold it in place. To remove or replace the bunk, you need to unscrew these fasteners carefully to avoid damaging the frame.
Do hybrid campers leak?
Hybrid campers can leak if their seals, seams, or canvas become damaged or worn. Proper installation and maintenance of the bunk tent canvas are crucial to prevent leaks. Regular inspections and timely repairs help keep your camper watertight.
What tools do I need to replace a bunk tent canvas?
You’ll need a utility knife, screwdriver (Phillips and flathead), caulk gun with waterproof sealant, and possibly a drill or jigsaw for structural adjustments. A measuring tape, scissors, and cleaning supplies are also helpful. Using quality tools ensures a smooth replacement process.
How long does it take to replace the bunk tent canvas?
The replacement process typically takes 2 to 4 hours for someone with basic DIY skills. This includes removal, preparation, and installation. If you’re inexperienced or encounter issues, it may take longer. Allow extra time for curing sealants and double-checking seals.
Can I replace the canvas myself or should I hire a professional?
Replacing the bunk tent canvas can be a DIY project if you have basic handyman skills and the right tools. However, professional installation ensures a perfect fit and waterproof seal, especially for complex or older campers. Consider your experience and comfort level before deciding.
What are the signs that my bunk tent canvas needs replacing?
Signs include visible tears, holes, mold, or mildew. Water leaks during rain or drafts when the camper is sealed indicate damage. Fading, discoloration, or sagging fabric also suggest it’s time for a replacement to maintain protection and comfort.
Where can I buy replacement canvas for my Shamrock or Roo camper?
Authorized RV parts dealers and the manufacturer’s website are the best sources. Lippert, the maker of many camper components, offers replacement bunk tent canvases. You can also check specialized RV supply stores online for compatible materials.
How do I maintain my bunk tent canvas?
Regularly inspect for damage and clean with mild soap and water. Avoid harsh chemicals that can degrade the fabric. Keep the canvas dry when not in use, and apply waterproofing treatments periodically to preserve its waterproofing and UV resistance.