Ventilating a crawl space is crucial for maintaining your home’s structure and preventing moisture buildup. This step-by-step guide will walk you through the process, ensuring you install effective ventilation to enhance air circulation and protect against mold and rot.
Understanding the Importance of Crawl Space Ventilation
Crawl space ventilation is vital for your home’s health. Proper ventilation helps control moisture and supports structural integrity. Let’s dive into why this is so important.
Table of Contents
Benefits of Ventilation for Home Integrity
1. Moisture Control: Good ventilation reduces humidity levels. This prevents moisture buildup, which can lead to mold growth and wood rot.
2. Improved Air Quality: Proper airflow keeps the air inside your home fresher. This is crucial, especially if you spend a lot of time indoors.
3. Pest Prevention: A well-ventilated crawl space deters pests like termites and rodents. These critters thrive in damp, stagnant environments.
4. Structural Health: Excess moisture can weaken your home’s foundation. Ventilation helps maintain the integrity of your structure over time.
Consequences of Poor Ventilation
Neglecting crawl space ventilation can lead to significant issues:
- Mold Growth: Studies show that homes with high humidity have a higher risk of mold. Mold can trigger allergies and respiratory problems.
- Structural Damage: Moisture can cause wood to rot. This can lead to costly repairs and decrease your home’s value.
- Increased Energy Costs: Poor ventilation can lead to higher energy bills. Your HVAC system has to work harder to maintain comfortable temperatures.
- Unpleasant Odors: Stagnant air can cause musty smells that linger in your home.
To prevent these issues, consider a Crawl Space Ventilation System Kit. It’s a great way to ensure your crawl space stays dry and healthy. Check Price on Amazon.
By focusing on proper ventilation, you can protect your home and improve your living conditions.
Types of Crawl Space Vents Available
When it comes to venting your crawl space, there are several options to consider. Each type of vent has its own advantages and is suited for different needs. Let’s break them down!
Manual vs. Mechanical Vents
Manual Vents
These vents require your intervention to open and close. They can be a cost-effective solution, but they need regular monitoring.
- Pros: Low cost, simple installation, no electricity needed.
- Cons: Requires manual operation, may be forgotten during seasonal changes.
Mechanical Vents
These vents use fans and dehumidifiers to control airflow automatically. They are more efficient but come with higher upfront costs.
- Pros: Automatic operation, better moisture control, consistent airflow.
- Cons: Higher installation costs, requires electricity, potential maintenance needs.
Choosing the Right Vent for Your Crawl Space
When selecting a vent, consider the following factors:
- Climate: In humid areas, mechanical vents are usually more effective. In drier climates, manual vents can suffice.
- Moisture Levels: If your crawl space is prone to excess moisture, mechanical options may be the way to go.
- Budget: Manual vents are cheaper, but think about long-term savings with mechanical options.
Here’s a quick comparison to help you decide:
| Feature | Manual Vents | Mechanical Vents |
|---|---|---|
| Cost | Low | High |
| Maintenance | Low | Moderate |
| Efficiency | Moderate | High |
| Control | Manual | Automatic |
| Best For | Mild climates | Humid environments |
By understanding these options, you can choose the best ventilation system for your needs. If you’re considering a more comprehensive solution, check out a Crawl Space Ventilation System Kit to keep your space dry and healthy.
Step 1: Assessing Your Crawl Space Needs

Before you start venting your crawl space, you need to assess its current condition. This step is crucial for understanding how much ventilation you really need and what kind of system will work best. Let’s break it down.
Measuring Crawl Space Dimensions
First things first, grab a tape measure. You’ll want to measure the length and width of your crawl space. Don’t forget the height too! Here’s a quick checklist to guide you:
- Length: Measure from one end to the other.
- Width: Measure across the narrowest point.
- Height: Measure from the ground to the underside of the floor above.
Make sure to note these dimensions down. They’ll help you calculate the necessary airflow later.
Calculating Ventilation Needs
Once you have your measurements, it’s time to figure out your ventilation needs. This involves assessing the moisture levels in your crawl space. Here’s how to do it:
1. Check for Moisture:
- Look for signs of moisture, such as dampness, stains, or mold.
- Use a moisture meter for accurate readings. Ideally, levels should be below 60%.
2. Determine Airflow Requirements:
- A general rule of thumb is to have one square foot of venting for every 150 square feet of crawl space.
- If you have high humidity, consider increasing the venting.
3. Consider Local Building Codes:
- Check your local codes for specific requirements on crawl space ventilation. Compliance is key to avoid future issues.
Checklist for Assessment
Here’s a handy checklist to ensure you don’t miss anything while assessing your crawl space:
- [ ] Measured dimensions (length, width, height)
- [ ] Moisture level checked (below 60% is ideal)
- [ ] Ventilation area calculated (1 sq. ft. per 150 sq. ft.)
- [ ] Local building codes reviewed
- [ ] Signs of pests or mold observed
Taking the time to assess your crawl space properly sets the stage for effective ventilation. If you’re leaning towards a complete setup, consider a Crawl Space Ventilation System Kit for a hassle-free solution.
Step 2: Preparing for Installation

Before diving into the installation of your crawl space vents, it’s crucial to prepare properly. This ensures a smooth process and helps you avoid common pitfalls. Let’s gather the tools and gear you’ll need, and talk about important safety precautions.
Tools Required for Installation
Here’s a handy list of tools you’ll need for the job:
- Circular Saw: Essential for cutting through concrete or masonry.
- Hammer Drill: Great for making holes in tough materials.
- Concrete Chisels: Useful for fine-tuning the opening.
- Sledgehammer: Helps with breaking up larger pieces of concrete if needed.
- Measuring Tape: For accurate measurements of vent placement.
- Level: Ensures your vents are installed straight.
- Utility Knife: Handy for cutting any insulation or vapor barriers.
Getting the right tools beforehand can save you time and frustration during installation.
Safety Gear and Precautions
Safety is key when working in your crawl space. Here’s what you should wear:
- Respirator: Protects against dust and mold spores.
- Safety Glasses: Shields your eyes from debris.
- Gloves: Keeps your hands safe from sharp tools and materials.
- Hard Hat: Useful if there’s a chance of overhead hazards.
Important Safety Tips:
- Work with a buddy: It’s always safer to have someone with you.
- Check for electrical wires or plumbing: Before cutting into walls, ensure you’re not hitting any hidden systems.
- Ventilate the area: If possible, open windows and doors to let fresh air in.
Taking these precautions ensures you stay safe while installing your crawl space vents. Remember, it’s better to be over-prepared than to face an accident!
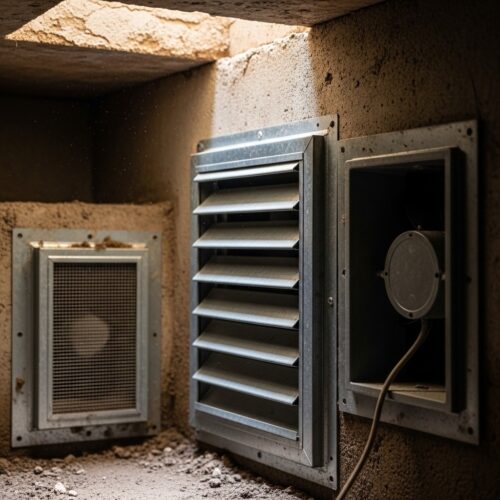
Step 3: Installing the Vents
Now that your crawl space is prepped and ready, it’s time to get those vents installed. Proper installation will help control moisture and keep your home healthy. Let’s dive into the steps!
Drilling and Placement Techniques
1. Mark the Vent Locations: Decide where to place the vents. Typically, vents should be installed along the foundation walls, spaced evenly. Use a pencil to mark the spots.
2. Choose the Right Tools: You’ll need a drill, a masonry bit (if working with concrete), a saw, and a measuring tape. Having the right tools makes the job easier.
3. Drill the Holes: Start drilling at your marked locations. If you’re drilling into concrete, make sure to use a hammer drill for better results. Keep the drill steady and apply consistent pressure.
4. Cut the Openings: Use a saw to carefully cut out the openings for your vents. If you’re using foundation vents, ensure the opening matches the size of the vent frame.
5. Clean the Edges: After cutting, clean the edges of the openings. This will help the vents fit snugly and increase durability.
Sealing and Finishing Touches
1. Insert the Vents: Place the vent frame into the opening. Ensure it sits flush against the wall. If the fit is loose, you may need to adjust the opening.
2. Seal the Gaps: Use masonry-grade caulk around the edges of the vent frame. This prevents air and moisture from sneaking in. A good seal is crucial for effective ventilation.
3. Check Alignment: Make sure the vent is aligned properly. It should open to allow airflow but be secure enough to stay in place.
4. Install Vent Covers: If your vents come with covers, attach these according to the manufacturer’s instructions. This adds an extra layer of protection.
5. Final Inspection: Double-check each vent to ensure they are properly sealed and secure. Look for any gaps or misalignments and fix them as needed.
Common Installation Mistakes to Avoid
- Wrong Size Vents: Using vents that are too small or too large can hinder airflow. Always measure accurately.
- Neglecting Sealing: Skipping the sealing step can lead to moisture issues down the line.
- Ignoring Building Codes: Familiarize yourself with local building codes for crawl space ventilation. This ensures safety and compliance.
By following these steps, you’ll ensure your crawl space is well-ventilated. Good ventilation keeps moisture at bay and helps prevent mold growth. Happy venting!
Maintaining Your Crawl Space Vents
Regular maintenance is key to ensuring your crawl space vents work effectively year-round. Without proper care, you could face moisture issues, leading to mold and structural damage.
Regular Inspection Guidelines
Inspect your crawl space vents at least twice a year. Here’s a quick checklist to help you stay on top of things:
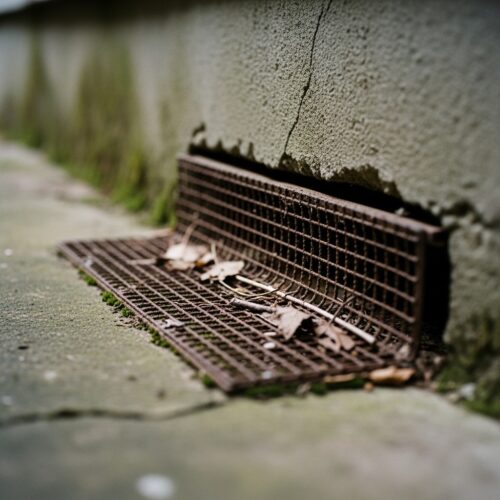
- Check for Blockages: Look for leaves, dirt, or debris around your vents. Clear any obstructions to maintain airflow.
- Inspect Screens: Ensure the screening is intact. Damaged screens can let in pests, which you definitely want to avoid.
- Look for Rot or Rust: Check the vents for signs of wear. Replace any that are rusted or rotting.
- Test Operation: Manually open and close any manual vents. Make sure they move smoothly and seal properly.
Seasonal Vent Management Tips
Adjusting your crawl space vents with the seasons can help control moisture levels. Here’s how to manage them throughout the year:
- Winter: Close your vents to prevent cold air from causing pipes to freeze. This is especially crucial in temperatures below 40℉.
- Spring and Fall: Open vents during these milder months to promote airflow. This helps reduce humidity as temperatures rise.
- Summer: If humidity levels rise, keep vents open to encourage air circulation. This is vital to prevent mold growth.
Maintenance Schedule Template
Creating a maintenance schedule can help you remember when to check your vents. Here’s a simple outline:
| Month | Task |
|---|---|
| January | Close vents for winter |
| April | Inspect and clean vents |
| July | Open vents for summer air circulation |
| October | Prepare for winter by closing vents |
By following these guidelines, you can ensure your crawl space vents are working their best. Regular checks and seasonal adjustments will help keep your home healthy and dry.
Frequently Asked Questions
These quick answers cover the most common questions about this topic, including key details, practical tips, and common concerns.
What is the best way to vent a crawl space?
The most effective method combines proper vent placement with adequate size and airflow. Install foundation vents along the perimeter walls, ensuring they are evenly spaced and meet local building codes. Consider using adjustable or vented covers to control airflow seasonally. Mechanical systems like exhaust fans or dehumidifiers can supplement natural vents for better moisture control.
What happens if a crawl space is not vented?
Without proper ventilation, moisture can accumulate, leading to mold growth, wood rot, and structural damage. Stagnant, damp air creates an ideal environment for pests and mold spores. Over time, these issues can weaken your home’s foundation and increase energy costs due to poor insulation.
What is the code for crawl space vents?
Building codes typically require vents to provide sufficient airflow to prevent moisture buildup. For example, many codes specify one square foot of vent opening per 150 square feet of crawl space area. The vents must be operable and secure, with screens to prevent pest entry. Always check your local regulations, as requirements can vary.
Should you cover crawl space vents in winter?
Yes, in cold climates, it’s advisable to close or block vents during winter to prevent cold air from entering and causing pipes to freeze. However, in warmer months, opening vents helps reduce humidity and improve air circulation. Seasonal vent management helps balance moisture control and temperature regulation.
How often should crawl space vents be checked?
Inspect your vents at least twice a year—preferably in spring and fall. Check for blockages, damage, or signs of pests. Ensure vents open and close properly, and reseal or repair any damaged screens or seals. Regular maintenance keeps airflow optimal and prevents moisture issues.
What types of vents are best for crawl spaces?
Vents can be manual or mechanical. Manual vents are simple, cost-effective, and require manual operation. Mechanical vents, like exhaust fans or dehumidifiers, automate airflow and moisture control, especially in humid climates. The best choice depends on your climate, moisture levels, and budget.
How do I know if my crawl space is properly vented?
Signs of proper venting include low humidity levels, absence of mold or musty odors, and dry wood surfaces. Use a moisture meter to check humidity; ideally, it should stay below 60%. Visual inspections for mold, pests, or dampness also help determine if your ventilation system is effective.
What should readers know about visual diagrams for vent placement?
Visual diagrams help clarify where to install vents for maximum effectiveness. They show optimal spacing along foundation walls and proper sizing. Diagrams also illustrate how to avoid blocking vents with debris or insulation, ensuring consistent airflow across the crawl space.