Crawl space encapsulation is a method of sealing off the crawl space in your home to control moisture, improve air quality, and protect against mold and pests. This guide explores the benefits and drawbacks of encapsulation, helping you decide if it’s the right choice for your home.
Understanding Crawl Space Encapsulation
Crawl space encapsulation is an effective way to seal off your crawl space. It focuses on controlling moisture, improving air quality, and protecting your home from pests and mold.
Table of Contents
What is Crawl Space Encapsulation?
Crawl space encapsulation involves covering the floors and walls of your crawl space with a thick plastic barrier. This barrier is often referred to as a vapor barrier. It prevents moisture from seeping in and keeps the area dry.
Purpose of Encapsulation
The main goals of crawl space encapsulation include:
- Moisture Control: By sealing off the crawl space, you prevent water vapor from entering. This reduces the risk of mold and mildew growth.
- Improved Air Quality: A dry crawl space leads to better indoor air quality. It helps keep allergens and pollutants at bay.
- Pest Prevention: A sealed space makes it harder for pests to enter your home. No more uninvited guests like rodents and insects!
The Encapsulation Process
The encapsulation process typically involves several steps:
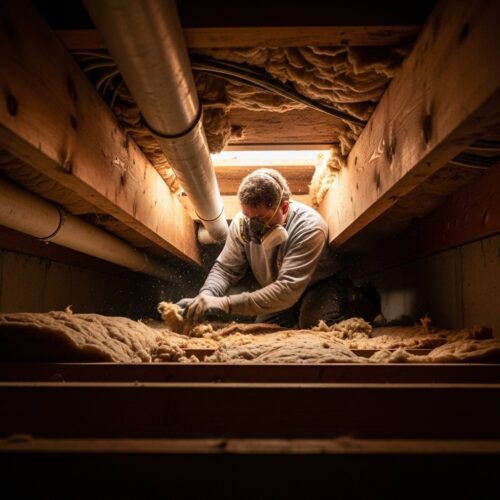
1. Cleaning the Crawl Space: Remove any debris, mold, or old insulation.
2. Repairing Issues: Fix any existing moisture problems or structural concerns.
3. Installing a Vapor Barrier: Lay down a heavy-duty plastic sheet on the ground and up the walls. This is your main defense against moisture.
4. Insulating: Add insulation to walls if needed. This helps maintain temperature and further reduces moisture.
5. Ventilation: Ensure proper ventilation. This can include installing a dehumidifier to manage humidity levels effectively.
Key Takeaway
Crawl space encapsulation is not just about sealing off the area. It’s about creating a healthier living environment. By keeping moisture out, you save yourself from potential mold issues and improve the overall air quality in your home. If you’re considering this for your home, weigh the benefits against the investment to find what works best for you.
Benefits of Crawl Space Encapsulation
Crawl space encapsulation offers several advantages that can significantly enhance your home. From improving air quality to controlling moisture, the benefits are worth considering.
Improved Air Quality
One of the biggest perks of crawl space encapsulation is better air quality. When you seal off your crawl space, you prevent outside air filled with dust, allergens, and mold spores from entering your home. This can lead to a healthier living environment.
- Less Dust and Allergens: A sealed crawl space keeps dust and allergens at bay.
- Healthier Home: Improved air quality can reduce health issues linked to mold exposure, such as respiratory problems and allergies.
Moisture Control and Mold Prevention
Moisture is the enemy of your crawl space. High humidity can lead to mold growth, which can damage your home and harm your health. Encapsulation effectively controls moisture levels.
- Vapor Barrier Installation: A vapor barrier helps keep moisture from the ground from seeping in.
- Prevent Mold Growth: Keeping humidity low stops mold before it starts. Did you know that mold can grow in as little as 24-48 hours if conditions are right? Encapsulation helps avoid that.
Enhanced Energy Efficiency
Encapsulating your crawl space can also boost your home’s energy efficiency. By controlling temperature and humidity, your HVAC system doesn’t have to work as hard.
- Lower Energy Bills: A well-sealed crawl space can lead to savings on heating and cooling costs.
- Consistent Temperature: Encapsulation keeps your home at a more stable temperature, making it more comfortable year-round.
Quick Comparison of Benefits
| Benefit | Description |
|---|---|
| Improved Air Quality | Reduces dust and allergens, improving health. |
| Moisture Control | Prevents mold growth and structural damage. |
| Enhanced Energy Efficiency | Lowers energy bills and provides stable temperatures. |
Considering these benefits, crawl space encapsulation can be a smart investment for your home. It boosts comfort, health, and even your wallet in the long run.
Drawbacks and Considerations of Crawl Space Encapsulation

Crawl space encapsulation offers many benefits, but it’s not without its drawbacks. Here, we’ll explore some of the potential issues you might face, including costs and installation challenges.
Initial Costs and Long-Term Investment
One of the biggest hurdles is the cost. Encapsulation can range from $1,500 to $15,000, depending on various factors like size and condition. Here’s a quick look at the costs involved:
| Crawl Space Size | Estimated Cost |
|---|---|
| Small (< 1,000 sq ft) | $1,500 – $5,000 |
| Medium (1,000 – 2,000 sq ft) | $5,000 – $10,000 |
| Large (> 2,000 sq ft) | $10,000 – $15,000 |
While this is a significant investment, many homeowners find that the benefits—like improved air quality and energy efficiency—make it worthwhile over time.
Common Installation Pitfalls
Installing a crawl space encapsulation system isn’t a walk in the park. Here are some common issues to keep in mind:
- Structural Concerns: Your crawl space must be in good condition before encapsulation. If not, repairs can add to your costs.
- Material Quality: Using subpar materials can lead to problems. It’s crucial to choose high-quality vapor barriers and insulation.
- Moisture Management: Proper drainage is key. Without it, moisture can build up, leading to mold and structural damage.
Maintenance Challenges
After installation, maintenance is essential to keep your crawl space in top shape. Here are some tips:
- Regular Inspections: Check your crawl space at least twice a year. Look for any signs of moisture or damage.
- HVAC Efficiency: If you have an older heating system, encapsulation may limit airflow. You might need to upgrade your HVAC for optimal performance.
- Pest Control: A sealed crawl space can deter pests, but it’s still wise to monitor for any unwanted guests.
By being aware of these drawbacks, you can make a more informed decision about whether crawl space encapsulation is right for you.
The Installation Process for Crawl Space Encapsulation

Encapsulating your crawl space involves several steps. It’s important to do it right to ensure moisture control and air quality improvement. Here’s a simple breakdown of the process.
Step-by-Step Guide to Installation
1. Preparation
- Clear the Area: Remove any debris, old insulation, or any items stored in the crawl space.
- Inspect for Damage: Check for leaks, mold, or structural issues. Make necessary repairs before proceeding.
- Dry the Space: Ensure the crawl space is dry. You may need to use fans or dehumidifiers.
2. Install Vapor Barrier
- Select Material: Choose a thick, durable vapor barrier (at least 6 mil).
- Cover the Ground: Lay the barrier across the entire ground area. Overlap seams by at least 12 inches and seal them with tape.
- Extend Up Walls: The barrier should extend up the walls of the crawl space. Seal it with tape or adhesive.
3. Insulation
- Choose Insulation Type: Use foam board or fiberglass insulation. Foam board is often preferred for its moisture resistance.
- Install Insulation: Attach insulation to the walls, ensuring it fits snugly. Use adhesive or mechanical fasteners to secure it.
4. Conditioning
- Seal Vents: If your crawl space has vents, seal them to prevent outside air from entering.
- Install a Dehumidifier: Consider adding a dehumidifier to maintain optimal moisture levels.
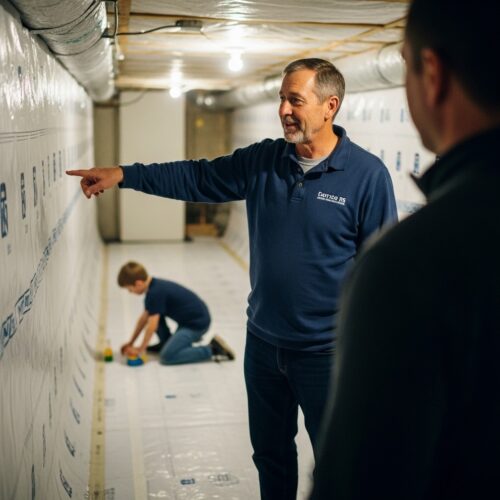
DIY vs. Professional Installation Considerations
Deciding whether to tackle this project yourself or hire professionals? Here are some points to think about:
- DIY Pros:
- Cost savings on labor.
- Control over every step of the process.
- DIY Cons:
- Requires physical labor and some construction knowledge.
- Risk of improper installation leading to future issues.
- Professional Pros:
- Expertise ensures the job is done correctly.
- May offer warranties on their work.
- Professional Cons:
- Higher upfront costs.
- Less control over materials and processes.
DIY Encapsulation Checklist
If you decide to go the DIY route, here’s a handy checklist to keep you on track:
- [ ] Clear the crawl space of debris.
- [ ] Inspect for damage and make repairs.
- [ ] Dry the crawl space thoroughly.
- [ ] Purchase a thick vapor barrier.
- [ ] Lay the vapor barrier and seal seams.
- [ ] Choose and install insulation material.
- [ ] Seal any vents and consider a dehumidifier.
Following these steps will help you successfully encapsulate your crawl space and enjoy the benefits of improved air quality and moisture control.
Cost Analysis for Crawl Space Encapsulation
Understanding the costs involved in crawl space encapsulation is crucial for homeowners. It helps in budgeting and making informed decisions. Let’s break down the average costs and what factors influence these prices.
Average Costs for Various Crawl Space Sizes
The cost of encapsulating a crawl space can vary based on its size. Here’s a quick glance at average costs for different sizes:
| Crawl Space Size | Estimated Cost |
|---|---|
| Small (up to 1,000 sq ft) | $2,000 – $4,000 |
| Medium (1,000 – 1,500 sq ft) | $4,000 – $6,000 |
| Large (1,500 – 2,500 sq ft) | $6,000 – $10,000 |
| Extra Large (over 2,500 sq ft) | $10,000 – $15,000 |
These figures give a ballpark idea, but actual costs can vary.
Factors Influencing Costs
Several factors come into play when determining the cost of encapsulating your crawl space:
- Size of the Crawl Space: Larger spaces naturally cost more.
- Condition of the Space: If repairs are needed, this will increase costs.
- Materials Used: Quality of vapor barriers and insulation materials affects pricing.
- Labor Costs: Hiring professionals can add significantly to the total.
- Permits: Depending on your area, permits might be required, costing $100 to $250.
- Additional Features: Items like sump pumps for drainage can drive up costs.
Real-Life Example
Imagine you have a 1,200 sq ft crawl space in decent condition. You opt for professional installation with mid-range materials. Your total could land around $5,500. However, if you DIY, you might manage to do it for about $2,500 with careful planning and material selection.
By understanding these costs and factors, you can better evaluate whether encapsulation is the right choice for your home.
Maintenance and Longevity of Encapsulated Crawl Spaces
Keeping your encapsulated crawl space in tip-top shape is crucial. Regular maintenance can prevent issues down the line and ensure your home stays healthy and safe. Here’s what you need to know.
Essential Maintenance Tasks
1. Inspect Regularly: Check your crawl space at least twice a year. Look for signs of moisture, mold, or pest activity.
2. Monitor Humidity Levels: Use a hygrometer to keep track of humidity. Aim for levels between 30-60%.
3. Check the Vapor Barrier: Ensure the vapor barrier is intact and not damaged. Repair any tears promptly.
4. Clean the Space: Remove debris and any old insulation. A clean space discourages pests and mold.
5. Maintain Dehumidifiers: If you have a dehumidifier, change filters regularly and check that it’s functioning well.
Signs Your Encapsulated Crawl Space Needs Attention
Keep an eye out for these warning signs:
- Increased Humidity: If humidity rises above 60%, it’s time to investigate.
- Mold Growth: Any visible mold is a red flag. Address it immediately.
- Pest Infestations: Rodents or insects are unwanted guests. Take action quickly.
- Unpleasant Odors: Musty smells can indicate moisture problems. Don’t ignore them.
Seasonal Maintenance Checklist
Here’s a handy checklist to guide your seasonal maintenance:
| Season | Task |
|---|---|
| Spring | Inspect for winter damage. |
| Summer | Monitor humidity; clean the area. |
| Fall | Check vapor barrier; prepare for winter. |
| Winter | Ensure dehumidifier is working; inspect for pests. |
By following these guidelines, you can keep your encapsulated crawl space healthy and functional for years to come.
Frequently Asked Questions
These quick answers cover the most common questions about this topic, including key details, practical tips, and common concerns.
What are the negatives of crawl space encapsulation?
While encapsulation offers many benefits, it also has some drawbacks. The initial cost can be high, especially for larger spaces or complex setups. Poor installation or low-quality materials may lead to moisture problems or mold growth over time. Additionally, if your crawl space has existing structural issues or poor drainage, encapsulation alone won’t fix those problems and could even hide underlying damage. Regular maintenance is essential to prevent issues, which can add to long-term costs and effort.
How much does it cost to encapsulate a 1500 sq ft crawl space?
The average cost to encapsulate a 1500 sq ft crawl space typically ranges from $4,000 to $8,000 when done professionally. Factors influencing the price include the condition of the space, local labor rates, and the materials chosen. Additional repairs or upgrades, such as sump pumps or upgraded insulation, can increase costs. It’s best to get multiple quotes from local contractors to find a price tailored to your specific needs.
What are the disadvantages of encapsulation?
Encapsulation can be expensive and requires ongoing maintenance. If not installed properly, it might trap moisture or cause mold issues. It may also limit airflow if vents are sealed without proper ventilation systems, leading to humidity buildup. Additionally, in regions with high water tables or poor drainage, encapsulation alone may not prevent water intrusion, requiring extra drainage solutions. DIY projects risk improper installation, which can lead to costly problems.
How long does a crawlspace encapsulation last?
With proper installation and maintenance, a crawl space encapsulation system can last 15 to 25 years or more. The lifespan depends on the quality of materials used, environmental conditions, and how well the space is maintained. Regular inspections, prompt repairs of tears or damage, and controlling humidity help extend the system’s durability. Over time, some materials may need replacement or upgrades to ensure continued effectiveness.
Can I encapsulate my crawl space myself?
Yes, experienced homeowners with construction or DIY skills can attempt encapsulation. However, it requires careful planning, proper materials, and attention to detail. Mistakes like improper sealing, inadequate vapor barrier installation, or neglecting drainage issues can cause problems later. For most homeowners, hiring a professional ensures the system is correctly installed, maximizing benefits and avoiding costly errors.
What materials are needed for crawl space encapsulation?
Essential materials include a heavy-duty vapor barrier (at least 6 mil thick), insulation (foam board or fiberglass), sealing tape, and possibly a dehumidifier. You may also need repair materials for existing damage, vents covers, and fasteners. High-quality, moisture-resistant materials improve longevity and effectiveness. Contractors often recommend durable, mold-resistant options for long-term performance.
How does encapsulation affect home energy efficiency?
Encapsulation helps regulate temperature and humidity in your home, reducing the workload on your HVAC system. A sealed crawl space prevents conditioned air from escaping and outside air from entering, leading to lower energy bills. It also minimizes temperature fluctuations, making your home more comfortable year-round. Overall, proper encapsulation can improve your home’s energy efficiency significantly.
What maintenance is required after encapsulation?
Post-encapsulation, regular inspections are key. Check for tears in the vapor barrier, mold, pests, or signs of moisture buildup. Keep humidity levels between 30-60% using dehumidifiers if needed. Clear debris and ensure ventilation systems are functioning properly. Address any issues promptly to prevent damage and maintain the system’s effectiveness over time.