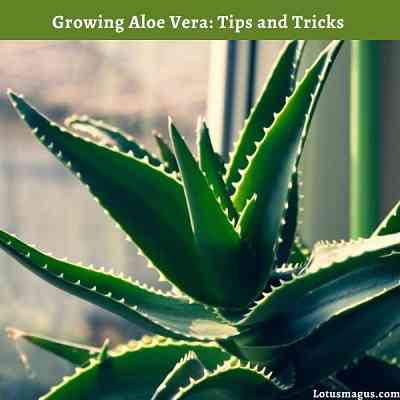
Growing Aloe Vera has been my hobby for the past few years, and I’m excited to share what I’ve learned with others who are interested in trying it out themselves. With that being said, I understand that starting your own Aloe Vera plantation can seem daunting. That’s why I wanted to create this beginner’s guide – to give you the tips and tricks you’ll need to ensure success. Here we go!
What is Aloe Vera?
I’m sure you’ve heard the buzz about aloe vera and all its benefits. So, what is it? Aloe vera is an evergreen succulent, meaning it retains water and stores it in its leaves. The plant grows wild in tropical climates but these days it is widely cultivated all over the world. In addition to being a popular houseplant, aloe vera has a huge range of uses, from beauty products to medicinal treatments. Its healing properties have been known for centuries, so why not grow your own aloe vera plant?
Table of Contents
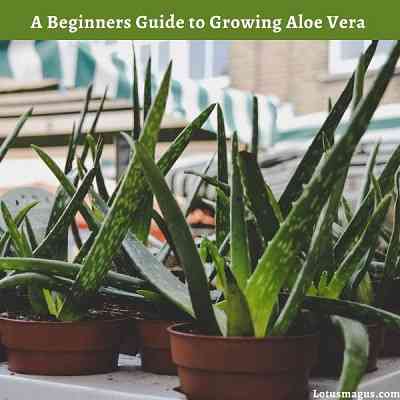
Aloe vera plants may take some effort to get started, but the end result can be extremely rewarding. That said, there are a few tips that you should keep in mind when starting out with aloe vera planting:
- First and foremost, choose a potting container that has drainage holes at the bottom.
- Aloe vera plants prefer to be rootbound, with lots of space for their roots to spread out down into the soil beneath them.
- You’ll also want to make sure your chosen container gets good sunlight and enough water – both are necessary for an aloe plant’s health and growth.
Benefits of Growing Aloe Vera
As a beginner, you’ll soon discover the many benefits of growing Aloe Vera. For starters, aloe vera is an easy-to-care for and fast-growing plant that’s practically maintenance free. Not to mention, it’s a great indoor air purifier, as it attempts to remove toxins and other pollutants through the natural cleaning process. Aloe plants are also quite stylish; the fleshy and succulent leaves of the aloe add a beautiful touch to any home décor style.
Another fantastic benefit of growing Aloe Vera is its medicinal properties; its gel-like leaves contain many vitamins and minerals to help treat burns or reduce inflammation and swelling. In fact, some people even swear by rubbing aloe gel directly onto their skin as a moisturizing agent!
Most importantly though, when planted in an appropriate pot or indoors, aloes do not require much attention: they are very low maintenance plants that will thrive with a few simple guidelines in place. With our beginner’s guide on how to grow Aloe Vera long term, you will be able to reap these many wonderful benefits.
Choosing the Right Aloe Vera Plant
When embarking on an aloe vera growing journey, the first step is to choose the right kind of aloe vera plant. Not all plants are equal, and some can end up being more challenging than others. In this section, I’m going to give you my tips and tricks for choosing the best aloe vera plant for your needs.
I’ll also explain how to spot a healthy plant and the types of pots that are the most suitable for growing aloe vera.
Types of Aloe Vera Plants
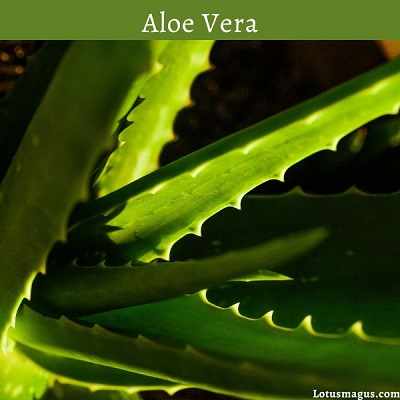
Aloe Vera is an incredibly versatile plant that’s been used by humans for hundreds of years. It has become a popular houseplant in recent years but Aloe Vera comes in many varieties and it can be a bit overwhelming to make the right choice. Before buying an Aloe Vera, it’s important to understand the different types of plants available, their characteristics, and when it is best to use each type.
- Short-Leafed Aloe Vera: Short-leafed Aloe Veras are usually the smallest of all aloes and can reach about 8 inches in length. They have thick, fleshy leaves with serrated edges and bumps on the tips of their leaves. They prefer bright light, but not direct sunlight and need to be watered every two weeks or so during its growing season (spring & summer).
- Taller Leafed Aloe: Taller leafed aloes look similar to short-leafed varieties but they can reach up to three feet in height with long, slender leaves. This type of Aloe needs plenty of direct sunlight but requires less frequent watering than short-leaved varieties do – once every three weeks should be enough during its growing season (spring & summer).
- Tree Aloe: Tree aloes are larger plants that reach up to five feet tall with thick trunks and large serrated leaves that can span a foot long! These aloes need plenty of direct sunlight and should only be watered when the soil appears dry. They also require more fertilizer than smaller varieties do so it’s important to keep them fed during their growing season (spring & summer).
- Foxtail/Cream Colored/Yellowish “Barb Plus” Aloes: Foxtail, cream colored or yellowish “Barb Plus” aloes are known for their interesting appearance – they look like a cross between a cactus and an aloe plant! These plants require more water than other types – weekly watering is recommended during the spring & summer months along with partial shade instead of full sun exposure.
Knowing these details about each type will help ensure you choose an Aloe Vera plant best suited for your environment ensuring your new plant thrives!
Where to Buy Aloe Vera Plants
When looking to buy an Aloe Vera plant, look for stores that specialize in selling plants and gardening supplies. Many local nurseries and larger natural food stores such as Whole Foods Market will have an ample selection. Alternatively, you may choose to purchase seeds from a seed catalog or online supplier and start your own Aloe Vera garden from scratch.
In either case, ask for help from the experts at the store in order to make sure you’re getting the best quality Aloe Vera plants available. The tell-tale signs of good health are a solid stem, vivid-looking leaves (not wilted), and preferably one with several offshoots already evident. Make sure not to buy any Aloe plants with yellow or brown spots on the leaves – this is a sign of disease or pests that can eat away at the plant’s health over time.
Once you have chosen an ideal-looking plant, take some time at home to properly pot it in well draining soil along with proper amounts of sunlight and water according to its needs. You should also confirm that your chosen location doesn’t get direct sunlight all day long as too much sun could harm your Aloe Vera plant over time due to leaf scorching. Generally speaking, a south facing window is a great spot for providing enough direct sunlight without being too excessive – 6-8 hours daily should be just enough!
Preparing Your Aloe Vera for Planting
If you’re looking to start growing your own Aloe Vera, you’ve come to the right place! Planting Aloe Vera is a great way to not only add a unique aesthetic to your home, but also to benefit from its many properties. Before you start planting though, there are some steps you’ll need to take to prepare your Aloe Vera. In this section, I’m going to walk you through everything you’ll need to know to ensure your Aloe Vera is ready to go. Let’s get started!
Potting Soil
When you have your pot ready to go and your planting container, you’ll be needing the perfect soil mix to optimize the growth and health of your aloe vera. Aloe vera thrives in well-drained soil that is slightly acidic. The ideal soil mix should contain three parts fast-draining soil, one part organic matter, with a pinch of balanced fertilizer for extra nutrients if desired. Poor quality potting soil can stunt aloe vera growth and make it prone to food poisoning; therefore, always check for proper drainage before purchasing a potting mix.
You can also make your own mixture from equal parts peat moss, perlite or sand, and builder’s sand—this will help with drainage too. If you use this homemade blend rather than store-bought mixes, it’s recommended that you add a tiny bit of an all-purpose fertilizer such as 20-20-20. Finally, add a layer of clay shards in the bottom to further promote drainage and aeration while protecting root systems from rot damage.
Planting Containers
The type of plant container you choose for planting your aloe vera will depend on the number of plants you want to grow and your available space. Smaller pots are perfectly fine for one or two plants, but bear in mind that aloe has shallow roots, so it will need a pot with good drainage. The ideal size is between 4” and 6” in diameter.
Terracotta or plastic containers tend to be the most popular options for growing aloe vera. Terracotta will activate evaporation that helps keep soil dry at the surface, and it also feels more natural when used outdoors. However, plastic containers are easier to transport and are more durable than terracotta. Whichever type of container you choose, be sure to check the bottom for drainage holes before planting your aloe vera.
Planting and Caring for Your Aloe Vera
Planting and properly caring for your Aloe Vera is one of the most important steps in successfully growing this plant. Proper care involves water, soil, sunshine and temperature, so it is important to know the ideal conditions for your Aloe Vera to thrive. Knowing the basics of care and how to properly take care of your Aloe Vera will help ensure that it continues to grow and produce strong, healthy leaves.
Here are the steps to follow for proper Aloe Vera care:
- Provide the right amount of water.
- Use the right type of soil.
- Ensure adequate sunlight.
- Maintain the right temperature.
Planting Your Aloe Vera
Planting your aloe vera is easy and can be done with a few simple steps. You will need to make sure you have the right space and soil type for the plant to thrive.
Choosing the right pot: Aloe vera is best established in a pot so it’s recommended to select one that has drainage holes. The size of the pot should be around 4-6 inches deep, depending on the size of your aloe vera cutting or offsets.
Preparing the soil: Fill your pot with a quality cactus mix or regular potting soil infused with pumice or perlite to improve drainage. Water should drain quickly from your pot, as soggy roots can lead to diseases, fungi, and root rot in plants like Aloe Vera. It’s important to give it enough space for root growth as well as plenty of nutrients such as compost, manure, worm casts and/or controlled-release fertilizers (for young aloe).
Transplanting: To transplant your aloe vera into its new home first use a pair of scissors or pruning shears wrap them in alcohol wipes then use them to carefully snip off excess offshoots from the mother plant (and some roots if any remain attached). Then place these into the new pots filled with prepared soil and lightly tamp it down around them. Water your planters regularly -though not over-watering! – and make sure they get enough sun, but not too much or too little!
Watering and Fertilizing
Watering and fertilizing your Aloe Vera plants moderately are both important steps in keeping your plants healthy.
For watering, the general rule is to allow the soil to dry out between waterings. To water, administer a thorough soaking and be sure to let the excess water drain from the pot or container. You may need to water more often during hot or dry weather, but as plants grow bigger, they will also become more tolerant of lower moisture levels. If possible, use rainwater for your plants – it’s believed that tap water can affect Aloe Vera’s flavor (depending on your area).
Fertilizing should be done
- once a month in warmer months
- every three months in chillier ones.
I usually opt for a commercially available balanced fertilizer but those with specific ingredients such as seaweed extract can also be used. Be sure not to over-fertilize as too much nitrogen in the soil can cause harm to your Aloe Vera’s leaves and roots.
Sunlight Requirements
Aloe vera loves a lot of bright light from the sun but not direct sunlight. The ideal place to put an aloe vera plant is near a south-facing window, where it will get the necessary amount of indirect sunlight. However, during the summer take your aloe into partial shade and keep away from direct sunlight during that time. Otherwise, you may scorch your leaves and damage your plant.
The direct light can cause sunburns and will cause the aloe’s leaves to bleach or crisp up.
Look for signs of dehydration such as curled leaves slumping downwards—this is a tell-tale sign that your aloe might need more sunshine to stay healthy! An aloe’s typical green color should be bright and vivid while its spines flexible; if it looks dull in color or brittle its time to move it closer to some gentle sunshine again!
Common Problems and Solutions
As someone new to growing aloe vera, I understand the struggles of finding a good balance between proper maintenance and not overwatering the plants. It’s easy to over-water aloe plants, leaving them vulnerable to root rot and other diseases. However, it’s also possible to provide the proper amount of water and light for optimal growth.
In this section, I will discuss common problems and solutions that have helped me become a successful aloe vera grower:
Brown Spots and Leaves
Brown spots and wilting leaves are a common problem for Aloe Vera plants. Brown spots can indicate a number of different problems, among which is underwatering. If the brown spots are patchy and scattered across your plant, underwatering may be to blame. Wilting or droopy leaves can also be an indication of underwatering.
If you believe overwatering may be the cause of the brown spots, it is important to check if your pot is draining properly, or if the soil is too wet. If the soil is dry when you touch it two inches down, then try watering the plant more frequently or with more water each time. Make sure the water runs out well through drainage holes so that there is no stagnant water left in your pot.
If underwatering and overwatering don’t seem to be causing your problem, it could be due to direct sunlight exposure caused by hot weather or sunburn damage from fragile skin on leaves exposed too long to direct sunlight. To prevent this from happening again, keep plants near a window but away from direct sunshine and heat during hot weather days.
Brown spots could also indicate pests such as scale and mealy insects attacking your Aloe Vera plant’s delicate leaves. To get rid of these pests, try introducing some good predatory insects like ladybugs in small amounts into your planting space—the natural pest predators will eat away any invaders without causing further harm to your plants!
Root Rot
Root rot can be a serious issue for aloe vera plants, and it’s important to address the problem quickly before it spreads. Roots are the primary means by which the plant takes in water and nutrients, so it’s important to act swiftly so that your plant can recover.
The key to addressing root rot is to ensure your plant has proper drainage. Poorly draining soils are often a leading contributor to this issue, as water remains wet for extended periods of time, leading to conditions in which fungal and bacterial infections can take hold. Inspect your soil for poor drainage, and if necessary amend with sand or gravel before replanting your aloe vera in well-draining soil. If you notice root rot already present, use sharp pruning shears or a fingernail file to cut away affected roots completely and Discard the trimmed pieces so that any fungi present won’t spread further throughout your collection of plants.
It’s also important not to overwater an aloe vera plant as this encourages an environment where root rot will try to take hold—if there is too much water around roots these may begin to suffer from stunted growth or even die off entirely—so only give it enough water that soils stay moist while not soggy bits troy can be critical. Additionally, if you have multiple aloe vera plants growing together try not misting between them as this condenses moisture onto their leaves which creates an ideal environment on pathogens mentioned previously thrive; instead separate plants together and space apart from one another so each one gets adequate air circulation (this also helps keep l prevent overcrowding).
Pests and Diseases
Pests and diseases are common problems of growing aloe vera. In some cases, this can be caused by environmental stress as well as an infestation of pests—all of which can ultimately lead to stunted growth or even death for the plant. However, there are ways to prevent or manage both pests and diseases that attack aloe vera.
Common pests associated with aloe vera range from mites to mealy bugs, each of which poses a different threat. These insects can cause damage through piercing and sucking on leaves that decreases the plant’s ability to store water and nutrients. To combat this, regularly inspect your plant for these signs of an infestation and use natural or organic pesticides if it is deemed necessary.
The two most common problems in terms of disease in aloe vera are leaf spot disease (associated with fungi) and root rot (induced by bacteria). Leaf spot disease tends to occur when the surface between leaves gets wet due to excessive watering or humid air, fostering bacterial growth on the leaves leading to discoloration. To prevent this issue, water your plants deeply but sparingly so no surface moisture lingers on their leaves. On the other hand, root rot develops due to overwatering; wet soil encourages fungus that attacks roots providing too little oxygen for healthy roots growth. If you notice wilting on lower parts of your plants despite regularly adequate watering, opt for a new potting mix as well as plenty ventilation around your plants to restore them back into good health again!
Conclusion
I hope you’ve enjoyed my beginner-friendly guide to growing Aloe Vera! With the right attention, you can have a thriving plant that provides helpful products to enrich and improve your life. Whether you use its healing properties topically or enjoy the plants beauty, there’s no denying that the benefits of having an Aloe Vera are truly invaluable.
Remember to research and keep track of your journey for maximum success. Good luck and most importantly, enjoy your efforts!
Read Related posts:
How to Harvest and Use Aloe Vera Gel A Step by Step Guide
The History and Folklore of Aloe Vera Myths Legends and Cultural Significance
Aloe Vera Flower – What to do, When and How often It Bloom?
Aloe Vera Flowers Uses and Medicinal Benefits
Is Aloe Vera Flower Luck? – Know The Reason Behind It?
Can You Freeze Aloe Vera Plant – Store and Preserve Gel, Leaf
Leggy Aloe Vera – Stem Too Long(How to Fix), Repotting Plant
Plants that Look Like Aloe Vera – 7 Similar Succulent(Pictures)
Can Aloe Vera Grow Without Sunlight? – (How Much Sun Does It Need)
Best Soil for Aloe Vera – Miracle Grow or Regular Potting MIx?