Introduction
Welcome to my guide on harvesting and using aloe vera gel! I want to share with you the knowledge and practices I’ve acquired over the years about harvesting and using this amazing plant. I can only hope that it benefits you and improves your health. Let’s get started.
Overview of Aloe Vera Gel
My love for and interest in Aloe Vera gel has grown over the years. When I first discovered its multiple benefits, I knew that this natural remedy could easily become an integral part of my daily routine. After researching the harvesting and end-use of the plant, I felt confident enough to share my journey with you in this step-by-step guide.
Table of Contents
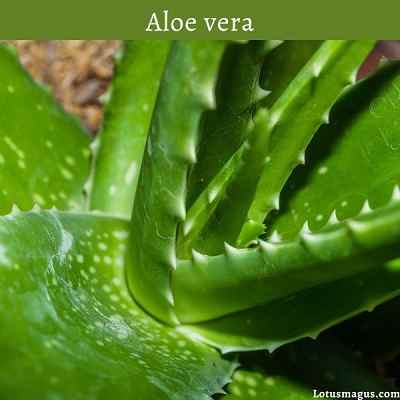
Aloe Vera gel is derived from the leaves of an aloe vera plant – a succulent desert species that can be found in tropical or subtropical regions across the world. It’s usually identified by its rosette shape, long green leaves with white spiked teeth along the edges, and mini yellow flowers shooting off a tall stem from its center.
Aloe Vera gel is renowned for its versatility and many beneficial properties: it has anti-inflammatory properties, helps maintain healthy skin, hair and nails, soothes sunburns and minor scrapes, reduces scar formation on cuts or burns and encourages collagen production for a youthful look – just to name a few. It’s also becoming increasingly popular as an everyday health supplement for improved digestive health by promoting regular bowel movements and supporting nutrient absorption capabilities in the gut wall membrane.
In this article we will cover everything from how to harvest fresh Aloe Vera gel from the plant itself to how to store it properly so you can get maximum value out of every pot you grow or buy. Let’s take a closer look at how Aloe Vera gel can enhance your life!

Benefits of Using Aloe Vera Gel
Aloe vera gel is the natural gel found in the leaves of an aloe vera plant, and has a variety of skincare benefits such as moisturizing, hydrating, soothing, and healing. It is known for it’s anti-inflammatory, antibacterial and antioxidant properties that can protect against skin damage caused by free radicals. Aloe vera gel also helps restore your skin’s natural moisture levels and contains vitamins A, C, E & B-12 which nourish and revitalize the skin.
Additionally, aloe vera gel has wound healing properties which allow it to help minimize scarring from wounds or burns. The natural antibacterial properties of the aloe vera plant make it an ideal ingredient to incorporate into your daily skincare routine or regular beauty treatments.
Harvesting Aloe Vera
Harvesting Aloe Vera is a rewarding and simple process. You can start with a few plants in your backyard and grow them into a full-fledged aloe vera crop! In this section, I’ll provide a step-by-step guide on how to harvest aloe vera correctly, so you can get the most out of your plants. Let’s get started!

- Choose the right aloe vera plants to harvest.
- Cut off the leaves with a sharp and clean knife.
- Peel off the outer layer of the leaf and discard.
- Slice the inner gel into small pieces.
- Store the gel in an airtight container in the refrigerator.
Identifying a Healthy Plant
Identifying a healthy aloe plant to harvest is essential for getting the best quality of product. Look for a plant with large, healthy leaves. Aloe vera plants tend to have fleshy, spikey leaves in various shades of gray-green with white spots. It needs very little maintenance besides well-draining soil and plenty of sunlight; however, if your aloe vera plant looks unhappy – yellowing, wilting or losing its bright green-color – it may not be ideal to harvest from as the gel collected may not be of the best quality.
Signs of a healthy aloe vera plant include:
- Plump leave edges
- Smooth texture
- No discoloration or soft spots on the leaf
Once you’ve identified a healthy plant to harvest from, you can move on to actually harvesting the gel!
Preparing the Plant for Harvesting
Before you start harvesting aloe vera from your plants, it’s important to prepare the plants for the process. Start by cutting off any dead or damaged leaves from your aloe vera plants, as these leaves won’t be suitable for harvesting.
Next, begin checking existing leaves to see if they are ripe and ready to be harvested. Look at each leaf to make sure that it feels nice and thin. If it is too thick and tough, let it grow a bit longer before harvesting.
When you have identified your chosen leaves, use a knife or snips to cut them off close to the base of the plant – but with care and caution! Be sure not to damage surrounding leaves in the process by rubbing off any fuzzy foliage and wiping away any debris with a wet cloth or paper towel.
Finally, place your newly-cut aloe vera leaves in a cool dark area until you’re ready to use them – preferably within one hour of cutting them from the plant for optimal quality results.
Harvesting the Gel
Harvesting aloe vera gel for use in projects, such as facial masks and DIY skincare, is not difficult at all. The process requires merely cutting off the leaves from the base of the plant.
To start harvesting aloe, choose a leaf that appears mature, meaning it is firm and full-size. No need to believe they must be yellow or brown to indicate maturity; all healthy leaves can be harvested! With a sharp knife or scissors, cut off the leaf as close to the stem as possible without damaging other parts of the plant.
Once you’ve cut the leaf away from its stem, remove any thorns along either side of it with your fingers; be sure not to damage any of the inner gel which may leak out during this process. Finally, turn your freshly harvested leaf upside down and press gently against a paper towel until all remaining liquid releases – do not discard this liquid as it is full of valuable antioxidants! Please note that chopped pieces should preserved away from direct sunlight and in an airtight container in order for them to stay fresh for a few days (no more than one week).
When ready to use your freshly harvested aloe vera gel, simply scoop out from inside 4-5 leaves with a spoon. Blend up into a creamy paste and voila! You now have fresh aloe vera gel that’s ready to use in any beauty project you wish for optimal skin health benefits!
Using Aloe Vera Gel
I’ve long been an avid fan of Aloe Vera gel and its many uses. I recently harvested Aloe Vera leaves from my own plants and it made me realize how easy it is to use this ingredient in many everyday products.
In this guide, I will share my step-by-step instructions on how to harvest and use Aloe Vera gel, so you can begin using this natural ingredient in your home:
Skin Care
One of the most popular uses of harvested Aloe Vera gel is to treat a variety of skin issues. Whether you are looking for an all-natural way to treat a sunburn or reduce the appearance of acne scars, Aloe Vera gel is ideal. Here’s a step-by-step guide for using Aloe Vera for skin care:
- Harvest the Gel – Before you can use Aloe Vera gel on your skin, you need to harvest it. To do this, cut off one or two leaves from an Aloe Vera plant and peel off the rind until all that is left is a thin layer over the gel.
- Gently Apply – Use your fingers to gently apply the gel on any area experiencing inflammation or irritation. Massage it into your skin lightly and allow it a few minutes to absorb before rinsing with cold water. This method may be used several times per day depending on how often you find relief necessary.
- Store Leftover Gel – If you have any leftover gel from harvesting, store it in the refrigerator for up to 10 days in sealed containers. Do not keep expired aloe vera products on hand since these may contain bacteria and could harm your health if applied to the skin.
By following this three-step process, you can easily reap all the natural benefits of aloe vera for healthy glowing skin!
Hair Care
To use aloe vera gel as a hair care tool, you will first need to harvest it. Here is a step-by-step guide to show you how I harvest and use aloe vera gel in my hair care routine:
- Harvesting Aloe Vera Gel from the Plant – To harvest aloe vera gel from the plant, you will need a sharp knife and gloves to protect your hands. Cut off a leaf just below the thorns on each side and remove the spines using your gloves. Cut off both ends of the leaf, then cut down it lengthwise. Score the back of the leaf so that you can easily lift its outer membrane away from the plant’s inner jelly – this is what we call aloe vera gel!
- How to Use Aloe Vera Gel in Your Hair Care Routine – To start, take some aloe vera gel in one hand and rub it between your palms. Now apply this gel to your scalp and massage it gently over your entire scalp area. Make sure to get enough of it applied on all areas of your head before leaving it for 10 minutes then washing off with lukewarm water. This simple process can help strengthen hairs strands, promote growth for new hairs, improve texture, reduce dandruff and add shine too!
Oral Care

Using aloe vera gel as a natural remedy for oral care is simple and quick. The steps are as follows:
- To start, you’ll need to harvest the gel from an aloe vera plant. You can either purchase a mature aloe vera plant or propagate your own using the pieces of stem of a plant purchased from your local store. Once the stem begins to form leaves, you’re able to harvest them in 2-3 months’ time.
- Once harvested, wash the leaf and cut off both ends with a sharp knife. Peel off the outer green skin of the leaf, revealing the clear inner aloe vera gel.
- Simply take some fresh aloe vera gel on your finger and spread it all around your mouth (both inside and outside) gently massaging it in for 1 – 2 minutes in total.
- You can even use it as a toothpaste substitute by adding some of your favorite spices like turmeric or black pepper powder for added flavorings and leave it overnight before rinsing off with lukewarm water in the morning! Remember not to swallow any of this mixture!
Conclusion
Through this guide, I am sure you can now confidently harvest and use Aloe Vera gel. Not only is it easy to get the gel out of the leaves but also it has many amazing benefits for your skin and hair. Moreover, it is relatively simple to store the gel and use it for future applications.
I hope this guide has been helpful for you and now you have the knowledge you need to make the most of Aloe Vera Gel.
Summary of Benefits
Harvesting and using aloe vera gel is a simple and natural way to soothe skin, treat sunburns, reduce inflammation, aid digestion, boost hydration, and more. After you’ve harvested your aloe vera plant, you can use the gel directly on your skin or mix it into face masks and other beauty treatments.
The benefits of aloe vera are vast. The rich source of vitamins A, B12 and E make it the perfect plant for nourishing skin; its anti-inflammatory properties help reduce redness and swelling; its antibacterial properties prevent infection; it helps tighten and tone skin; it soothes sunburns – even severe ones; it helps lock in moisture for hydrated skin; it aids in digestion by reducing acid reflux symptoms; taken orally as a juice or supplement can boost energy levels due to its high mineral content.
Aside from its beauty treatments, aloe vera also has plenty of other uses like treating insect bites, cuts and scrapes, helping relieve the pain associated with joint disorders like arthritis or fibromyalgia, helping with constipation issues—and those are just a few. In short: there is no end to the benefits that this superplant provides!
Tips for Storing Aloe Vera Gel
Once you’ve harvested your Aloe Vera gel, it’s important to store it in a way that preserves its healing properties. Here are a few tips for properly storing your Aloe Vera gel:
- Make sure that you don’t leave any of the gel on the leaves—harvest only what you need and discard the rest.
- If you plan to use fresh Aloe Vera within a few days, place the cut leaves in a ziplock bag and store them in your refrigerator.
- For longer-term storage, freeze the leaves whole. When you’re ready to use them, defrost them in the fridge overnight before slicing open and processing them.
- To preserve your Aloe Vera gel for up to one year, measure out your freshly harvested gel into ice cube trays or zip-lock bags; this will make sure that individual servings remain ready-to-use at all times. Once frozen, store these premeasured cubes/bags in an airtight container in your freezer for easy access whenever needed.
Related Posts:
Related Posts:
Why Your Aloe Plant Fell Apart: Overwatering and How to Fix It
How To Fix An Overwatered Aloe Plant: Pictures, Watering Schedule
The Benefits of Aloe Vera From Skincare to Digestive Health
A Beginners Guide to Growing Aloe Vera Tips and Tricks for Success
The History and Folklore of Aloe Vera Myths Legends and Cultural Significance
Is Aloe Vera Flower Luck? – Know The Reason Behind It
Aloe Vera Meaning (What Does It Symbolize Spiritually In Different Cultures?)
Aloe Vera Flowers Uses and Medicinal Benefits
What To Do When Aloe is Flowering? 5 Ways to Keep Blooming
Aloe Vera Plant Care – 5 Tips to Grow Them Indoors
Can You Freeze Aloe Vera Plant – Store and Preserve Gel, Leaf
Aloe Vera Plant Varieties Pictures ( Capitata var. quartziticola, Crosby’s prolific)
Leggy Aloe Vera – Stem Too Long(How to Fix), Repotting Plant
Plants that Look Like Aloe Vera – 7 Similar Succulent(Pictures)
Aloe Vera Flower: What to do, How often It Bloom? Care, Grow (uk)