Polka Dot Plants (Hypoestes phyllostachya) are colorful, low-maintenance houseplants. This plant’s water propagation is a plus. In this article, we’ll cover everything you need to know about propagating the Polka Dot Plant in water, including the materials you’ll need, the steps to take, and tips for success.
Can you propagate polka dot plant in water?
Yes, you can propagate polka dot plant in water with just the stem cuttings and it requires your 5 min only to do so. This water propagation method uses fresh polka dot plant cuttings is easiest and traditional method for new gardener to learn in today’s era. This also solves many problem if your plant is getting yellow leaves or brown spots or dying. then this is definitely a plant saver technique.
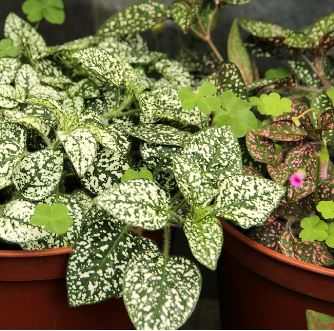
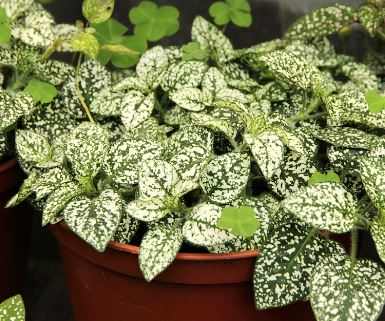
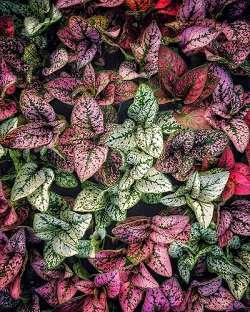
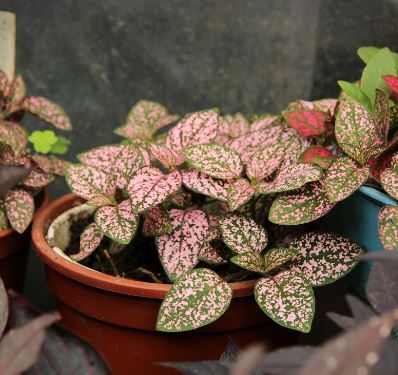
The attractive herbaceous perennial polka dot plant (Hypoestes phyllostachya) is a popular houseplant. It is endemic to Madagascar, unlike other Acanthaceae species from South Africa and Southeast Asia. The plant features red, pink, and white variegated leaves and summer lavender or pink blooms.
Polka dot plants are wonderful for beginners since they’re simple to care for. They need well-drained, nutrient-rich soil with a pH of 6.1 to 7.3. They like mild moisture, so don’t overwater. They like strong indirect light but may tolerate shade.
To maintain form and development, fertilize and trim the plant periodically. In a dry indoor atmosphere, increased humidity may help the plant. Polka dot plants grow from stem cuttings in water or soil.
The environment and care affect polka dot plant development. They may reach 1-2 feet tall with adequate care, although houseplants generally stay smaller. The polka dot plant is great for adding color and happiness to an interior setting.
| Property | Description |
|---|---|
| Plant species | Polka dot plant (Hypoestes phyllostachya) |
| Propagation method | Stem cuttings |
| Cutting length | At least 2 inches (5 cm) |
| Node location | Cut just below a node |
| Leaf removal | Remove lower leaves that will be below the water |
| Water type | Clean, room-temperature water |
| Water level | Submerge at least one node |
| Light exposure | Indirect light |
| Water refreshing | Every 2-3 days |
| Rooting time | About 2-4 weeks |
| Transplanting | Once roots are at least 1 inch (2.5 cm) long |
| Soil type | Moist, well-draining potting mix |
| Pot size | About 2 inches (5 cm) larger than the root ball |
| Soil settling | Water after planting to settle the soil |
| Acclimation | Gradually increase light exposure and watering frequency |
| Maintenance | Keep soil moist but not waterlogged, and mist frequently to increase humidity |
How long does it take polka dot plant to root in water?

The time it takes for polka dot plant cuttings to root in water can vary and the new roots may begin to form in as soon as 5 days to 1 week, others advise that it may take as long as several weeks. However, all sources agree that polka dot plants develop swiftly, therefore you can anticipate results to come in a short period of time.
Finding a node on the plant’s stem is the first step in propagating your polka dot plant in water. Where the leaves link to the stem is called a node, and because these nodes have the best chance of producing new roots, it is crucial to take cuttings from them. Remove the lowest leaves from the stem by cutting it just below the node.
Make sure the node is completely buried in the water when you place the cutting in a glass or jar of water. To stop bacteria and algae development, it’s crucial to replace the water every few days. Till the roots have developed, keep the cutting in low light or indirect sunlight. You may put the cutting into soil after the roots are approximately an inch long.
Where do you cut polka dot plants for propagation?
Stem tip cuttings, which should be obtained in the spring or summer, may be used to easily produce polka dot plants, according to Cornell Extension. Snip a stem tip of your polka dot plant that is approximately 4 inches long, making sure it has a few nodes and at least two healthy leaves at the top. On the stem, nodes are lumps where new roots may eventually grow. Once you have determined which piece has to be cut, take the leaves off the bottom half of the stem and plant the cutting up to the first set of surviving leaves in wet potting soil.
Your polka-dot plant may also be propagated in water. Cut the stem just below a node, take off any leaves that could fall into the water, and then submerge the stem. Transplant the cutting into the ground as soon as you see roots growing.
When spreading the cutting, moisture retention is crucial. You may accomplish this by placing a plastic bag over it or by using a humidifier. Until the cutting has developed roots, keep it in indirect light and away from the sun.
Any portion of the plant may be used for polka dot plant cuttings, but they must be at least 2 inches (5 cm) long. Before placing the cuttings in water or soil, some people prefer to give them a rooting hormone treatment, although it’s not essential.
Why are my cuttings not rooting in water?

It may be disappointing when cuttings that have been rooted in water when trying to propagate a plant do not take. There are a number of causes for cuttings not to take root in water.
The cuts can be too lengthy, to start. Use a short part of the plant when taking cuttings since a longer cutting will make it more difficult for the little root tip to provide moisture to the whole cutting. Furthermore, if the cuttings are left too long, they can wilt and parts of the leaves might turn yellow, which might hinder their potential to germinate.
Second, a node may not be severed at all. Nodes are crucial because they contain the hormones and cells required for the cutting to take root and develop into a new plant. Without a node, the cutting may not have the resources it needs to establish itself.
Third, it’s possible to keep the cuttings in too much darkness. Cuttings need air as well as moisture in order to take root. They could not have adequate access to oxygen to promote root development if they are maintained in water that is let to stand still.
Fourth, the cuttings can come from a vine that is too old or isn’t healthy. The cutting may not have the nutrients it needs to establish root and flourish if the plant from which it was taken is unhealthy.
Fifth, it’s possible to keep the cuttings excessively chilly. Cuttings should be maintained in a warm, well-lit area since they need heat to root and thrive.
Sixth, there’s a chance the cuttings aren’t getting enough water. Cuttings need enough water to take root and flourish, even though it’s crucial not to overwater them.
Materials You’ll Need
Before we get started, let’s go over the materials you’ll need for propagating Polka Dot Plant in water. Here’s what you’ll need:
- Polka Dot Plant
- Clean Scissors or Pruners
- Clear Glass Jar or Vase
- Distilled Water
- Pebbles or Gravel (Optional)
Propagating Polka Dot Plant in Water

Propagating Polka Dot Plant in water is a simple process that can be done in just a few steps. Here’s what you need to do:
Step 1: Identify a Node
Look for a stem with at least one node that is healthy. The nodes are the places on the stem where the leaves attach.
Step 2: Cut Just Below a Node
Make a precise cut immediately below the node using clean pruners or scissors. About 4-5 inches should be trimmed from the material.
Step 3: Remove Lower Leaves
Just a few leaves should remain at the stem’s top after removing the lower leaves. This will lessen the likelihood of the leaves decaying in the water.
Step 4: Place in Water
Put distilled water in a vase or jar made of transparent glass. It may be necessary to add the water using a funnel if you’re using a jar with a small neck. If you’re concerned that the cutting may topple over, you can add gravel or stones to the jar’s bottom to offer support.
Make sure the bottom of the cutting is completely immersed in the water. Make certain that at least one node is submerged in water.
Step 5: Place in Indirect Light
Put the jar in an area that has strong, indirect light. Avoid direct sunlight since it could dry out or burn the cutting.

Step 6: Change Water Regularly
Every two to three days, change the water. This will assist in keeping the water clean and preventing the formation of microorganisms.
Tips for Success
Here are a few tips to help you successfully propagate your Polka Dot Plant in water:
- If you want to avoid mineral accumulation, use distilled water.
- Avoid direct sunshine, which might burn or dry out the cutting.
- To maintain freshness and stop the development of germs, change the water every two to three days.
- Be tolerant! The cutting may take many weeks to form roots.

Conclusion
Propagating Polka Dot Plant in water is an easy and rewarding process that can help you grow your collection of beautiful houseplants. With a few simple steps and some patience, you can create new plants from your existing Polka Dot Plant.
Related Posts:
Polka Dot Plant Leggy – How to Fix, Reduce Legginess(Solution)
Polka Dot Plant Outdoors – Tips to Grow Hypoestes phyllostachya
How to Prune Polka dot Plant – Trimming Hypoestes Guide(WITH CARE)
Polka Dot Plant Toxic to Cats – Is Hypoestes Safe for Pets?
Polka Dot Plant Propagation in Soil: How to Take Cuttings
String of Nickels Propagation – How to Guide
Schefflera Propagation – How to Take Your FIRST Cuttings
Wandering Jew Plant Propagation in Water and Soil(Full Guide)
